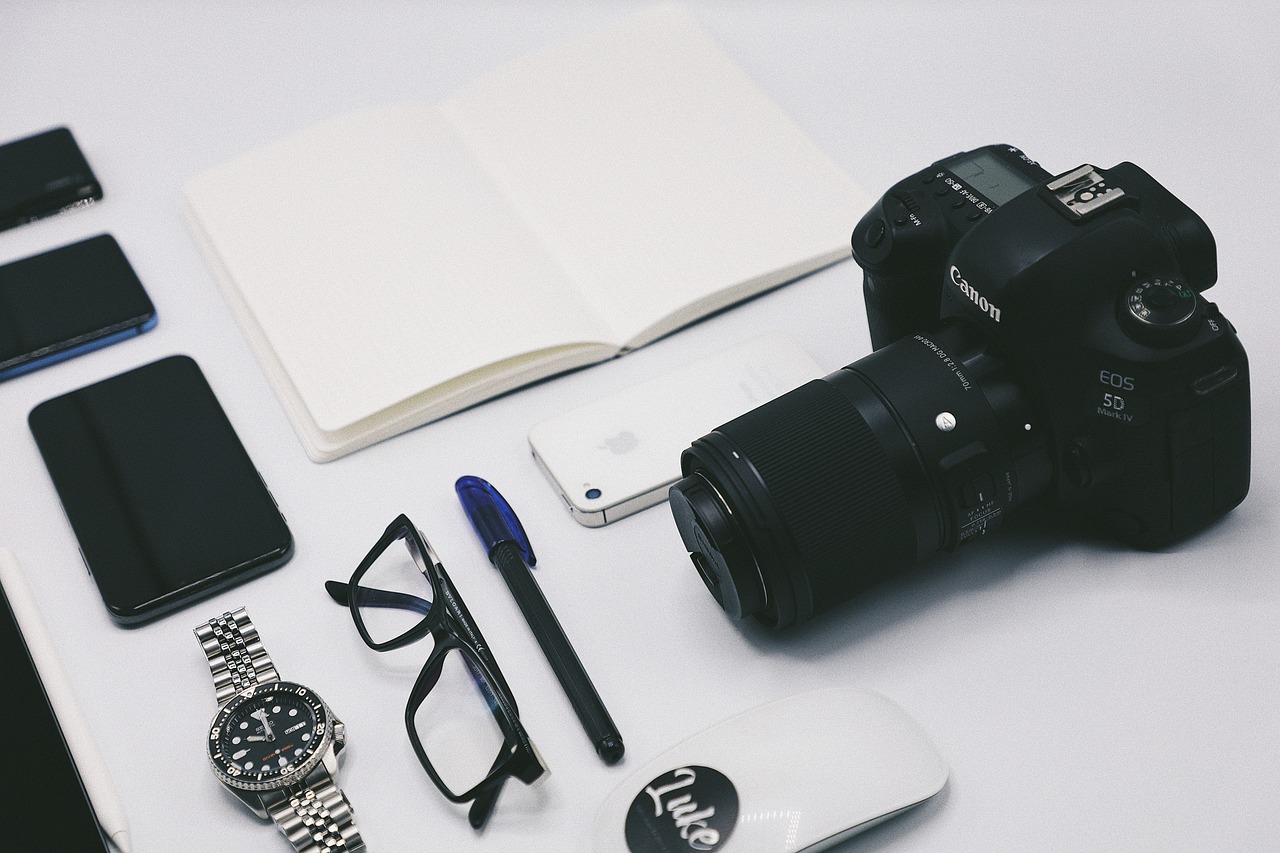
This article delves into the integration of action cameras with OBS Studio, providing a comprehensive guide to enhance your streaming quality and boost viewer engagement. Action cameras have become increasingly popular among streamers for their portability and high-definition video capabilities. By combining these devices with OBS Studio, users can achieve professional-grade streaming.
OBS Studio, or Open Broadcaster Software, is a powerful and open-source streaming tool that allows users to capture and broadcast video content seamlessly. With a range of features, including scene transitions, audio mixing, and customizable layouts, OBS Studio is essential for anyone looking to enhance their streaming experience.
Action cameras provide several advantages over traditional webcams. They are compact, durable, and often waterproof, making them ideal for outdoor and adventure streaming. Additionally, many action cameras offer 4K video quality and wide-angle lenses, which can significantly improve the visual appeal of your streams.
To get started, proper setup of your action camera is crucial. Here are the necessary steps:
- Choose the Right Action Camera: Look for a model that supports live streaming and has good low-light performance.
- Connecting Your Action Camera: You can connect your camera to your computer using USB or HDMI cables. Ensure you have the right adapters if necessary.
Once your camera is connected, it’s time to configure OBS Studio:
- Adding Your Action Camera as a Video Source: Open OBS, click on the “+” button under “Sources,” and select “Video Capture Device.” Choose your camera from the list.
- Adjusting Video Settings: Fine-tune settings such as resolution (1080p or 4K), frame rate (30 or 60 FPS), and bitrate to optimize stream quality.
To make your stream more engaging, consider incorporating:
- Overlays and Graphics: Use overlays to display alerts or information about your stream. This can enhance viewer interaction.
- Audio Sources: Integrate high-quality audio sources to ensure your viewers can hear you clearly. Use a microphone that suits your streaming environment.
Even with a solid setup, you may encounter challenges. Here are common issues and their solutions:
- Resolving Connection Problems: If your camera isn’t recognized, check your connections and ensure the camera is powered on.
- Fixing Video Quality Issues: If your stream quality is poor, adjust your settings in OBS or check your internet connection.
By following these steps, you can effectively use an action camera with OBS Studio to create high-quality streams that captivate your audience. With the right setup and configuration, you can elevate your streaming game and provide an engaging experience for your viewers.
What is OBS Studio?
OBS Studio is a versatile and robust open-source software designed specifically for recording and live streaming video content. It has gained immense popularity among content creators, gamers, and educators due to its extensive features and user-friendly interface. By understanding the various capabilities of OBS Studio, users can truly maximize their streaming potential and create high-quality content that captivates their audience.
One of the standout features of OBS Studio is its ability to support multiple video sources. Users can easily switch between different inputs, such as webcams, action cameras, and screen captures, allowing for a dynamic viewing experience. Additionally, OBS Studio supports various video formats and resolutions, making it adaptable to different streaming platforms and audience preferences.
Another significant advantage of OBS Studio is its customizability. Users can create personalized layouts, add overlays, and incorporate graphics to enhance their streams. This level of customization not only improves the visual appeal but also helps in branding and establishing a unique identity for the stream. Furthermore, OBS Studio allows for the integration of browser sources, enabling users to display real-time data, alerts, and chat feeds directly within their streams.
In terms of audio capabilities, OBS Studio offers advanced features for managing sound quality. Users can mix audio from multiple sources, adjust levels, and apply filters to ensure clear and balanced sound. This is particularly important for maintaining viewer engagement, as poor audio quality can lead to a frustrating experience.
Security and privacy are also addressed within OBS Studio. The software allows users to control who can access their streams and recordings, which is essential for protecting sensitive content. Additionally, the open-source nature of OBS Studio means it is continually updated and improved by a community of developers, ensuring a reliable and secure streaming experience.
To maximize the effectiveness of OBS Studio, users should familiarize themselves with its interface and settings. Taking the time to explore the various features and options available can lead to a more polished and professional streaming experience. Whether you are a beginner or an experienced streamer, understanding the full potential of OBS Studio is crucial for achieving your streaming goals.
In summary, OBS Studio is a powerful tool that offers a wide range of features for recording and streaming video content. Its flexibility, customizability, and robust audio management make it an ideal choice for anyone looking to enhance their streaming capabilities. By leveraging the functionalities of OBS Studio, users can create engaging and high-quality content that resonates with their audience.
Why Choose an Action Camera for Streaming?
When it comes to streaming, the choice of equipment can significantly impact the quality of your content. One increasingly popular option is the action camera. But why should you consider using an action camera for your streaming needs? This article delves into the numerous advantages that action cameras offer over traditional webcams, particularly for livestreaming.
One of the most compelling reasons to opt for an action camera is its portability. These devices are lightweight and compact, making them easy to transport. Whether you’re streaming from a bustling event, a scenic outdoor location, or even your living room, action cameras allow you to set up and start streaming with minimal hassle. Unlike traditional webcams that are often fixed in one location, action cameras provide the flexibility to capture dynamic angles and perspectives.
Action cameras are designed to withstand harsh conditions. They are often waterproof, shockproof, and dustproof, making them ideal for outdoor activities. This durability means you can take your streaming setup on the road, into the mountains, or even underwater without worrying about damaging your equipment. In contrast, traditional webcams are typically more fragile and less suited for adventurous streaming.
Another significant advantage of action cameras is their high video quality. Many action cameras support 4K resolution and high frame rates, which can greatly enhance the viewing experience for your audience. With superior optics and advanced image stabilization technology, action cameras can deliver smooth and vibrant video, even in fast-paced environments. Traditional webcams, while improving, often lag behind in terms of video quality and performance.
Action cameras are incredibly versatile. They can be used for a variety of purposes beyond live streaming, such as recording vlogs, creating tutorials, or capturing travel experiences. This multifunctionality allows content creators to maximize their investment in equipment. Additionally, many action cameras come with a range of accessories, such as mounts and tripods, enabling you to customize your setup to suit different streaming scenarios.
Using an action camera can also enhance user engagement. The ability to move around and capture different angles can make your streams more dynamic and interesting. Viewers are more likely to stay engaged when they see varied perspectives and immersive content. This interactive element is often lacking in traditional webcam streams, where the camera is typically stationary and limited in movement.
In summary, action cameras offer numerous advantages for livestreaming compared to traditional webcams. Their portability, durability, high video quality, versatility, and potential for enhanced user engagement make them an excellent choice for content creators looking to elevate their streaming experience. Whether you’re a seasoned streamer or just starting, investing in an action camera could be a game-changer for your content.
Setting Up Your Action Camera for Streaming
Proper setup is essential for optimal performance when using your action camera with OBS Studio. This section outlines the necessary steps to prepare your action camera for use, ensuring you can capture high-quality streams that engage your audience effectively.
1. Gather the Necessary Equipment
- Action Camera
- USB or HDMI Cable (depending on your camera model)
- Computer with OBS Studio Installed
- Power Source (if needed for extended streaming)
2. Choose the Right Settings on Your Action Camera
Before connecting your action camera to your computer, it’s crucial to adjust its settings for streaming. Here are some key settings to consider:
- Resolution: Set your camera to the desired resolution, typically 1080p for a good balance of quality and performance.
- Frame Rate: Choose a frame rate of 30 or 60 fps for smooth video playback.
- Field of View: Select a wide field of view if you want to capture more of your surroundings.
3. Connecting Your Action Camera
Establishing a connection between your action camera and computer is the next step. You can connect via:
- USB: Most action cameras can be connected via USB. Ensure you have the appropriate drivers installed for your camera.
- HDMI: If your camera supports HDMI output, you can use an HDMI capture card to connect it to your computer.
4. Configuring OBS Studio
Once your action camera is connected, you need to configure OBS Studio to recognize it:
- Open OBS Studio and go to the Sources panel.
- Click the + button to add a new source, then select Video Capture Device.
- Name your source and select your action camera from the list of devices.
- Adjust the settings as needed for optimal performance.
5. Testing Your Setup
Before going live, it’s crucial to test your setup. Check the video feed, audio levels, and ensure everything is functioning smoothly. Make adjustments as necessary to ensure your stream quality meets your expectations.
6. Additional Considerations
Remember to monitor your camera’s battery life and consider using an external power source for longer streaming sessions. Additionally, familiarize yourself with OBS Studio’s features, such as overlays and audio management, to enhance your overall streaming experience.
By following these steps, you will be well on your way to setting up your action camera for streaming with OBS Studio. This preparation is vital for delivering a professional and engaging live stream that captivates your audience.
Choosing the Right Action Camera
When it comes to streaming, is a critical step that can significantly impact the quality of your content. With a plethora of options available, understanding the essential features that make certain models ideal for streaming is vital. This section will guide you through the key aspects to consider when selecting an action camera for your streaming needs.
- Video Resolution: Opt for cameras that offer at least 1080p resolution, with 4K being preferable for a sharper image quality.
- Frame Rate: A higher frame rate (60 fps or more) is essential for capturing smooth motion, especially during action-packed scenes.
- Low Light Performance: Look for models that perform well in low light conditions, as this can enhance the quality of your streams in various environments.
- Field of View: A wider field of view allows for more dynamic shots and can make your streams visually engaging.
- Stabilization Features: Built-in stabilization technology can help reduce shaky footage, providing a smoother viewing experience for your audience.
Another crucial aspect to consider is how the action camera connects to your streaming setup. Many modern action cameras offer multiple connectivity options, such as:
- USB Streaming: Some models allow direct USB connections to your computer, making setup straightforward.
- HDMI Output: For higher-quality streaming, HDMI output is often preferred, providing a cleaner video signal.
- Wireless Capabilities: Wi-Fi or Bluetooth connectivity can allow for more flexibility in positioning your camera.
Action cameras are designed for adventure, so their durability is a significant advantage. Ensure that the camera you choose is:
- Waterproof: Ideal for outdoor streaming or activities near water.
- Shockproof: This feature is essential for those who plan to use the camera in rugged conditions.
- Lightweight: A lightweight design makes it easier to carry and set up, especially for mobile streams.
Lastly, consider the battery life of the action camera. Long battery life is crucial for uninterrupted streaming sessions. Look for cameras that offer:
- Extended Battery Options: Some models allow for external battery packs or have options for battery replacements.
- Power Saving Modes: Features that help conserve battery during less intensive use can be beneficial.
In summary, selecting the right action camera for streaming involves evaluating several critical features, including video resolution, connectivity options, durability, and battery life. By focusing on these aspects, you can ensure that your streaming setup is not only effective but also engaging for your audience.
Connecting Your Action Camera to Your Computer
Connecting your action camera to your computer is a crucial step for anyone looking to enhance their streaming experience with OBS Studio. This process allows you to leverage the high-quality video capabilities of your action camera, providing viewers with stunning visuals. Below, we will explore various connection methods, including USB and HDMI, and discuss the advantages of each.
Using a USB connection is one of the simplest and most convenient methods for connecting your action camera to your computer. Most action cameras come equipped with a USB port that allows for easy plug-and-play connectivity.
- Ease of Use: Simply plug the camera into your computer and it should be recognized automatically.
- Power Supply: Many USB connections also provide power to your camera, allowing for extended streaming sessions without battery concerns.
- Cost-Effective: USB cables are generally inexpensive and widely available, making them a practical choice for most users.
If you are looking for the best video quality, an HDMI connection is your best bet. This method provides a direct digital connection between your action camera and computer, ensuring high-definition video output.
- Superior Video Quality: HDMI connections can transmit uncompressed video signals, resulting in higher resolution and better color accuracy.
- Low Latency: HDMI connections typically have lower latency compared to USB, which is crucial for live streaming.
- Advanced Features: Many HDMI-compatible cameras offer additional features, such as clean HDMI output, which removes on-screen displays for a more professional look.
To connect your action camera via HDMI, you will likely need a capture card. This device converts the HDMI output from your camera into a format that your computer can recognize. Here’s how to set it up:
1. Connect the action camera to the capture card using an HDMI cable.2. Plug the capture card into your computer via USB.3. Open OBS Studio and select the capture card as your video source.
For those who prefer a cable-free setup, many modern action cameras offer Wi-Fi connectivity. This allows you to stream wirelessly, although it may introduce some latency compared to wired connections.
- Mobility: Wireless connections allow for greater freedom of movement while streaming.
- Setup Flexibility: You can position your camera in various locations without being tethered to your computer.
In summary, whether you choose a USB, HDMI, or wireless connection for your action camera, each method has its unique advantages. By understanding these options, you can make an informed decision that enhances your streaming capabilities with OBS Studio.
Configuring OBS Studio for Your Action Camera
Configuring OBS Studio for your action camera is a crucial step in ensuring that your streaming experience is both high-quality and seamless. Once your camera is connected, you will need to navigate through several settings to optimize performance. Below are the essential configurations that will help you achieve the best results.
Before diving into specific configurations, it’s important to familiarize yourself with the main settings available in OBS Studio. The software offers a range of options, from video quality to audio input, all of which can significantly impact your stream’s overall quality.
- Resolution: Set your resolution based on your internet speed and the capabilities of your action camera. Common settings are 720p or 1080p.
- Frame Rate: A frame rate of 30fps is standard, but if your camera supports it, you might consider 60fps for smoother motion.
- Bitrate: Adjust your bitrate according to your upload speed. A higher bitrate results in better quality but requires more bandwidth.
Audio quality is just as important as video quality. To configure your audio settings:
- Select Your Audio Input: Ensure that the correct audio source is selected, whether it’s from your action camera or an external microphone.
- Audio Bitrate: Set the audio bitrate to 128kbps for a good balance between quality and performance.
Once your camera is connected, you need to add it as a video source in OBS Studio:
- Open OBS Studio and click on the “+” button in the Sources box.
- Select “Video Capture Device” and create a new source.
- Name your source and click “OK.”
- Choose your action camera from the device dropdown menu and configure the settings as needed.
It’s crucial to test your stream settings before going live. Use the “Preview Stream” feature to check both video and audio quality. Make adjustments as necessary, and ensure everything is functioning smoothly.
OBS Studio offers advanced features that can further enhance your streaming experience:
- Scene Transitions: Use transitions to create a professional look when switching between different scenes.
- Filters: Apply filters to improve the visual quality of your video feed, such as color correction or chroma keying.
By carefully configuring OBS Studio settings and utilizing the features available, you can create a high-quality streaming experience that captivates your audience. Experiment with different settings to find what works best for your specific needs and ensure a smooth and engaging livestream.
Adding Your Action Camera as a Video Source
When it comes to streaming with OBS Studio, is a crucial step that can significantly enhance your broadcast quality. This guide will provide you with a detailed walkthrough on how to seamlessly integrate your action camera into your OBS setup.
Action cameras are designed for high-quality video capture in dynamic environments. By adding one as a video source in OBS, you can leverage its superior image quality and portability to create engaging content. Whether you’re streaming outdoor adventures, gaming, or tutorials, an action camera can elevate your production value.
- Connect Your Camera: First, ensure your action camera is properly connected to your computer. Depending on the model, you can use a USB cable or an HDMI capture card for the connection.
- Open OBS Studio: Launch the OBS Studio application on your computer. If you haven’t installed it yet, you can download it from the official OBS website.
- Add a Video Source: In the main OBS interface, locate the Sources panel at the bottom. Right-click within this panel and select Add >Video Capture Device.
- Name Your Source: A dialog box will appear prompting you to name your video source. Choose a name that will help you identify it easily, such as “Action Camera.”
- Select Your Camera: In the properties window, you will see a dropdown menu labeled Device. Click on it and select your action camera from the list of available devices.
- Configure Settings: Adjust the resolution, frame rate, and other settings to match your streaming requirements. Make sure to choose settings that reflect the capabilities of your action camera.
- Check the Preview: Once you have configured the settings, check the preview window in OBS to ensure that the camera feed is displaying correctly. Make any necessary adjustments.
After adding your action camera, you may need to adjust the camera feed to ensure it fits well within your stream layout. You can resize and reposition the video source in the OBS canvas by clicking and dragging the corners of the video feed. Additionally, consider using filters to enhance your video quality, such as color correction and chroma key for green screen setups.
Before you go live, it’s essential to conduct final checks:
- Test Your Audio: Ensure that your action camera’s audio is synced correctly, or consider using an external microphone for better sound quality.
- Monitor Performance: Keep an eye on your CPU usage and frame rates in OBS to ensure smooth streaming.
- Run a Test Stream: Conduct a private test stream to check how everything looks and sounds before your actual broadcast.
By following these steps, you can successfully add your action camera as a video source in OBS Studio, allowing you to create high-quality streams that engage your audience. With the right setup and adjustments, your action camera can become a powerful tool in your streaming arsenal.
Adjusting Video Settings for Quality Streaming
When it comes to streaming, the quality of your video can make or break your viewer’s experience. Adjusting video settings is essential for achieving optimal streaming results. This section focuses on how to fine-tune your video settings in OBS Studio, including resolution, frame rate, and bitrate, to ensure the best possible stream quality.
Video resolution refers to the amount of detail that the video holds, typically measured in pixels. The most common resolutions for streaming include:
- 720p (1280×720): Standard HD quality.
- 1080p (1920×1080): Full HD, offering a clearer image.
- 4K (3840×2160): Ultra HD, providing stunning detail but requiring more bandwidth.
Choosing the right resolution is crucial as it affects both the visual quality and the bandwidth required for streaming. Higher resolutions provide better image quality but can lead to buffering issues if your internet connection is not fast enough.
Frame rate, measured in frames per second (FPS), is another critical factor in video quality. Common frame rates include:
- 30 FPS: Standard for most streams.
- 60 FPS: Provides smoother motion, ideal for fast-paced content.
Higher frame rates can enhance the viewing experience, especially for action-packed streams. However, they also require more processing power and bandwidth, so it’s essential to find a balance that works for your setup.
Bitrate refers to the amount of data processed per second in your video stream. It’s typically measured in kilobits per second (Kbps). Understanding and adjusting your bitrate settings can significantly impact the quality of your stream. Here are some general guidelines:
- 720p at 30 FPS: 1500-4000 Kbps
- 1080p at 30 FPS: 3000-6000 Kbps
- 1080p at 60 FPS: 4500-9000 Kbps
Choosing the right bitrate is essential for maintaining a smooth streaming experience. A higher bitrate improves quality but can lead to buffering if your internet connection cannot handle it.
To adjust these settings in OBS Studio, follow these steps:
1. Open OBS Studio and go to 'Settings'.2. Click on the 'Video' tab.3. Set your 'Base (Canvas) Resolution' to your desired resolution.4. Adjust the 'Output (Scaled) Resolution' to match your streaming preference.5. Set your 'Common FPS Values' to your chosen frame rate.6. Navigate to the 'Output' tab to adjust your bitrate settings under 'Streaming'.
Once you’ve made these adjustments, run a test stream to see how your settings perform. Monitor the stream quality and make further adjustments as necessary.
By carefully adjusting your video settings, you can significantly enhance your stream quality, making your content more engaging and enjoyable for your viewers. Take the time to experiment with these settings to find the perfect balance for your unique streaming needs.
Enhancing Your Stream with Additional Features
Enhancing your streaming experience is crucial for engaging your audience and delivering high-quality content. OBS Studio, a powerful software for video streaming and recording, provides a plethora of features that can significantly elevate your stream. In this section, we will explore how to incorporate overlays, alerts, and other enhancements into your stream, making it more interactive and visually appealing.
Overlays are graphical elements that are displayed on top of your video feed. They can include anything from a webcam frame to social media handles and donation alerts. Utilizing overlays not only enhances the visual appeal of your stream but also provides essential information to your viewers. For example, displaying the latest follower or subscriber can encourage audience interaction and engagement.
Creating custom overlays can be done using graphic design software like Adobe Photoshop or free alternatives such as GIMP. Once you have your overlay designed, follow these steps to implement it in OBS Studio:
- Open OBS Studio and navigate to the Sources panel.
- Right-click and select Add > Image to upload your overlay file.
- Position and resize the overlay as needed, ensuring it complements your video feed without obstructing important content.
Alerts are notifications that appear on your stream when certain actions occur, such as new followers, donations, or subscriptions. These alerts can be customized to fit your stream’s theme and can be set up using services like Streamlabs or StreamElements. Here’s how to integrate alerts into your OBS Studio setup:
- Create an account with a streaming alert service.
- Customize your alerts, choosing animations, sounds, and messages.
- Copy the provided URL for the alert box and return to OBS Studio.
- Add a new source by selecting Add > Browser and paste the alert URL.
- Adjust the size and position of your alert box to fit your overlay.
While video quality is essential, audio quality can make or break your stream. To enhance your audio, consider the following:
- Invest in a quality microphone to capture clear sound.
- Utilize audio filters within OBS, such as noise suppression and gain control, to improve sound clarity.
- Incorporate background music or sound effects to create a more immersive experience.
Scene transitions can add a professional touch to your stream. OBS Studio offers various transition options, including fades and slides. To set up transitions:
- Navigate to the Scene Transitions panel in OBS.
- Choose your preferred transition style and duration.
- Test the transitions to ensure they enhance the flow between scenes.
Incorporating overlays, alerts, and audio enhancements into your OBS Studio stream can significantly improve viewer engagement and overall quality. By following these guidelines, you can create a more interactive and visually appealing streaming experience that keeps your audience coming back for more.
Using Overlays and Graphics
in your OBS setup can significantly enhance viewer engagement and create a more professional streaming experience. Overlays are graphical elements that appear on top of your video feed, allowing you to display important information such as alerts, chat messages, and branding. This section will delve into the creation and implementation of overlays, ensuring you maximize their potential.
What Are Overlays? Overlays are visual components that add context and information to your stream. They can include anything from your logo to social media handles, and even real-time alerts for new subscribers or donations. By utilizing overlays, you can provide your audience with a richer viewing experience that keeps them informed and engaged.
Why Use Overlays? The incorporation of overlays can lead to improved viewer retention and interaction. When viewers see relevant information displayed on-screen, they are more likely to stay engaged with the content. Additionally, overlays can help to establish your brand identity, making your streams more recognizable and memorable.
- Branding: Use overlays to showcase your logo and color scheme, reinforcing your brand.
- Information: Display social media handles, website links, or stream schedules to keep viewers informed.
- Alerts: Real-time alerts for subscribers, donations, or messages can encourage viewer participation.
How to Create Overlays? Creating overlays can be done using graphic design software such as Adobe Photoshop, Canva, or GIMP. Here are some steps to guide you:
- Design Your Overlay: Start by designing your overlay. Keep it simple and ensure it complements your video without being too distracting.
- Use Transparent Backgrounds: Save your overlay files as PNGs with transparent backgrounds to seamlessly integrate them into your stream.
- Test for Compatibility: Ensure that your overlays are compatible with OBS Studio by testing their appearance in different resolutions.
Implementing Overlays in OBS Studio is straightforward. Follow these steps to add your overlays:
- Open OBS Studio: Launch the application and navigate to your scene.
- Add a New Source: Click on the “+” button in the Sources box and select “Image” to add your overlay.
- Browse for Your Overlay: Locate your previously designed overlay file and click “OK.”
- Adjust the Position: Use the mouse to drag and resize the overlay as needed, ensuring it fits well within your stream layout.
Tips for Effective Overlays include:
- Keep It Clean: Avoid cluttering your stream with too many overlays. Less is often more.
- Consistent Style: Maintain a consistent style across all overlays to create a cohesive look.
- Test Visibility: Ensure that your overlays are visible against various backgrounds and do not obstruct crucial content.
By effectively utilizing overlays and graphics in your OBS setup, you can create a more engaging and professional streaming environment. Experiment with different designs and elements to find what resonates with your audience and enhances their viewing experience.
Incorporating Audio Sources for Better Engagement
When it comes to live streaming, audio quality is just as important as the visual experience. Viewers are more likely to stay engaged when they can hear you clearly, making sound management a critical component of your streaming setup. In this section, we will explore how to effectively integrate various audio sources and manage sound levels to enhance your stream’s overall quality.
High-quality audio can significantly impact viewer retention. Poor sound can lead to frustration, causing viewers to leave your stream prematurely. By ensuring that your audio is clear and well-balanced, you create a more professional and enjoyable experience. This not only keeps your audience engaged but also encourages them to return for future streams.
- Microphones: A good microphone can make a world of difference. Consider using USB, XLR, or shotgun microphones depending on your needs.
- Audio Interfaces: These devices allow you to connect professional microphones to your computer, improving sound quality.
- Music and Sound Effects: Incorporating background music or sound effects can enhance your stream’s atmosphere, but ensure they are not overpowering.
Once you’ve chosen your audio sources, the next step is to integrate them with OBS Studio. Here’s how:
1. Connect your audio devices to your computer.2. Open OBS Studio and go to the 'Settings' menu.3. Select 'Audio' from the left sidebar.4. Choose your desired audio devices for 'Mic/Auxiliary Audio' and 'Desktop Audio'.5. Click 'OK' to save your settings.
After setting up your audio sources, managing sound levels is essential. Here are some tips:
- Monitor Your Audio: Use headphones to monitor your audio levels in real-time, ensuring clarity and balance.
- Adjust Audio Levels: In OBS, use the mixer section to adjust the levels of your microphone and desktop audio. Aim for levels that peak around -6 dB to -12 dB for optimal sound quality.
- Use Filters: OBS allows you to add filters to your audio sources, such as noise suppression and gain control, to enhance clarity.
Before going live, it’s crucial to test your audio setup. Conduct a trial run to check for any issues. Listen for background noise, echo, or any inconsistencies in volume. Adjust your settings as needed to ensure a polished sound.
Incorporating quality audio sources and managing sound levels effectively can dramatically improve your streaming experience. By prioritizing audio quality, you enhance viewer engagement and create a more professional atmosphere. Remember, a well-balanced audio setup is key to keeping your audience coming back for more!
Troubleshooting Common Issues
Streaming with an action camera using OBS Studio can be an exciting experience, but even the most advanced setups can encounter challenges. This section aims to address some of the most common problems that users face and provide effective solutions to ensure a smooth streaming experience.
When using an action camera for streaming, several issues may arise. Below, we outline common problems and their solutions to help you maintain high-quality broadcasts.
Connection issues can be frustrating and may interrupt your stream. Here are some steps to troubleshoot:
- Check Cables and Connections: Ensure that all cables are securely connected to both your action camera and your computer. A loose connection can cause disruptions.
- Use the Right Ports: Make sure you are using compatible USB or HDMI ports. Some ports may not support video input.
- Restart Devices: Sometimes, simply restarting your action camera and computer can resolve connectivity issues.
- Update Drivers: Ensure that your camera drivers and OBS Studio are up to date. Outdated software can lead to compatibility problems.
Poor video quality can detract from viewer engagement. If you’re facing this issue, consider the following:
- Adjust Resolution Settings: Check the resolution settings in OBS. Ensure they match the capabilities of your action camera for optimal output.
- Modify Frame Rate and Bitrate: Experiment with different frame rates and bitrates in OBS. High settings can improve quality but may require more bandwidth.
- Lighting Conditions: Ensure you have adequate lighting. Low light can result in grainy video, so consider additional lighting sources if necessary.
- Test Your Internet Speed: A slow internet connection can affect streaming quality. Use a speed test tool to check your upload speed and adjust your settings accordingly.
Audio synchronization issues can be distracting for viewers. Here’s how to address them:
- Check Audio Sources: Ensure that the correct audio source is selected in OBS. If you’re using an external microphone, make sure it’s set as the primary audio input.
- Adjust Audio Delay: OBS allows you to add audio delay to sync your video and audio. Experiment with this feature until you achieve the desired synchronization.
- Monitor Audio Levels: Use the audio mixer in OBS to monitor levels and ensure they are balanced throughout the stream.
Frame rate drops can lead to choppy video, which is unappealing to viewers. Here are some solutions:
- Close Unnecessary Applications: Running multiple applications can consume system resources. Close any unnecessary programs to free up CPU and RAM for OBS.
- Lower Streaming Settings: If you’re experiencing frame drops, consider lowering your streaming resolution and bitrate to improve performance.
- Optimize OBS Settings: In OBS, navigate to the settings menu and adjust the video settings for better performance based on your system’s capabilities.
By addressing these common issues proactively, you can enhance your streaming experience with an action camera and OBS Studio. Remember, troubleshooting is part of the process, and with practice, you’ll become adept at resolving these challenges efficiently.
Resolving Connection Problems
When streaming with an action camera and OBS Studio, maintaining a stable connection is crucial for a seamless experience. Connection issues can disrupt your stream, leading to frustration for both you and your viewers. In this section, we will discuss how to troubleshoot and fix common connectivity problems that may arise between your action camera and OBS Studio.
Understanding the root causes of connection problems is the first step in resolving them. Common issues can include:
- Incompatible cables: Using the wrong type of cable can prevent your action camera from connecting properly.
- Driver issues: Outdated or missing drivers can hinder the communication between your camera and OBS.
- USB port problems: Faulty or overloaded USB ports can lead to connectivity failures.
- Power supply issues: Insufficient power can cause your camera to disconnect unexpectedly.
Here are some practical steps to help you troubleshoot and resolve connection issues:
- Check Your Cables: Ensure that you are using high-quality and compatible cables. If you are using HDMI, make sure the cable is firmly connected to both the camera and the capture card.
- Update Drivers: Regularly check for updates on your camera’s drivers and OBS Studio. Keeping your software up to date can resolve many connectivity issues.
- Test Different USB Ports: Try connecting your camera to different USB ports on your computer. If you are using a USB hub, connect the camera directly to the computer instead.
- Power Cycle Your Devices: Sometimes, simply restarting your action camera and computer can resolve connection issues. Disconnect the camera, restart your computer, and then reconnect.
If the general troubleshooting steps do not resolve your issues, you may need to identify specific problems:
- Camera Not Recognized: If OBS does not recognize your camera, ensure that the camera is set to the correct mode (e.g., streaming mode).
- Lag or Delay: If you experience lag, check your video settings in OBS. Lowering the resolution or frame rate can help improve performance.
- Frequent Disconnections: If your camera keeps disconnecting, check the power supply and ensure that all cables are securely connected.
If you have tried all of the above steps and are still experiencing connection issues, it may be time to seek professional help. Contact the manufacturer’s support team or consult forums dedicated to OBS Studio and action cameras for additional insights.
By following these troubleshooting steps and understanding the potential causes of connection issues, you can enhance your streaming experience and maintain a stable connection between your action camera and OBS Studio. Remember, a smooth stream not only improves viewer engagement but also elevates your overall streaming quality.
Fixing Video Quality Issues
When streaming, the quality of your video is paramount. If your video quality is subpar, it can significantly affect viewer retention and engagement. To ensure that your audience remains captivated, it’s essential to diagnose and resolve any video quality issues promptly. This section will provide you with effective strategies to enhance your streaming experience.
Understanding the root causes of video quality issues is the first step in troubleshooting. Common factors include:
- Low Bitrate: A low bitrate can lead to pixelated or blurry images.
- Inadequate Resolution: Streaming at a resolution that is too low can diminish the viewing experience.
- Network Issues: Unstable internet connections can cause lag and buffering.
- Improper Camera Settings: Incorrect settings on your action camera may result in poor video output.
To effectively troubleshoot, follow these steps:
- Check Your Internet Speed: Use a speed test tool to ensure your upload speed meets the requirements for your streaming resolution and bitrate.
- Review OBS Settings: Make sure the settings in OBS Studio match your camera’s capabilities. Check the resolution and bitrate settings to ensure they are optimized for streaming.
- Inspect Camera Settings: Ensure your action camera is set to the highest quality settings. Check for options like 1080p or 4K resolution, and adjust frame rates accordingly.
Once you have diagnosed the issues, you can take the following actions to improve video quality:
- Adjust Bitrate: Increase your bitrate in OBS settings. A higher bitrate allows for better quality but requires more bandwidth.
- Optimize Resolution: Match your streaming resolution with your upload speed. For instance, if your upload speed is limited, consider streaming at 720p instead of 1080p.
- Use a Wired Connection: If you are currently using Wi-Fi, switch to a wired Ethernet connection for more stability.
- Update Drivers: Ensure your video drivers and OBS Studio are up to date to benefit from the latest performance improvements.
After making adjustments, it’s crucial to test your stream:
1. Conduct a private test stream.2. Monitor the stream quality and viewer feedback.3. Adjust settings based on the test results.
By following these steps, you can effectively troubleshoot and enhance your video quality, ensuring a better experience for your viewers. Remember, maintaining high video quality is an ongoing process that requires attention and adjustments as needed.
Frequently Asked Questions
- Can I use any action camera with OBS Studio?
Not all action cameras are compatible with OBS Studio. It’s important to choose a model that supports USB or HDMI output for seamless integration. Look for cameras that are specifically designed for streaming to ensure the best performance.
- What are the best settings for streaming with an action camera?
For optimal streaming quality, set your resolution to 1080p at 30 or 60 frames per second. Adjust the bitrate based on your internet speed; a higher bitrate generally results in better quality, but ensure it matches your upload capacity to avoid lag.
- How do I troubleshoot connection issues between my action camera and OBS?
If you’re facing connection problems, start by checking the cable connections and ensuring your camera is powered on. Restarting both your camera and OBS can often resolve minor glitches. If issues persist, try using a different USB port or HDMI cable.
- Can I add overlays and alerts to my stream?
Absolutely! OBS Studio allows you to enhance your stream with overlays and alerts. You can create custom graphics or use pre-made templates to engage your audience and make your stream visually appealing.
- What should I do if my video quality is poor during streaming?
Poor video quality can stem from several factors. Check your camera settings, ensure good lighting, and verify your internet connection speed. Adjusting the bitrate and resolution settings in OBS can also help improve the overall quality of your stream.
