This article provides a comprehensive step-by-step guide on capturing stunning time-lapse videos using action cameras, including tips, techniques, and settings to enhance your filming experience.
Time-lapse photography is a fascinating technique that captures a series of images at set intervals, which are then compiled to create a video that showcases changes over time. This method can condense hours, days, or even months into a visually engaging short film, allowing viewers to witness transformations that would otherwise go unnoticed.
Action cameras are designed for versatility and durability. Their compact size makes them easy to transport, while their robust build ensures they can withstand harsh conditions. With high-quality video capabilities and various mounting options, action cameras are perfect for capturing time-lapse sequences in diverse settings, from breathtaking nature scenes to bustling cityscapes.
Selecting the best action camera is crucial for achieving stunning time-lapse footage. Consider the following factors:
- Resolution: Higher resolutions provide better detail in your footage.
- Frame Rate: A higher frame rate can enhance the smoothness of your video.
- Battery Life: Longer battery life is essential for extended shoots.
Understanding your camera’s settings is vital for successful time-lapse photography. Key settings include:
- Interval Shooting: This determines how frequently your camera captures images.
- Resolution: Affects the clarity of your final video.
- Exposure: Proper exposure settings prevent overexposure or underexposure in your footage.
Proper preparation is essential before starting your time-lapse shoot. Ensure your action camera is fully charged, format the memory card, and verify that all settings are configured correctly to avoid any interruptions during filming.
The location you choose plays a significant role in the success of your time-lapse. Look for scenes with dynamic movement, such as:
- Sunsets and sunrises
- Busy city streets
- Natural phenomena like blooming flowers or flowing water
Once you have your location, it’s time to set up your shot. This includes:
- Framing: Ensure your subject is well-composed within the frame.
- Stabilization: Use a tripod or stabilizer to prevent shaky footage.
- Lighting: Adjust your settings based on the available light to enhance video quality.
Post-production is where your time-lapse really comes to life. Utilize editing software to compile images, adjust playback speed, and apply filters to enhance the visual appeal of your video. This stage allows for creativity and fine-tuning to achieve the desired effect.
Being aware of common pitfalls in time-lapse photography can save you time and effort. Here are some mistakes to avoid:
- Improper Interval Settings: Not adjusting the interval based on the scene can lead to choppy footage.
- Poor Framing: Neglecting to frame your subject properly can detract from the overall quality.
- Inadequate Battery Life: Always ensure your battery is charged for the duration of your shoot.
Once your time-lapse video is ready, sharing it on social media or video platforms can help showcase your work. Use engaging titles and descriptions to attract viewers and maximize visibility. Consider using relevant hashtags to reach a broader audience and connect with fellow enthusiasts.

What is Time-Lapse Photography?
Time-lapse photography is an innovative technique that allows us to witness the world in a new light. By capturing a sequence of images at predetermined intervals, this method effectively condenses extensive periods—be it hours, days, or even months—into a short, captivating film. The result is a stunning visual narrative that highlights the subtle changes in our environment, making it a popular choice among filmmakers, artists, and enthusiasts alike.
At its core, time-lapse photography involves taking a series of photographs over time, with each image representing a specific moment. These images are then compiled into a video, creating the illusion of time moving faster than it does in reality. This technique can be applied to various subjects, such as nature scenes, urban landscapes, and even human activities. The beauty of time-lapse lies in its ability to reveal the unseen dynamics of motion and change.
- Visual Storytelling: Time-lapse allows for a unique narrative that can convey the passage of time in a visually engaging way.
- Highlighting Change: This technique emphasizes transformations that may go unnoticed in real-time, such as the blooming of flowers or the bustling activity of a city.
- Artistic Expression: Time-lapse photography can serve as a powerful medium for artists to experiment with motion, light, and perspective.
While professional cameras are commonly used for time-lapse photography, action cameras have gained popularity due to their compact size and durability. These cameras are often equipped with features specifically designed for time-lapse, such as interval shooting modes and high-resolution settings. When selecting equipment, consider the following:
- Camera Quality: Look for cameras that offer high-resolution capabilities to ensure clear and detailed footage.
- Battery Life: Since time-lapse shoots can last for extended periods, a camera with a long battery life is essential.
- Stability Equipment: Tripods or stabilizers can help maintain a steady shot, crucial for achieving professional results.
Understanding your camera’s settings is pivotal for successful time-lapse photography. Key settings include:
- Interval Shooting: This determines how frequently your camera captures images. Adjusting this based on the scene’s dynamics is crucial for smooth playback.
- Resolution: Higher resolutions provide better detail and clarity, enhancing the overall quality of your final video.
- Exposure Settings: Proper exposure settings are vital to prevent overexposed or underexposed images, especially in changing lighting conditions.
Choosing the right location can significantly impact the success of your time-lapse project. Look for scenes with dynamic elements, such as:
- Sunsets and Sunrises: These natural phenomena provide beautiful color changes and dramatic shifts in light.
- Urban Environments: Busy streets and bustling city life offer a wealth of activity to capture.
- Nature Scenes: Observe the gradual changes in landscapes, such as clouds moving or flowers blooming.
Editing plays a crucial role in enhancing your time-lapse footage. Utilizing video editing software, you can compile images, adjust playback speed, and apply filters to create a visually appealing final product. Consider using techniques such as:
- Speed Adjustment: Altering the speed can emphasize certain elements of your footage.
- Color Grading: Enhancing colors can add depth and vibrancy to your video.
- Transitions: Smooth transitions between scenes can create a more polished viewing experience.
Why Use an Action Camera for Time-Lapse?
When it comes to capturing breathtaking time-lapse videos, the choice of equipment plays a crucial role. Among the various options available, action cameras stand out due to their unique features and capabilities. But what exactly makes these compact devices ideal for time-lapse photography?
- Compact Size: Action cameras are designed to be lightweight and portable. This compactness allows you to easily carry them during outdoor adventures or urban explorations, making them perfect for spontaneous shoots.
- Durability: Built to withstand harsh conditions, action cameras are typically waterproof, shockproof, and dustproof. This durability means you can capture time-lapse sequences in challenging environments, from sandy beaches to rugged mountains, without worrying about damaging your equipment.
- High-Quality Video: Modern action cameras offer impressive video resolutions, often exceeding 4K. This high-quality output ensures that your time-lapse videos are sharp and visually appealing, even when viewed on larger screens.
- Versatility: Action cameras are incredibly versatile, allowing you to shoot in various modes. Whether you’re interested in capturing fast-paced urban life or the slow transition of a sunset, these cameras can adapt to different scenarios with ease.
- Wide-Angle Lens: Most action cameras come equipped with a wide-angle lens, which is ideal for time-lapse photography. This feature enables you to capture expansive landscapes and dynamic scenes, ensuring that you don’t miss any significant action.
- Easy Connectivity: Many action cameras offer built-in Wi-Fi or Bluetooth, allowing for easy transfer of your footage to smartphones or computers. This feature simplifies the process of editing and sharing your time-lapse videos online.
- Long Battery Life: Time-lapse photography often requires extended shooting periods. Many action cameras are designed with long-lasting batteries, enabling you to capture hours of footage without needing to recharge frequently.
In addition to these features, action cameras often come with user-friendly interfaces and intuitive controls, making them accessible for both beginners and experienced photographers. With the right settings, you can achieve stunning results that showcase the beauty of changing scenes over time.
Moreover, the affordability of action cameras compared to traditional DSLRs or mirrorless cameras makes them a popular choice for many enthusiasts. You don’t need to break the bank to start creating impressive time-lapse videos.
In conclusion, the combination of compact size, durability, high-quality video, and versatility makes action cameras an excellent choice for anyone looking to explore the world of time-lapse photography. Whether you’re capturing the hustle and bustle of city life or the serene beauty of nature, these cameras provide the tools necessary to bring your creative vision to life.

Choosing the Right Action Camera
When it comes to capturing breathtaking time-lapse footage, selecting the right action camera is essential. With a myriad of options available, understanding the key features that contribute to the quality of your time-lapse videos will help you make an informed decision. Below, we explore the vital aspects to consider when choosing an action camera for your time-lapse projects.
- Resolution: The resolution of your camera determines the clarity and detail of your footage. Look for cameras that offer at least 1080p, but 4K resolution is ideal for capturing stunning visuals that stand out.
- Frame Rate: A higher frame rate allows for smoother playback. For time-lapse videos, a frame rate of 30fps or higher is recommended to enhance the viewing experience.
- Battery Life: Long shooting sessions are typical in time-lapse photography. Choose a camera with an extended battery life or the option to use external power sources to avoid interruptions during your shoot.
- Interval Shooting Options: The ability to set custom intervals for capturing images is crucial. Look for cameras that allow you to adjust these settings easily, enabling you to tailor the shooting frequency to the scene’s dynamics.
- Durability: Action cameras are designed for rugged environments. Ensure your camera is waterproof and shockproof, especially if you plan to shoot outdoors.
Resolution plays a significant role in the quality of your time-lapse footage. Higher resolutions not only provide better detail but also allow for cropping and zooming during editing without losing image quality. This flexibility is crucial when you want to highlight specific elements in your footage.
The frame rate determines how fluid your time-lapse video appears. A higher frame rate can make fast-moving scenes look smoother, while lower frame rates may result in choppy playback. It’s essential to find a balance that suits your specific project and the type of motion you are capturing.
Battery life is a critical consideration for time-lapse photography. Long shoots can drain batteries quickly, so opt for a camera that can last several hours on a single charge. Additionally, consider models that support external battery packs or have interchangeable batteries for uninterrupted shooting.
Yes! Interval shooting options allow you to customize how often your camera captures images. This feature is vital for creating smooth transitions in your time-lapse videos. The ability to adjust intervals based on the speed of the scene ensures that your final product is visually engaging and dynamic.
Durability is particularly important if you plan to shoot in challenging environments. An action camera that can withstand water, dust, and impact will give you the confidence to capture stunning footage without worrying about damaging your equipment.
In summary, choosing the right action camera for time-lapse photography involves careful consideration of resolution, frame rate, battery life, interval shooting options, and durability. By focusing on these key factors, you can select a camera that meets your needs and helps you create mesmerizing time-lapse videos that capture the beauty of changing moments.

Essential Settings for Time-Lapse Shooting
When it comes to capturing stunning time-lapse videos, understanding your camera’s settings is vital. The right adjustments can elevate your footage from ordinary to extraordinary. Below are the key settings you should focus on to ensure your time-lapse photography is both effective and visually appealing.
- Interval Shooting: This setting determines how often your camera takes a picture. A well-chosen interval can enhance the smoothness of your final video. For example, if you’re capturing a sunset, an interval of 5 to 10 seconds might be ideal, while a bustling city scene may require shorter intervals.
- Resolution: The resolution impacts the detail and clarity of your footage. Higher resolutions, such as 4K, allow for more detail, which can be crucial when zooming in during editing. However, keep in mind that higher resolution files consume more memory and processing power.
- Exposure Settings: Properly configuring exposure settings is essential for achieving balanced lighting in your time-lapse. Consider using manual mode to lock in your exposure settings, preventing fluctuations that can occur with automatic adjustments during changes in lighting.
- White Balance: Setting a consistent white balance can help maintain color accuracy throughout your time-lapse. Avoid using auto white balance, as it can lead to color shifts in your footage.
- Focus: Ensure your focus is set correctly, especially if you’re capturing a scene with depth. Using manual focus can prevent the camera from refocusing during the shoot, which can disrupt the flow of your time-lapse.
Each of these settings plays a crucial role in determining the overall quality of your time-lapse video. For instance, interval shooting affects the pacing of your footage. Too long of an interval can make the video feel choppy, while too short can result in an overwhelming amount of frames. Similarly, resolution and exposure settings directly influence the visual appeal and clarity of your final product.
Adapting your camera settings to the specific scene you’re capturing is essential for achieving the best results. For example:
| Scene Type | Recommended Interval | Suggested Resolution | Exposure Setting |
|---|---|---|---|
| Sunset | 5-10 seconds | 4K | Manual, locked |
| City Traffic | 1-3 seconds | 1080p | Auto or Manual |
| Flower Blooming | 30 seconds | 4K | Manual, locked |
By understanding how to manipulate these settings based on the scene, you can create more compelling and visually interesting time-lapse videos.
Mastering your camera’s settings is a fundamental step in the journey of time-lapse photography. By paying attention to interval shooting, resolution, and exposure, you can significantly enhance the quality of your videos. Experimenting with these settings and understanding their impact will not only improve your skills but also lead to stunning visual narratives that capture the essence of time.
Interval Shooting Explained
Interval shooting is a fundamental concept in time-lapse photography that dictates how often your camera captures images. This setting is crucial for achieving the desired effect in your final video. The frequency of image capture can significantly influence the smoothness and overall quality of your time-lapse footage. Understanding how to adjust this setting based on the scene’s dynamics is essential for creating visually appealing time-lapse videos.
When considering interval settings, it is important to evaluate the speed of the action you are capturing. For instance, if you are filming a bustling city street, you might opt for shorter intervals, such as one frame every second. This will help to capture the fast-paced movement of cars and pedestrians, resulting in a lively and engaging video. Conversely, if you are documenting the slow transition of a sunset, a longer interval, such as one frame every 10 seconds, would be more appropriate to emphasize the gradual changes in light and color.
Another factor to consider is the duration of your shoot. The total length of time you intend to film will influence how you set your intervals. For example, if you plan to shoot for several hours, shorter intervals will yield a larger number of frames, allowing you to create a more detailed and fluid time-lapse. However, if battery life or storage space is a concern, you may need to increase the interval duration to conserve resources.
It is also worth noting that the interval shooting feature may vary across different camera models. Some action cameras provide customizable settings, allowing you to fine-tune the interval to your specific needs, while others may have fixed intervals that limit your creative options. Always refer to your camera’s manual to understand its capabilities and limitations.
Moreover, the environmental conditions can impact your choice of interval settings. For example, in low-light situations, longer intervals may be necessary to avoid capturing too much noise in your footage. In contrast, bright daylight conditions may allow for shorter intervals without compromising image quality.
In summary, mastering interval shooting is key to producing stunning time-lapse videos. By carefully considering the speed of the scene, the duration of your shoot, the capabilities of your camera, and the environmental conditions, you can effectively set your intervals to create captivating visual narratives. Experimenting with different settings will also help you discover the best approach for your unique shooting scenarios.
Ultimately, a well-planned approach to interval shooting not only enhances the quality of your time-lapse videos but also enriches your overall filming experience. By understanding the nuances of this technique, you can elevate your time-lapse photography to new heights, capturing moments that tell compelling stories through the passage of time.
Resolution and Frame Rate
play a crucial role in the quality of your time-lapse videos. Understanding these elements can significantly enhance the viewing experience, making your footage more engaging and visually appealing.
When capturing a time-lapse, the resolution you choose determines the level of detail in your footage. Higher resolutions, such as 4K, provide more clarity and allow for greater flexibility in editing. This means you can crop or zoom into your footage without losing quality, which is especially useful when focusing on specific areas of interest in your scene. Conversely, lower resolutions might save storage space but can lead to pixelation and a lack of detail, especially when viewed on larger screens.
In addition to resolution, the frame rate is equally important. Frame rates dictate how smooth your video appears. A higher frame rate, such as 60 fps, can create a more fluid motion, which is ideal for fast-moving subjects or dynamic scenes. However, for standard time-lapse videos, a frame rate of 24 fps or 30 fps is often sufficient. It’s essential to strike a balance between resolution and frame rate to achieve the desired effect without overwhelming your editing capabilities or storage resources.
Moreover, the choice of resolution and frame rate can also affect the post-production process. Higher resolutions require more processing power and storage space, which can slow down your editing software. Therefore, it’s crucial to consider your hardware capabilities when making these choices. If you plan to share your time-lapse on social media, remember that different platforms have varying requirements for optimal playback. For instance, Instagram and YouTube may compress videos differently, affecting how your footage appears to viewers.
Another factor to consider is the subject matter of your time-lapse. For instance, if you’re capturing a sunset, a higher resolution will help in preserving the vibrant colors and details of the sky. On the other hand, if your subject is a bustling cityscape, a smoother frame rate can enhance the feeling of motion and energy, drawing viewers into the scene.
Ultimately, the right combination of resolution and frame rate will depend on your specific project needs and goals. Experimenting with different settings can yield valuable insights into how these elements affect your final product. Don’t hesitate to test various configurations to find what works best for your unique style and the story you want to tell through your time-lapse.
In summary, paying attention to both resolution and frame rate is essential for creating stunning time-lapse videos. By choosing the right settings, you can enhance the clarity and fluidity of your footage, resulting in a more captivating viewing experience. Whether you are a beginner or an experienced filmmaker, understanding these technical aspects will elevate your time-lapse photography to new heights.
Preparing Your Action Camera
Before embarking on your time-lapse adventure, it is crucial to ensure that your action camera is fully prepared. This preparation not only enhances your shooting experience but also guarantees that you capture the best possible footage. Here are the essential steps to get your action camera ready for a successful time-lapse shoot:
- Charge the Battery: Always start by charging your action camera’s battery. Time-lapse photography can be demanding, often requiring extended shooting times. A fully charged battery will prevent interruptions and ensure that you don’t miss any critical moments.
- Format the Memory Card: Before you begin shooting, it’s advisable to format your memory card. This process clears any previous files and ensures that your card is optimized for recording. Remember, a full memory card can halt your shoot unexpectedly.
- Check Camera Settings: Take some time to configure the camera settings according to your specific needs. Key settings to adjust include:
- Resolution: Opt for a higher resolution for clearer images, but be mindful of your storage capacity.
- Frame Rate: Adjust the frame rate based on your desired playback speed. A lower frame rate can create a more dramatic effect.
- Interval Shooting: Set the interval for how often the camera will take a picture. This is crucial for achieving the desired time-lapse effect.
- Stabilization: If your action camera supports it, enable any stabilization features. Smooth footage is key to a professional-looking time-lapse video.
Why is Preparation Important?
Proper preparation is essential for several reasons. First, it minimizes the risk of technical issues during your shoot. Imagine setting up your scene only to discover that your battery is dead or your memory card is full. This can lead to frustration and wasted opportunities. Second, having your settings optimized for the specific conditions you’ll be shooting in allows for better quality footage.
Final Checks Before You Start
Before you hit the record button, conduct a final check. Ensure that your camera is securely mounted and that you have accounted for any potential changes in lighting or movement in your scene. It’s also a good practice to do a test shot to confirm that everything is functioning as expected.
In summary, taking the time to adequately prepare your action camera can significantly enhance your time-lapse shooting experience. By ensuring your battery is charged, your memory card is formatted, and your settings are dialed in, you set yourself up for success. This attention to detail can make all the difference between a mediocre video and a stunning time-lapse that captures the beauty of motion over time.
Finding the Perfect Location
When it comes to capturing breathtaking time-lapse videos, is crucial. The right setting can transform your footage from ordinary to extraordinary. Here are some key considerations to help you select the most engaging scenes for your time-lapse projects.
- Dynamic Movement: Look for scenes that exhibit dynamic movement. This can include the gradual transition of a sunset, the hustle and bustle of city streets, or the slow change of seasons in nature. Such movements add a layer of excitement and interest, making your time-lapse footage more captivating.
- Natural Landscapes: Locations like mountains, forests, or beaches can provide stunning backdrops for your time-lapse. Capture the changing colors of the sky as the sun sets over a serene landscape or document the transformation of a forest as it transitions through the seasons.
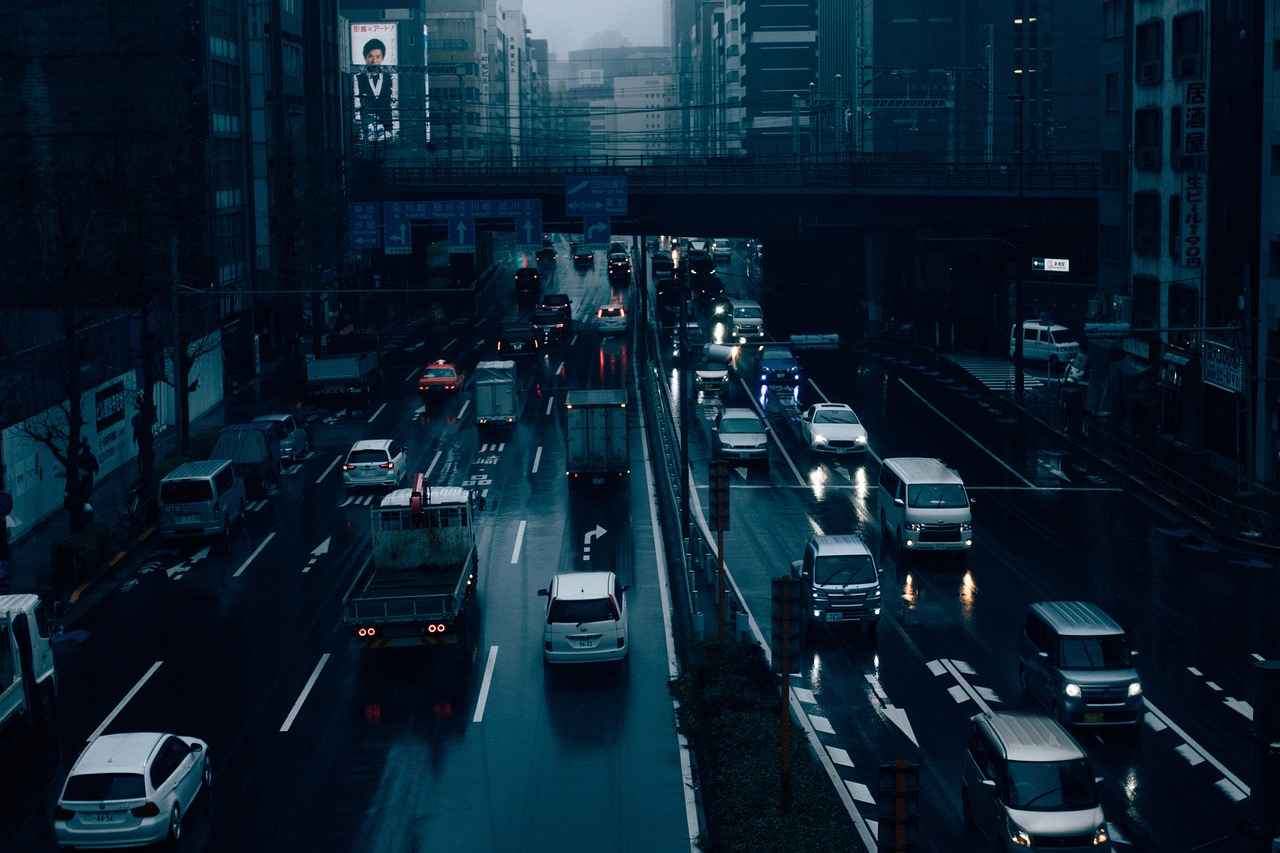
- Urban Environments: Cities offer a rich tapestry of activity. Consider filming busy intersections, where the flow of traffic creates a mesmerizing pattern. You can also capture the movement of pedestrians, showcasing the vibrancy of urban life.
- Events and Activities: Festivals, parades, or sporting events present excellent opportunities for time-lapse photography. The energy and excitement of these events can be beautifully encapsulated in a condensed format, highlighting the essence of the occasion.
- Weather Changes: Dramatic weather conditions, such as storm clouds rolling in or the gradual clearing of a foggy morning, can create stunning time-lapse sequences. These natural phenomena showcase the power and beauty of nature, making your footage more compelling.
When scouting for the ideal location, consider the following tips:
1. Visit the location at different times of the day to see how the light changes.2. Take note of any potential obstructions that could interfere with your shot.3. Ensure you have the necessary permissions to film, especially in public places or private properties.4. Think about accessibility and safety, particularly if you're shooting in remote areas.
In conclusion, choosing the right location is a fundamental aspect of creating a successful time-lapse video. By focusing on scenes with dynamic movement and considering various environments, you can enhance the visual appeal of your footage and engage your audience effectively.
Setting Up Your Shot
Setting up your shot is a critical step in capturing stunning time-lapse videos with your action camera. This process not only involves framing your subject effectively but also ensuring that your camera is stable and properly adjusted for the lighting conditions. A well-composed shot can significantly enhance the overall quality of your time-lapse video, making it visually appealing and engaging for your audience.
Framing is essential in photography and becomes even more crucial in time-lapse shooting. When framing your subject, consider the rule of thirds, which suggests dividing your frame into nine equal parts and placing your subject along these lines or their intersections. This technique creates a more balanced and interesting composition, drawing viewers’ attention to the focal point of your video.
Stability is key to achieving smooth and professional-looking time-lapse footage. Using a tripod or a camera stabilizer can help eliminate unwanted shakes and jitters. If you’re filming in windy conditions or on uneven surfaces, consider using a weighted tripod or stabilizer to enhance stability further. Remember, even the slightest movement can disrupt the flow of your time-lapse, so take the time to ensure your setup is secure.
Lighting plays a vital role in the quality of your time-lapse video. Natural light changes throughout the day, affecting how your scene appears. To avoid overexposure or underexposure, adjust your camera settings accordingly. Utilize features such as exposure compensation and ISO settings to manage lighting effectively. If you’re shooting during the golden hour, the soft, warm light can add an enchanting quality to your footage, enhancing its visual appeal.
Besides framing your subject, selecting an appropriate background is equally important. A cluttered or distracting background can take away from your main subject. Look for dynamic scenes that complement your subject. For example, if you’re capturing a sunset, ensure the foreground adds depth without overshadowing the beauty of the sky.
Incorporating natural elements such as trees, mountains, or water can add layers to your composition. These elements not only provide context but also contribute to the overall storytelling of your time-lapse video. When setting up your shot, think about how these elements interact with your subject and how they can guide the viewer’s eye through the frame.
Before you start capturing your time-lapse, take a moment to review your setup. Check your framing, stability, and lighting adjustments. A quick review can save you from potential issues during the recording. Additionally, consider taking a few test shots to ensure everything is working as intended. This practice will help you identify any adjustments needed before you start your actual shoot.
Setting up your shot is not just about placing your camera and pressing record; it involves careful consideration of composition, stability, and lighting. By paying attention to these details, you can create a time-lapse video that captivates your audience and showcases your skills as a filmmaker. Remember, a well-composed shot enhances the overall quality of your time-lapse video, making it a memorable viewing experience.
Stabilization Techniques
When it comes to capturing stunning time-lapse videos, achieving smooth and stable footage is essential. One of the most effective ways to ensure your shots are free from unwanted shakes and jitters is by utilizing stabilization techniques. This section will delve into the importance of stability in time-lapse photography and explore various methods to achieve it.
Stability is crucial for maintaining a professional look in your time-lapse videos. Shaky footage can distract viewers and detract from the overall impact of your work. By ensuring your camera remains steady throughout the shooting process, you can create a visually appealing narrative that effectively showcases the passage of time.
A tripod is one of the most effective tools for stabilizing your camera during time-lapse shoots. By securely mounting your action camera on a tripod, you minimize the risk of movement caused by wind, uneven surfaces, or accidental bumps. Here are some tips for using a tripod:
- Choose the Right Tripod: Select a tripod that is compatible with your action camera and can support its weight.
- Adjust the Height: Set the tripod at a height that captures the best angle of your subject while remaining stable.
- Use Weights: If shooting in windy conditions, consider adding weight to your tripod for extra stability.
If you’re looking for even greater stability, consider using a stabilizer or a gimbal. These devices are designed to counteract camera movements and vibrations, providing a smooth shooting experience. Here’s how to effectively use them:
- Balance Your Camera: Ensure your action camera is properly balanced on the stabilizer or gimbal to achieve optimal performance.
- Practice Movements: Familiarize yourself with the device’s controls to execute smooth pans and tilts.
- Monitor Battery Life: Stabilizers and gimbals often require power, so keep an eye on battery levels during extended shoots.
In situations where a tripod or stabilizer isn’t feasible, you can still achieve stable footage using handheld techniques. Here are some practical tips:
- Use Both Hands: Hold the camera with both hands to reduce shake and improve control.
- Adopt a Stable Stance: Stand with your feet shoulder-width apart and tuck your elbows into your body for added support.
- Engage Your Core: Keep your core engaged to help stabilize your body during the shoot.
Even with the best stabilization techniques, some minor shakes may still occur. Fortunately, many editing software programs offer post-production stabilization features. These tools can help smooth out any remaining jitters in your footage. Here are a few popular options:
- Adobe Premiere Pro: Offers a Warp Stabilizer effect that can significantly enhance shaky footage.
- Final Cut Pro: Includes a stabilization feature that automatically analyzes and corrects shaky clips.
- iMovie: A user-friendly option for beginners that provides basic stabilization tools.
By implementing these stabilization techniques, you can greatly enhance the quality of your time-lapse videos. Whether you choose to use a tripod, a stabilizer, or handheld methods, the key is to maintain a steady shot to create captivating visuals that engage your audience.
Lighting Considerations
play a crucial role in the quality of your time-lapse footage. The right lighting can enhance the visual appeal of your video, making it more engaging for viewers. Understanding how to manipulate and adapt to various lighting conditions is essential for capturing stunning time-lapse sequences.
First and foremost, natural light changes throughout the day can significantly impact your footage. For instance, the golden hour—shortly after sunrise and before sunset—provides soft, warm light that can add a magical touch to your time-lapse. Conversely, harsh midday sunlight may cause overexposure, washing out details in your images. To combat this, consider adjusting your camera settings to ensure optimal exposure.
When shooting in varying light conditions, it’s vital to adjust your camera settings accordingly. Most action cameras allow you to modify settings such as ISO, shutter speed, and aperture. For example:
- ISO: Keep the ISO as low as possible to reduce noise, especially in bright conditions.
- Shutter Speed: A slower shutter speed can help capture more light, but be cautious of motion blur.
- Aperture: A wider aperture (lower f-stop number) allows more light, but be mindful of depth of field.
Another consideration is the use of filters. Neutral density (ND) filters can be particularly useful in bright conditions, as they reduce the amount of light entering the lens without affecting color balance. This allows for longer exposures, which can create beautiful motion blur in moving subjects, adding a dynamic element to your time-lapse.
Moreover, it’s essential to pay attention to the direction of light. The angle at which light hits your subject can create shadows and highlights that enhance texture and depth in your footage. Experimenting with different angles can yield unique results, so don’t hesitate to change your position or the orientation of your camera.
Finally, consider the weather conditions. Overcast days can provide even lighting, reducing harsh shadows and offering a more consistent exposure. However, be aware that changing weather can also introduce challenges, such as sudden drops in light. Always be prepared to adapt your settings quickly to maintain the quality of your footage.
In summary, mastering the art of lighting in time-lapse photography involves understanding natural light, adjusting your camera settings, utilizing filters, and being mindful of the direction and quality of light. By paying close attention to these factors, you can significantly enhance the quality of your time-lapse videos, making them more captivating and enjoyable for your audience.
Editing Your Time-Lapse Footage
Post-production is the stage where your time-lapse video truly transforms into a captivating visual story. Utilizing editing software is essential for compiling images, adjusting speed, and enhancing the overall appearance of your footage. Here’s a detailed guide on how to effectively edit your time-lapse videos.
- Choosing the Right Editing Software: Select software that suits your skill level and meets your project needs. Popular options include Adobe Premiere Pro, Final Cut Pro, and DaVinci Resolve. Each offers unique features that can enhance your editing experience.
- Importing Your Footage: Start by importing your sequence of images into the editing software. Ensure that the images are in the correct order to maintain the flow of the time-lapse.
- Adjusting Playback Speed: One of the key elements of time-lapse editing is speed adjustment. Most editing software allows you to change the duration of the clip, effectively speeding up the footage. Experiment with different speeds to find the right balance for your project.
After setting the speed, consider applying filters and effects. Filters can add a professional touch to your video, enhancing colors and contrast. For instance:
- Color Grading: Adjust the color balance to create a mood that fits your footage. Warmer tones can evoke a sense of calm, while cooler tones may convey a more dramatic feel.
- Stabilization: If your footage appears shaky, use stabilization features to smooth it out. Most editing software includes tools to help reduce or eliminate unwanted movements.
Another important aspect is adding audio. Consider incorporating background music or sound effects that complement the visuals. This can enhance the emotional impact of your time-lapse video and keep viewers engaged.
Finally, exporting your video is the last step in the editing process. Choose the appropriate file format and resolution based on where you plan to share your video. For online platforms, formats like MP4 are widely accepted and provide a good balance between quality and file size.
In summary, editing your time-lapse footage is a crucial step in creating a compelling visual narrative. By choosing the right software, adjusting playback speed, applying filters, and adding audio, you can elevate your time-lapse videos to new heights. Remember, the editing phase is where your creative vision comes to life, so take your time to explore different techniques and make your video truly unique.
Common Mistakes to Avoid
When venturing into the world of time-lapse photography, it’s essential to recognize that even minor oversights can lead to significant setbacks. Being aware of common pitfalls can save you both time and effort, ensuring that your shooting experience is as smooth and rewarding as possible. Below are some of the critical mistakes to avoid, along with tips on how to sidestep them.
- Improper Interval Settings: One of the most common errors is setting the wrong interval for capturing images. If the interval is too short, you may end up with excessive footage, making it challenging to edit. Conversely, if it’s too long, you may miss crucial moments that could enhance your final video. Always consider the speed of the action you are capturing and adjust your intervals accordingly.
- Poor Framing: The composition of your shot plays a vital role in the overall impact of your time-lapse video. A well-framed shot draws the viewer’s eye and maintains their interest. Before you start shooting, take the time to plan your composition. Consider the rule of thirds, leading lines, and other compositional techniques to enhance your visual storytelling.
- Inadequate Battery Life: Nothing is more frustrating than running out of battery mid-shoot. Always ensure your camera is fully charged before starting your time-lapse project. Additionally, consider carrying extra batteries, especially for longer shoots. This precaution will allow you to focus on capturing your footage without interruptions.
- Ignoring Lighting Conditions: Lighting can make or break your time-lapse video. Poor lighting can result in grainy, underexposed, or overexposed footage. Pay attention to the time of day and the natural light available in your shooting environment. Adjust your camera settings to accommodate changing light conditions, and consider using filters if necessary.
- Neglecting Camera Stability: A shaky camera can ruin an otherwise stunning time-lapse. Always use a tripod or stabilizer to keep your camera steady. Even slight movements can be exaggerated in time-lapse footage, so invest in quality stabilization equipment to ensure a professional look.
- Forgetting to Format Your Memory Card: Before starting any shoot, it’s crucial to format your memory card. This step not only frees up space but also reduces the risk of file corruption. Always double-check that your card has enough storage for the duration of your time-lapse shoot.
- Not Reviewing Footage Regularly: It’s easy to get caught up in the excitement of shooting, but regularly reviewing your footage can help you catch mistakes early. Check for issues like framing, exposure, and focus. Making adjustments during the shoot can save you from having to reshoot later.
By being mindful of these common pitfalls, you can enhance your time-lapse photography skills and create stunning videos that captivate your audience. Preparation, awareness, and attention to detail are key components of a successful time-lapse shoot.

Sharing Your Time-Lapse Videos
Sharing your time-lapse videos is a crucial step in showcasing your creativity and hard work. In today’s digital age, platforms like social media and video-sharing sites offer an excellent opportunity to reach a broader audience. But how can you effectively share your time-lapse videos to maximize engagement and visibility?
Sharing your time-lapse videos not only allows you to display your artistic skills, but it also helps you connect with like-minded individuals and build a community around your work. By sharing your videos, you can:
- Gain Feedback: Receive constructive criticism and praise from viewers.
- Expand Your Reach: Attract new followers and potential collaborations.
- Enhance Your Portfolio: Showcase your skills for future opportunities.
Not all platforms are created equal when it comes to sharing video content. Consider the following popular platforms:
- YouTube: Ideal for longer videos and reaching a vast audience.
- Instagram: Perfect for short, visually appealing clips with a strong emphasis on aesthetics.
- Facebook: Great for sharing with friends and family, as well as joining relevant groups.
- TikTok: Excellent for creative, short-form content that can go viral.
Once you choose your platform, the next step is to craft engaging titles and descriptions. This is crucial for attracting viewers and improving your video’s searchability. Here are some tips:
- Use Keywords: Incorporate relevant keywords that reflect the content of your video.
- Be Descriptive: Provide a brief overview of what viewers can expect to see.
- Include Call-to-Actions: Encourage viewers to like, share, or comment on your video.
Hashtags are an essential tool for increasing visibility on platforms like Instagram and TikTok. Use popular and relevant hashtags to help your video reach a wider audience. For example:
#TimeLapse #Photography #CreativeVideo #NatureLovers #UrbanExploration
Once your video is live, don’t forget to engage with your audience. Respond to comments, ask for feedback, and encourage viewers to share your video. This interaction not only builds community but also boosts your video’s algorithmic ranking on many platforms.
After sharing your time-lapse video, analyze its performance through metrics such as views, likes, shares, and comments. Understanding what resonates with your audience can help you refine your future content. Use insights from these metrics to adjust your strategy and improve engagement over time.
In summary, sharing your time-lapse videos effectively involves choosing the right platforms, crafting engaging titles and descriptions, utilizing hashtags, and engaging with your audience. By following these strategies, you can significantly enhance your video’s visibility and connect with a broader community. Remember, the more you share, the more opportunities you have to grow your audience and showcase your talent.
Frequently Asked Questions
- What is the best interval for time-lapse photography?
The best interval for time-lapse photography really depends on the subject you’re capturing. For fast-moving scenes, like clouds or traffic, a shorter interval of 1-5 seconds works well. For slower changes, like a plant growing, you might want to set it to 30 seconds or even longer!
- Can I use any action camera for time-lapse?
Absolutely! Most action cameras come with a time-lapse mode. Just make sure it has good resolution and battery life, especially for longer shoots. It’s always a good idea to check the camera’s specifications to ensure it meets your needs.
- How do I stabilize my action camera for time-lapse?
Stabilization is key for smooth time-lapse footage. You can use a tripod, a gimbal, or even find a stable surface to place your camera on. Just think of it like trying to capture a beautiful painting; a steady hand makes all the difference!
- What editing software is best for time-lapse videos?
There are many great options out there! Software like Adobe Premiere Pro, Final Cut Pro, or even free options like DaVinci Resolve can help you compile and edit your time-lapse footage effectively. Choose one that fits your skill level and editing needs!
- How can I improve the lighting in my time-lapse?
Good lighting can transform your time-lapse! Shoot during the golden hours—early morning or late afternoon—when the light is soft and warm. If you’re shooting indoors, try to use natural light from windows or adjust your camera settings to accommodate lower light conditions.
