This guide provides essential steps and tips for beginners to effectively set up their action cameras, ensuring optimal performance and capturing stunning footage right from the start. Whether you’re planning to document your adventures or create engaging content, understanding your action camera is crucial.
To make the most of your action camera, it’s important to familiarize yourself with its key components. Here are the main parts you should know:
- Camera Body: The main unit that houses all the essential elements.
- Battery: Powers your camera; knowing how to manage battery life is vital.
- Lens: Determines the quality of your images and videos.
- Connectivity Options: Includes Wi-Fi and Bluetooth for transferring files and controlling the camera remotely.
Charging your action camera correctly ensures that it operates efficiently. Follow these best practices:
- Use the recommended charger that comes with your camera.
- Avoid overcharging; most cameras have built-in protection.
- Charge your camera for at least 2-3 hours before first use.
Before you start filming, adjusting key settings is vital for achieving the best results:
- Resolution: Choose between 1080p and 4K based on your needs.
- Frame Rate: Adjust for smooth footage; consider 30fps for regular shooting and 60fps for action.
- Field of View (FOV): Select wide for immersive shots or narrow for focused scenes.
Video resolution significantly impacts the quality of your footage. Common options include:
- 1080p: Standard quality for most casual videos.
- 4K: Offers high detail and clarity, ideal for professional use.
Frame rate affects how smooth your video appears. Here’s a quick breakdown:
- 30fps: Suitable for regular action.
- 60fps: Best for fast-paced scenes.
- 120fps: Perfect for slow-motion effects.
The field of view (FOV) determines how much of the scene is captured. Your options include:
- Wide: Great for action shots.
- Medium: Balanced view for most situations.
- Narrow: Ideal for focused subjects.
Audio quality can make or break your video. Adjust these settings for optimal sound:
- Microphone Options: Choose between built-in and external mics.
- Wind Noise Reduction: Activate this feature for outdoor shoots.
Proper mounting is essential for stable footage. Consider these options:
- Helmet Mount: Ideal for biking or extreme sports.
- Handlebar Mount: Great for capturing rides.
- Tripod Mount: Perfect for stationary shots.
Accessories can significantly improve your filming experience. Here are some must-have items:
- Protective Cases: Safeguard your camera from damage.
- Extra Batteries: Ensure you don’t run out of power during shoots.
- Gimbals: Stabilize your footage for smooth results.
Connecting your action camera to smartphones, tablets, or computers can enhance functionality:
- Wi-Fi: Use for quick file transfers.
- Bluetooth: Control your camera remotely.
To capture the best footage, consider these shooting techniques:
- Angles: Experiment with different perspectives.
- Lighting: Shoot in well-lit conditions for clarity.
- Stabilization: Use gimbals or stabilization features for smooth footage.
Editing is key to creating polished videos. Consider these software options:
- Adobe Premiere Pro: Comprehensive editing capabilities.
- Final Cut Pro: Ideal for Mac users.
- iMovie: Great for beginners.
Regular maintenance ensures your action camera lasts longer:
- Cleaning: Use a soft cloth to clean the lens.
- Storage: Keep it in a dry place when not in use.
- Care: Regularly check for software updates.
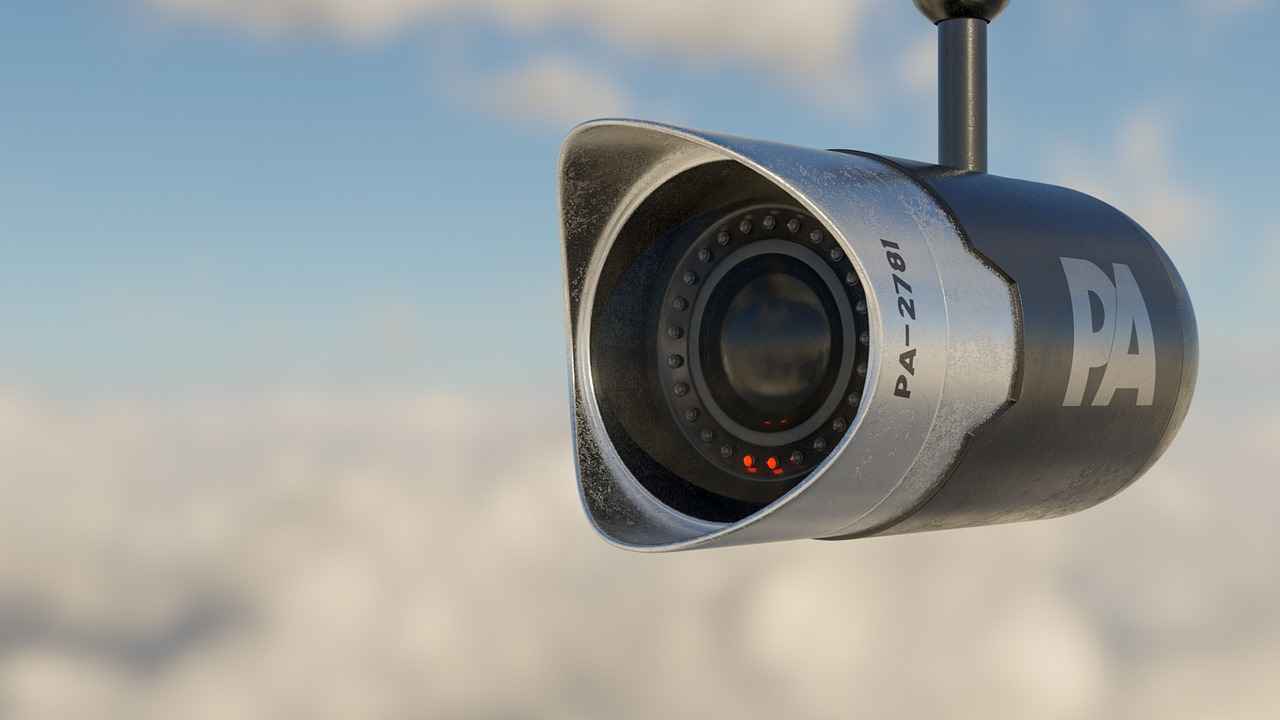
What Are the Essential Components of an Action Camera?
When diving into the world of action cameras, understanding the essential components is vital for achieving the best results. Whether you’re capturing breathtaking landscapes or thrilling sports activities, knowing the functionalities of your camera can significantly enhance your filming experience. This section explores the key elements of an action camera: the camera body, battery, lens, and connectivity options.
The camera body is the core of your action camera, housing all the internal components. It’s designed to be durable and weatherproof, ensuring it can withstand extreme conditions. Many action cameras feature a rugged design, often with shock resistance, making them ideal for outdoor adventures. Understanding the layout of buttons and ports on the camera body is essential for quick access during shooting.
The battery of an action camera plays a crucial role in its performance. A high-capacity battery allows for longer recording times, which is particularly important during extended activities. It’s advisable to check the battery life indicator and carry spare batteries for uninterrupted shooting. Additionally, understanding how to charge your battery properly can prolong its lifespan and efficiency.
The lens is another critical component, as it directly affects the quality of the footage. Most action cameras come with a wide-angle lens, which captures more of the scene, making it perfect for action shots. However, some cameras offer interchangeable lenses, allowing for more creative flexibility. Familiarizing yourself with the lens specifications, such as aperture and focal length, can help you achieve the desired effects in your videos.
Connectivity options are essential for enhancing the functionality of your action camera. Many modern action cameras feature Wi-Fi and Bluetooth capabilities, enabling you to connect to smartphones, tablets, and computers. This allows for easy file transfers, remote control functionality, and live streaming. Understanding how to set up these connections can significantly improve your shooting experience and make sharing your adventures easier.
All these components work in harmony to deliver stunning footage. The camera body provides the necessary protection and housing, while the lens captures high-quality images. The battery ensures that your camera stays powered throughout your adventures, and the connectivity options allow for seamless integration with other devices. By understanding each component’s role, you can make informed decisions about settings and accessories, ultimately enhancing your filming capabilities.
In summary, grasping the essential components of an action camera is not just beneficial; it’s crucial for anyone looking to maximize their filming experience. By paying attention to the camera body, battery, lens, and connectivity options, you can set up your action camera effectively and capture breathtaking footage that you’ll cherish for years to come.
How to Charge Your Action Camera Properly?
Charging your action camera properly is crucial for maintaining its performance and longevity. Whether you are a beginner or an experienced user, understanding the best practices for charging can significantly enhance your shooting experience. In this section, we will cover the recommended charger types, optimal charging times, and tips to ensure your camera is always ready for your next adventure.
Using the right charger is essential for ensuring that your action camera charges efficiently and safely. Here are some recommended charger types:
- OEM Chargers: Always opt for the original equipment manufacturer (OEM) charger that comes with your camera. These chargers are specifically designed for your device, ensuring optimal charging.
- USB-C Chargers: Many modern action cameras utilize USB-C for charging. Look for a high-quality USB-C charger that supports fast charging to minimize downtime.
- Power Banks: If you’re on the go, a portable power bank can be a lifesaver. Ensure it has enough output power to charge your camera efficiently.
Charging times can vary based on the camera model and the type of charger used. On average, here are some guidelines:
- Standard Charging: Most action cameras take between 1.5 to 3 hours to fully charge when using the OEM charger.
- Fast Charging: If your camera supports fast charging, it can reduce charging time to about 1 hour with a compatible charger.
- Battery Maintenance: To prolong battery life, avoid letting your camera’s battery drain completely before charging.
To ensure your action camera remains in top condition, follow these best practices:
- Avoid Overcharging: Disconnect the charger once the battery is full to prevent overheating and potential damage.
- Charge in a Cool Environment: High temperatures can affect battery performance. Always charge your camera in a cool, dry place.
- Use Quality Cables: Low-quality charging cables can lead to inefficient charging and may even damage your camera’s battery.
By following these guidelines, you can ensure that your action camera is charged correctly and ready to capture stunning footage whenever you need it. Proper charging not only enhances the performance of your camera but also extends its lifespan, allowing you to enjoy your adventures without interruption.
What Settings Should You Adjust First?
When you first acquire an action camera, it’s essential to understand that the initial settings can significantly influence your shooting experience and the quality of your footage. Before you dive into capturing breathtaking moments, taking the time to adjust key settings is vital. This section highlights essential settings like resolution, frame rate, and field of view, tailored for different shooting scenarios.
Every action camera comes with a set of default settings that may not be optimal for your specific filming needs. Adjusting these settings allows you to tailor your camera’s performance to suit various environments and activities, ensuring that you capture the best possible footage. Here are some critical settings to consider:
Video resolution plays a crucial role in determining the clarity and detail of your footage. Common options include:
- 720p: Suitable for casual shooting and saves storage space.
- 1080p: A popular choice for high-definition video, balancing quality and file size.
- 4K: Provides stunning detail, ideal for professional-level footage but requires more storage and processing power.
Choosing the right resolution depends on your intended use. For social media, 1080p is usually sufficient, while 4K is recommended for cinematic projects.
Frame rate, measured in frames per second (fps), influences how smooth and fluid your video appears. Common frame rates include:
- 30 fps: Standard for most videos, providing smooth motion.
- 60 fps: Great for capturing fast action, making it ideal for sports.
- 120 fps or higher: Used for slow-motion effects, allowing you to capture intricate details.
Consider your shooting scenario when selecting a frame rate. For example, action-packed activities benefit from higher frame rates, while interviews or scenic shots may only require 30 fps.
The field of view determines how much of the scene your camera captures. Most action cameras offer several FOV options:
- Wide: Captures a broad perspective, ideal for landscapes and action shots.
- Medium: Balances between wide and narrow, suitable for general use.
- Narrow: Focuses on a specific subject, perfect for interviews or close-ups.
Selecting the appropriate FOV can enhance the storytelling aspect of your videos. For instance, wide FOV is excellent for adventure sports, while narrow FOV works well for personal vlogs.
Besides resolution, frame rate, and FOV, consider adjusting the following settings:
- White Balance: Adjust this according to the lighting conditions to maintain color accuracy.
- ISO Settings: A lower ISO is best for bright conditions, while a higher ISO is beneficial in low light.
- Stabilization: Enable electronic stabilization for smoother footage during dynamic activities.
By carefully adjusting these settings, you can optimize your action camera for any shooting scenario. Take the time to experiment with these options to find the perfect configuration for your unique filming style. With the right settings in place, you will be well on your way to capturing stunning, high-quality footage that truly reflects your adventures.
Understanding Video Resolutions
is essential for anyone looking to maximize the quality of their footage. The resolution of your video directly affects how clear and detailed the final product will be. Two of the most common video resolutions today are 1080p and 4K, and understanding their differences can help you make an informed choice.
1080p, also known as Full HD, has a resolution of 1920 x 1080 pixels. This resolution offers a high level of detail and is suitable for most casual and professional filming needs. It is widely supported across various devices and platforms, making it a versatile choice for many users.
4K resolution, or Ultra HD, boasts a resolution of 3840 x 2160 pixels. This means it has four times the pixel count of 1080p, resulting in significantly sharper and more detailed images. 4K is ideal for projects that require high-quality visuals, such as cinematic films or nature documentaries. However, it also demands more storage space and processing power.
- Casual Use: If you’re filming for personal use or social media, 1080p is often sufficient.
- Professional Projects: For high-quality productions, consider using 4K to ensure the best possible image quality.
- Storage and Processing: Be mindful of your storage capacity and editing hardware; 4K files are larger and require more powerful equipment.
Higher resolutions like 4K provide more flexibility in post-production. You can crop or zoom in on your footage without losing quality, which is particularly useful for action shots or dynamic scenes. In contrast, 1080p footage may limit your options if you need to make significant adjustments during editing.
As technology advances, more platforms and devices are supporting higher resolutions. By choosing 4K, you not only enhance your current projects but also ensure that your footage remains relevant for future viewing experiences.
Understanding video resolutions like 1080p and 4K is crucial for capturing the best possible footage. By evaluating your needs and considering factors such as editing flexibility, storage, and future-proofing, you can select the resolution that best suits your projects.
Frame Rate Explained
Understanding frame rate is crucial for anyone looking to optimize their video content. Frame rate, measured in frames per second (fps), determines how smooth your video playback appears. A higher frame rate results in smoother motion, while a lower frame rate can create a choppier experience. In this section, we will explore various frame rates and their ideal use cases.
- 24 fps: This is the standard frame rate for most films. It provides a cinematic feel and is perfect for storytelling. If you’re shooting a short film or a narrative piece, 24 fps is a great choice.
- 30 fps: Commonly used for television broadcasts, 30 fps offers a slightly smoother motion than 24 fps. It’s ideal for vlogs or videos that require a more lifelike appearance without being overly smooth.
- 60 fps: This frame rate is excellent for capturing fast action, such as sports or dynamic activities. It allows for smooth playback and is ideal for action-packed scenes where detail is important.
- 120 fps and above: High frame rates like 120 fps or even 240 fps are perfect for slow-motion effects. By capturing more frames, you can slow down the action significantly without losing clarity, making it ideal for dramatic moments in your videos.
Choosing the Right Frame Rate for Your Content
When deciding on a frame rate, consider the type of content you are creating. For instance, if you’re filming a scenic landscape, a lower frame rate like 24 fps may be more appropriate to give a cinematic effect. Conversely, if you are capturing high-speed sports, opting for 60 fps or higher will provide a more fluid representation of the action.
Frame Rate and Editing
It’s also essential to consider how frame rate affects post-production. For example, if you shoot at 120 fps, you have the flexibility to slow down your footage during editing, creating stunning slow-motion sequences. However, shooting at a higher frame rate can require more storage space and processing power, so ensure your equipment can handle it.
Conclusion
In summary, understanding frame rates can significantly enhance the quality of your videos. By selecting the appropriate frame rate for your shooting scenario, you can ensure your footage appears as smooth and professional as possible. Always keep your audience’s viewing experience in mind, and choose a frame rate that best suits your content’s purpose.
Field of View Options
The field of view (FOV) is a crucial aspect of action camera settings that defines how much of the scene is captured in your footage. Understanding the different FOV options—wide, medium, and narrow—can greatly influence the storytelling of your videos. Here, we delve into each FOV type and provide guidance on when to utilize them for the best results.
Wide FOV captures a broader scene, making it ideal for landscapes, group shots, and action-packed activities. This setting allows viewers to immerse themselves in the environment, showcasing more of the surroundings. It’s particularly useful for:
- Outdoor adventures like hiking or skiing
- Sports events where capturing the action is key
- Vlogs that aim to provide a sense of place
However, be cautious as wide FOV can introduce distortion, especially at the edges of the frame. This effect can be used creatively but may not be suitable for all types of footage.
Medium FOV offers a balanced perspective, providing a good mix of the subject and its surroundings. This setting is versatile and works well in various scenarios, such as:
- Interviews or talking head videos
- Situations where you want to maintain focus on the subject while still showing some background
- General-purpose filming that requires a natural look
This option minimizes distortion and is often the best choice for content creators who want a professional look without the exaggerated effects of wide FOV.
Narrow FOV is perfect for close-up shots, emphasizing the subject while eliminating distractions from the background. This setting is best suited for:
- Detail-oriented shots, such as product reviews or tutorials
- Capturing facial expressions in interviews
- Scenes where the subject’s actions are the primary focus
Using narrow FOV can create an intimate atmosphere, drawing the viewer’s attention directly to the subject. However, it may not be ideal for capturing wider contexts or environments.
Choosing the appropriate FOV depends on the story you want to tell. Here are some tips to guide your decision:
- Consider the Subject: If your focus is on a specific action or detail, narrow FOV is ideal.
- Think About the Environment: For scenic shots, wide FOV enhances the visual experience.
- Assess Your Audience: Understand what your viewers want to see—immersive landscapes or focused narratives.
Experimenting with different FOV settings can help you discover what works best for your unique style and vision.
In summary, the field of view is a powerful tool in the arsenal of any action camera user. By understanding the distinct characteristics of wide, medium, and narrow FOV, you can make informed choices that elevate your video content and engage your audience effectively.
Customizing Audio Settings
When it comes to creating engaging videos, audio quality is just as crucial as the visual elements. Poor sound can detract from even the most stunning footage, making it essential to customize your audio settings effectively. This section will guide you through the various aspects of audio customization, including microphone options and wind noise reduction features.
Audio quality can significantly influence the viewer’s experience. High-quality sound enhances storytelling, while poor audio can lead to viewer disengagement. Whether you are creating content for social media, vlogs, or professional projects, investing time in audio settings is vital.
Your action camera may come with a built-in microphone, but for optimal sound quality, consider using an external microphone. External microphones can capture clearer audio and reduce background noise. Here are some popular microphone types:
- Lavalier Microphones: These clip-on mics are excellent for interviews and dialogue, providing clear sound without being intrusive.
- Shotgun Microphones: Ideal for capturing sound from a specific direction, these mics are perfect for outdoor filming.
- Handheld Microphones: These are versatile and great for on-the-go interviews or dynamic shooting scenarios.
Wind noise can be a significant issue when filming outdoors, often ruining audio quality. Many action cameras come equipped with windscreen features or settings designed to minimize wind noise. Here are some tips to effectively reduce wind noise:
- Use a Windscreen: Investing in a high-quality windscreen can drastically reduce wind interference.
- Positioning: Place your microphone away from direct wind paths or shield it with your body when filming.
- Settings Adjustment: Some cameras allow you to adjust audio sensitivity. Lowering this can help mitigate wind noise.
Another crucial aspect of customizing audio settings is adjusting the audio levels. Most action cameras allow you to set the input levels to ensure that sound is neither too quiet nor too distorted. Here’s how to do it:
- Monitor Levels: Use headphones to monitor audio levels while filming, ensuring clarity and volume are appropriate.
- Test Shots: Always conduct test recordings to check audio levels before your main shoot.
- Manual Adjustments: If your camera allows, manually adjust the gain settings to optimize audio capture.
To ensure the best audio quality in your videos, consider the following additional tips:
- Record in a Quiet Environment: Whenever possible, choose a filming location with minimal background noise.
- Use Audio Editing Software: Post-production audio editing can significantly enhance the overall sound quality of your video.
- Regularly Test Equipment: Regularly check your microphones and cables for any issues to avoid unpleasant surprises during filming.
By taking the time to customize your audio settings, you can significantly improve the quality of your videos. Remember, clear and engaging audio not only enhances viewer experience but also elevates your content to a professional level.
How to Mount Your Action Camera Correctly?
Mounting your action camera correctly is crucial for achieving stable and high-quality footage. Whether you are capturing thrilling moments while biking, skiing, or simply recording your daily adventures, the right mount can make all the difference. In this section, we will explore various mounting options, their advantages, and tips for ensuring secure placement.
There are several popular mounting options available, each suited for different activities and environments:
- Helmet Mounts: Ideal for capturing first-person perspectives, helmet mounts allow you to attach your camera securely to your helmet. This option is perfect for activities like biking, skateboarding, or skiing, where a hands-free recording solution is essential.
- Handlebar Mounts: If you’re cycling or riding a motorcycle, handlebar mounts provide a stable platform to capture the road ahead. Ensure the mount is tightened properly to avoid vibrations that can affect footage quality.
- Chest Mounts: Chest mounts offer a unique angle that is particularly useful for action sports. They keep the camera steady while providing a view of both the rider and the environment.
- Tripods: For stationary shots, tripods are invaluable. They allow for precise positioning and stability, making them ideal for landscapes or group shots.
- Selfie Sticks: To capture personal moments or group selfies, a selfie stick can extend your reach. Look for one that is lightweight and easy to handle.
Regardless of the mount you choose, ensuring that your action camera is securely placed is essential to avoid accidents or damage. Here are some tips:
- Check Compatibility: Ensure that the mount is compatible with your specific camera model. Using the right attachments will help maintain stability.
- Use Safety Straps: For additional security, consider using safety straps or tether cords. These can prevent your camera from falling off during intense activities.
- Test the Mount: Before starting your activity, do a quick test to check the mount’s stability. Give it a gentle shake to ensure it is securely attached.
- Adjust Positioning: Position the camera at an angle that captures the best view while remaining stable. Experiment with different angles to find what works best for your activity.
Proper mounting is essential for achieving stable and clear footage. An improperly mounted camera can lead to shaky, unusable video, ruining the experience of capturing those special moments. By investing some time in selecting the right mount and ensuring secure placement, you can significantly enhance the quality of your recordings.
In summary, whether you opt for helmet mounts, handlebar mounts, or tripods, understanding the various mounting options and their secure placement is key to capturing stunning action shots. By following the tips provided, you will be well on your way to creating impressive footage that you can cherish for years to come.
What Accessories Enhance Your Action Camera Experience?
When it comes to maximizing the potential of your action camera, accessories play a pivotal role. They not only enhance your filming capabilities but also ensure that you capture the best moments with ease and efficiency. Below, we explore some essential accessories that can significantly improve your filming experience.
A protective case is a must-have for any action camera user. These cases safeguard your camera from water damage, dirt, and impacts, making them ideal for outdoor adventures. With a variety of options available, including waterproof and shockproof cases, you can choose one that suits your specific needs. For instance, if you plan on diving or shooting in wet conditions, a waterproof case will ensure that your camera remains functional and safe.
Nothing is more frustrating than running out of battery in the middle of an exciting shoot. Extra batteries are a simple yet effective way to extend your filming time. By having a few spare batteries on hand, you can ensure that your camera is always ready to capture those spontaneous moments without interruptions. Consider investing in a battery charger that can charge multiple batteries simultaneously, allowing you to prepare for long filming sessions efficiently.
A gimbal is a stabilization tool that can dramatically improve the quality of your footage. By minimizing shakes and vibrations, a gimbal allows for smooth and cinematic shots, even during high-action scenes. This is particularly beneficial for sports enthusiasts or anyone filming in dynamic environments. With a gimbal, you can achieve professional-quality video without the need for extensive editing.
Mounting accessories are crucial for capturing unique angles and perspectives. From helmet mounts to chest harnesses, these accessories allow you to secure your action camera in various positions, providing creative filming options. For example, a helmet mount is perfect for capturing first-person views during biking or skiing, while a tripod can be used for stable shots in static settings. The versatility offered by these mounts can enhance your storytelling capabilities significantly.
Filters can greatly enhance the quality of your footage by reducing glare and improving color saturation. Polarizing filters, for instance, help to eliminate reflections from water or glass surfaces, resulting in clearer images. ND (Neutral Density) filters allow you to control the exposure in bright conditions, enabling you to achieve the desired depth of field and motion blur. Incorporating filters into your filming setup can elevate your videos to a more professional level.
- Microphones: For improved audio quality, consider adding an external microphone. This can significantly enhance the sound quality of your videos, especially in noisy environments.
- Lighting Kits: Proper lighting can make a huge difference in video quality. Portable LED lights can help illuminate your subject in low-light conditions.
- Carrying Cases: A good carrying case keeps all your accessories organized and protected, making it easy to transport your gear wherever you go.
In summary, the right accessories can transform your action camera experience, allowing you to capture stunning footage with ease. By investing in protective cases, extra batteries, gimbals, and other essential accessories, you can ensure that you are well-equipped for any filming adventure.
How to Connect Your Action Camera to Other Devices?
Connecting your action camera to smartphones, tablets, or computers can significantly enhance its functionality and usability. With the advent of technology, most modern action cameras come equipped with Bluetooth and Wi-Fi connectivity options, allowing you to quickly transfer files, control the camera remotely, and even stream live footage. This section will guide you through the various connectivity options available and the steps to set them up effectively.
Bluetooth connectivity provides a convenient way to connect your action camera to other devices without the need for wires. This is particularly useful for quickly transferring photos and videos directly to your smartphone or tablet. To set up Bluetooth:
- Ensure that your action camera is powered on.
- Access the camera’s settings menu and navigate to the Bluetooth section.
- Enable Bluetooth and make your camera discoverable.
- On your smartphone or tablet, go to the Bluetooth settings and search for available devices.
- Select your action camera from the list and pair the devices.
Once connected, you can use your smartphone to control the camera, adjust settings, and even start/stop recording remotely.
Wi-Fi connectivity offers a more robust solution for connecting your action camera to devices, especially for transferring large files or streaming live video. Here’s how to set it up:
- Turn on your action camera and access the settings menu.
- Find the Wi-Fi settings and enable it.
- Note the Wi-Fi network name (SSID) and password displayed on the camera screen.
- On your smartphone, tablet, or computer, go to the Wi-Fi settings and connect to the camera’s network using the provided password.
Once connected, you can use the camera’s companion app to access files, change settings, and even live stream your adventures directly to social media platforms.
Connecting your action camera to other devices not only enhances functionality but also improves your overall filming experience. Here are some key benefits:
- Remote Control: Use your smartphone to control the camera from a distance, perfect for capturing group shots or action sequences.
- Instant Sharing: Quickly share your favorite moments on social media without the need for a computer.
- Live Streaming: Engage your audience in real-time by streaming your adventures directly from your action camera.
- Efficient Editing: Transfer footage to your editing software seamlessly for quicker post-production.
In conclusion, setting up Bluetooth and Wi-Fi connectivity on your action camera is a straightforward process that unlocks a world of possibilities. Whether you want to control your camera remotely or share your adventures instantly, understanding these connectivity options is essential for any action camera user.
What Are the Best Practices for Shooting with an Action Camera?
When it comes to capturing breathtaking footage with your action camera, employing the right shooting techniques is essential. Understanding how to manipulate angles, lighting, and stabilization can significantly enhance the quality of your videos. Below are some best practices that will help you achieve optimal results.
Angles play a crucial role in storytelling through your videos. Here are some tips:
- Low Angles: Shooting from a low angle can make subjects appear more powerful and dramatic. This technique is particularly effective in sports or action shots.
- High Angles: Conversely, high angles can provide a broader view of the scene, which is useful in capturing landscapes or group activities.
- Point of View (POV): Using a POV angle can immerse viewers in the action, making them feel part of the experience.
Lighting is another critical factor that influences the quality of your footage. Here are some suggestions:
- Golden Hour: The best time to shoot is during the golden hour—shortly after sunrise or before sunset—when the light is soft and warm.
- Avoid Harsh Midday Sun: Shooting in harsh sunlight can create unwanted shadows. If you must shoot during this time, seek shaded areas or use diffusers.
- Use Additional Lights: For indoor shoots or low-light conditions, consider using LED lights or reflectors to enhance visibility.
Shaky footage can detract from the viewing experience. Here are methods to ensure stabilization:
- Use a Gimbal: A gimbal stabilizer can significantly reduce camera shake and ensure smooth motion, especially during action shots.
- Employ Built-in Stabilization: Many modern action cameras come with electronic stabilization features. Make sure to enable this setting before filming.
- Body Movement: When shooting handheld, use your body as a stabilizer. Keep your elbows close to your body and move smoothly to minimize shake.
Action cameras often come equipped with various shooting modes that can enhance your footage:
- Time-lapse: This mode captures frames at set intervals, creating a fast-motion effect that can be stunning for long events.
- Slow Motion: Use this feature to capture fast-moving subjects in detail, adding a dramatic effect to your footage.
- Burst Mode: This mode allows you to capture multiple frames per second, which is ideal for action shots where timing is crucial.
By applying these best practices, you can maximize the potential of your action camera and create visually stunning videos. Remember, practice makes perfect, so don’t hesitate to experiment with different techniques to find what works best for your style.
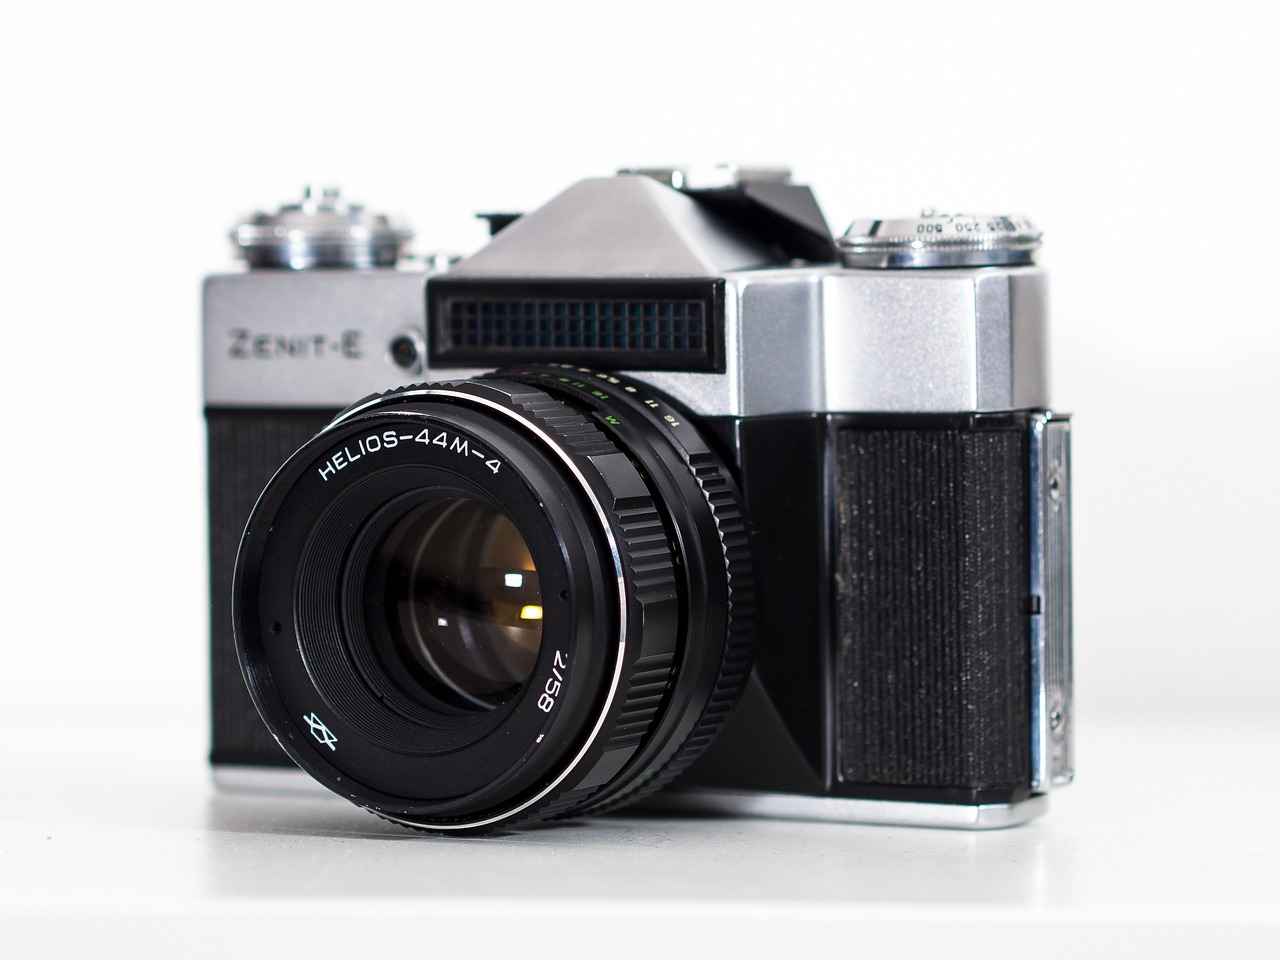
How to Edit Your Action Camera Footage?
Editing your action camera footage is an essential step in the video creation process, allowing you to transform raw clips into polished, engaging content. Whether you are a beginner or an experienced videographer, understanding the basics of editing can significantly enhance your storytelling and visual impact. In this section, we will explore popular editing software options and fundamental techniques that can elevate your footage.
Choosing the right editing software is crucial for achieving the desired results. Here are some of the most popular options:
- Adobe Premiere Pro: A professional-grade software that offers extensive features for detailed editing.
- Final Cut Pro: Ideal for Mac users, this software provides powerful editing tools with a user-friendly interface.
- DaVinci Resolve: Known for its advanced color correction capabilities, it is a great choice for those looking to enhance the visual quality of their videos.
- iMovie: A beginner-friendly option for Mac users, offering basic editing tools and templates.
- GoPro Quik: Specifically designed for GoPro cameras, this software allows for quick edits and automatic video creation.
Once you have chosen your editing software, it’s time to dive into some fundamental techniques that can make a significant difference:
- Cutting and Trimming: Remove unwanted sections from your footage to keep the content engaging. Focus on keeping only the best clips that contribute to your story.
- Transitions: Use transitions to create smooth shifts between clips. Simple fades or cuts can enhance the flow of your video.
- Color Correction: Adjust the colors and brightness of your footage to ensure consistency and vibrancy. This step is vital for making your video visually appealing.
- Adding Music and Sound Effects: Incorporate background music and sound effects to enhance the emotional impact of your video. Ensure that the audio levels are balanced for a professional finish.
- Text and Titles: Use text overlays to provide context or highlight key points. Choose fonts and colors that complement your footage.
Efficient editing is about more than just the software and techniques; it’s also about workflow. Here are some tips to streamline your editing process:
- Organize Your Footage: Before editing, categorize your clips into folders based on scenes or themes. This organization saves time during the editing phase.
- Use Keyboard Shortcuts: Familiarize yourself with keyboard shortcuts for your editing software to speed up your workflow.
- Regularly Save Your Work: Avoid losing progress by saving your project frequently and creating backups.
By mastering these editing techniques and utilizing the right software, you can transform your action camera footage into captivating videos that resonate with your audience. Remember, the key to effective editing lies in practice and creativity, so don’t hesitate to experiment with different styles and techniques!
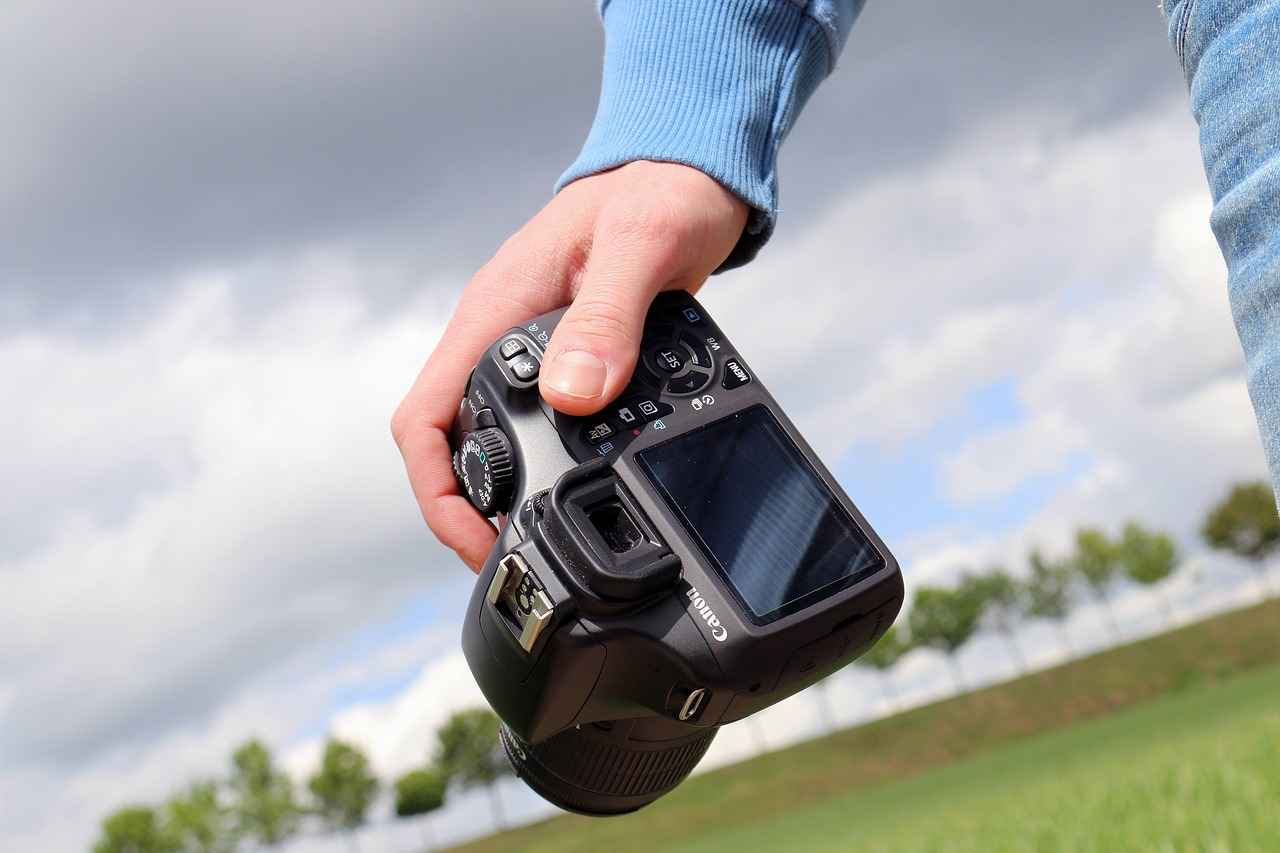
What Maintenance Tips Should You Follow?
Maintaining your action camera is essential for ensuring its longevity and optimal performance. Regular maintenance not only helps in keeping your camera in excellent condition but also enhances the quality of the footage you capture. Below are some crucial tips on cleaning, storage, and care that every action camera owner should follow.
Cleaning your action camera is vital to prevent dirt, dust, and grime from affecting its performance. Regular cleaning can help maintain the quality of the lens, ensuring that your videos remain clear and vibrant. Use a microfiber cloth to gently wipe the lens and body of the camera after each use, especially if you’ve been shooting in dusty or wet environments.
Proper storage is crucial to prolonging the life of your action camera. Always store it in a dry and cool place, away from direct sunlight and extreme temperatures. Consider using a dedicated camera bag with padding to protect it from impacts. Additionally, remove the battery if you plan not to use the camera for an extended period, as this helps prevent corrosion.
Battery health is critical for the performance of your action camera. To maintain battery life:
- Charge your battery fully before using it for the first time.
- Avoid letting the battery drain completely, as this can shorten its lifespan.
- Store batteries at around 50% charge if not used for a long time.
If your action camera is waterproof, ensure that the seals and doors are intact before use. After shooting in water, rinse the camera with fresh water to remove any salt or chlorine. Allow it to dry completely before storing.
Keeping your camera’s firmware updated is essential for optimal performance. Manufacturers often release updates that fix bugs, improve features, and enhance compatibility with accessories. Regularly check the manufacturer’s website for updates and follow their instructions for installation.
Investing in accessories can aid in maintaining your action camera:
- Lens protectors: Prevent scratches and damage to the lens.
- Silica gel packs: Keep moisture at bay when storing your camera.
- Cleaning kits: Include brushes and solutions specifically designed for camera equipment.
Always handle your action camera with clean hands and avoid touching the lens to prevent smudges. When mounting, ensure that all connections are secure and that the camera is firmly attached to avoid accidental drops.
By following these maintenance tips, you can ensure that your action camera remains in top condition, allowing you to capture stunning footage for years to come. Regular care not only enhances performance but also saves you money in the long run by avoiding costly repairs or replacements.
Frequently Asked Questions
- What should I do first when setting up my action camera?
Start by charging your action camera fully and then familiarize yourself with its components like the battery, lens, and connectivity options. It’s like prepping your car before a road trip—make sure everything’s in place!
- How do I choose the right video resolution for my needs?
Consider what you’re filming and where you’ll share it. For social media, 1080p is usually sufficient, but if you want stunning quality for larger screens, go for 4K. Think of it as choosing between a postcard and a high-resolution print!
- What accessories do I really need for my action camera?
Must-have accessories include extra batteries for longer shoots, a protective case for durability, and a gimbal for smoother footage. It’s like packing your toolkit before a DIY project—you want to be prepared!
- How can I connect my action camera to my smartphone?
You can connect via Bluetooth or Wi-Fi, depending on your camera model. Just follow the instructions in your camera’s manual, and it’s as easy as pairing your headphones!
- What are some best practices for shooting with my action camera?
Experiment with different angles, utilize natural light, and keep your camera steady. Think of it like painting a picture; the right perspective and lighting can turn a good shot into a masterpiece!
