This article serves as a comprehensive guide on setting up an action camera for motorcycle vlogging, detailing the best mounts and optimal settings to enhance your filming experience. With the rise of vlogging, especially in the motorcycle community, having the right equipment is crucial for capturing breathtaking moments on the road.
Action cameras are compact, durable, and specifically designed for high-quality video capture. They are perfect for motorcycle vloggers who want to document their adventures with minimal hassle. Their lightweight nature allows for easy mounting, while their rugged build ensures they can withstand the elements and the vibrations of riding.
When selecting an action camera, consider the following essential features:
- Resolution: Look for at least 1080p, but 4K is ideal for stunning clarity.
- Frame Rate: Higher frame rates (60fps or more) are preferable for capturing smooth motion.
- Image Stabilization: This feature is critical for reducing shaky footage.
Several action cameras are highly rated for motorcycle vlogging. Here are a few top choices:
| Camera Model | Resolution | Price |
|---|---|---|
| GoPro Hero 10 | 5.3K | $399 |
| DJI Osmo Action 3 | 4K | $329 |
| Insta360 ONE R | 5.7K | $479 |
Proper mounting is crucial for capturing stable footage while riding. Here are some popular mounting options:
- Helmet Mounts: These provide a unique perspective but can be heavy on the head.
- Handlebar Mounts: Ideal for easy access and stability, offering a clear view of the road.
- Chest Mounts: Great for capturing rider perspective and body movements.
The positioning of your action camera can significantly impact your footage quality. Here are some best practices:
- Mount the camera at eye level for a natural perspective.
- Avoid placing it too close to the bike to minimize vibrations.
- Experiment with angles to find the most dynamic shots.
Setting your action camera correctly is vital for quality video. Here are some ideal settings:
- Resolution: Use 4K for stunning clarity.
- Frame Rate: 60fps is recommended for smooth action.
- Stabilization: Always enable this feature to reduce shaky footage.
Editing is where you can enhance your storytelling. Here are some tips:
- Use software like Adobe Premiere Pro or Final Cut Pro for advanced editing.
- Incorporate music and sound effects to engage your audience.
- Keep your videos concise to maintain viewer interest.
To improve your vlogging experience, avoid these common pitfalls:
- Neglecting to check your camera settings before a ride.
- Overlooking sound quality; use an external microphone if possible.
- Failing to plan your shots can lead to disorganized footage.
Building a connection with your audience is crucial. Here are strategies to engage viewers:
- Share personal stories to create a relatable narrative.
- Encourage interaction through comments and suggestions.
- Maintain a consistent posting schedule to keep your audience engaged.
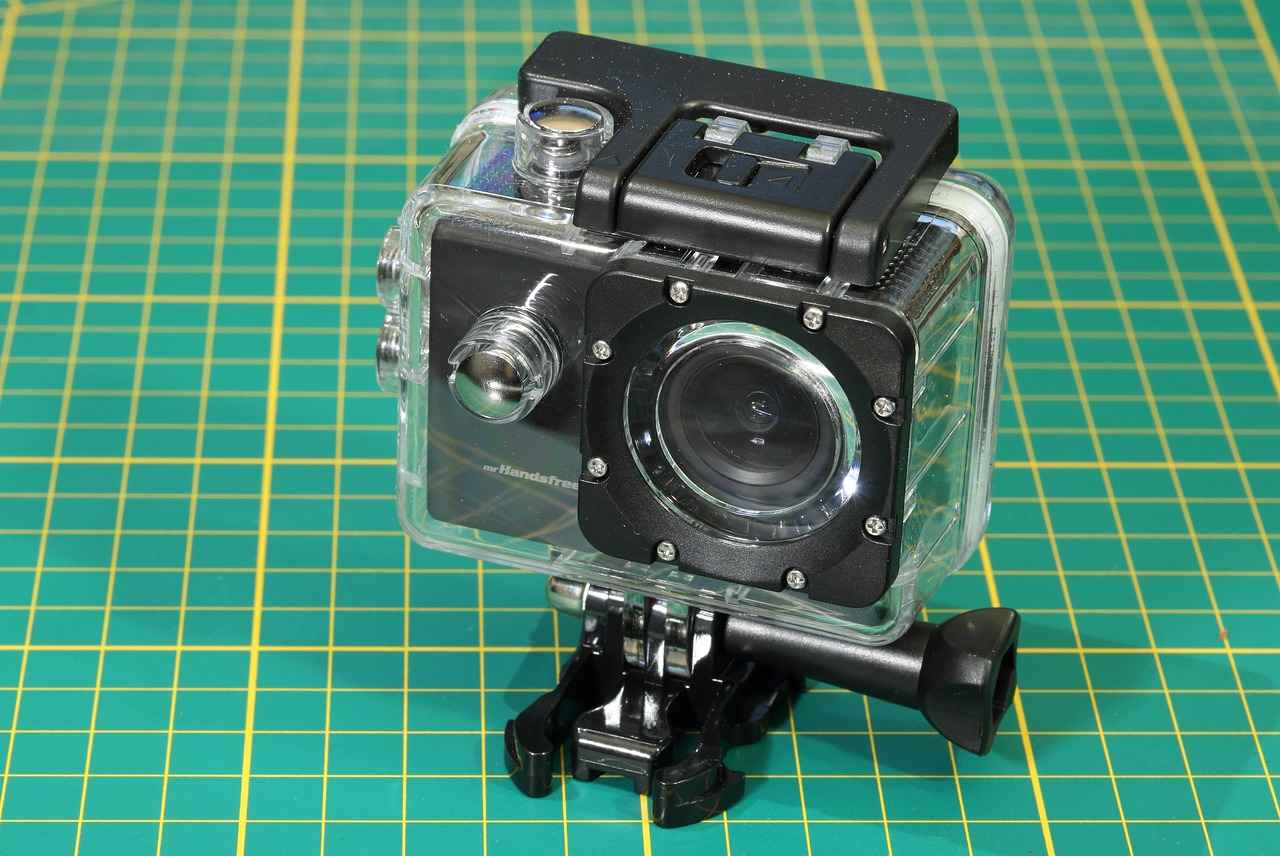
Why Choose an Action Camera for Motorcycle Vlogging?
When it comes to documenting thrilling motorcycle adventures, the choice of equipment can significantly impact the quality of your content. Action cameras have emerged as a top choice among motorcycle vloggers, and for good reason. These devices are not only compact and lightweight but also boast durability and exceptional video quality, making them ideal for capturing the fast-paced nature of motorcycle riding.
One of the primary reasons motorcycle vloggers prefer action cameras is their rugged design. Built to withstand the elements, these cameras are often waterproof and shockproof, allowing you to film in various conditions without worrying about damaging your gear. This resilience is particularly important for riders who venture into challenging terrains or unpredictable weather.
Additionally, action cameras are designed for high-quality video capture. With the capability to shoot in resolutions up to 4K and frame rates that allow for smooth slow-motion playback, these cameras ensure that every twist and turn of your ride is documented in stunning detail. This quality is crucial for engaging your audience and providing an immersive viewing experience.
Another significant advantage of using action cameras is their wide-angle lenses. This feature allows you to capture more of the surrounding scenery, providing viewers with a broader perspective of your journey. Whether you’re cruising along scenic highways or navigating through bustling city streets, the expansive field of view enhances the storytelling aspect of your vlogs.
Moreover, action cameras often come equipped with advanced stabilization technology. This is essential for motorcycle vloggers, as the vibrations and movements experienced during a ride can lead to shaky footage. With built-in stabilization features, these cameras help produce smooth, professional-looking videos, allowing you to focus on the ride rather than worrying about camera shake.
In addition to their technical features, action cameras are also incredibly versatile. They can be mounted in various locations on your motorcycle, from helmet mounts to handlebar mounts, providing different perspectives that can enrich your vlogging content. This versatility enables vloggers to experiment with angles and shots, making each video unique and engaging.
Finally, the ease of use of action cameras cannot be overlooked. Many models offer user-friendly interfaces and mobile app connectivity, allowing for quick adjustments and easy sharing of content. This accessibility is particularly beneficial for vloggers who want to edit and upload their footage promptly, keeping their audience engaged with fresh content.
In summary, choosing an action camera for motorcycle vlogging is a decision backed by numerous advantages. From their durability and high-quality video capabilities to their versatility and ease of use, action cameras provide everything a motorcycle vlogger needs to document their adventures effectively. With the right equipment, you can capture the essence of your rides and share your experiences with the world.
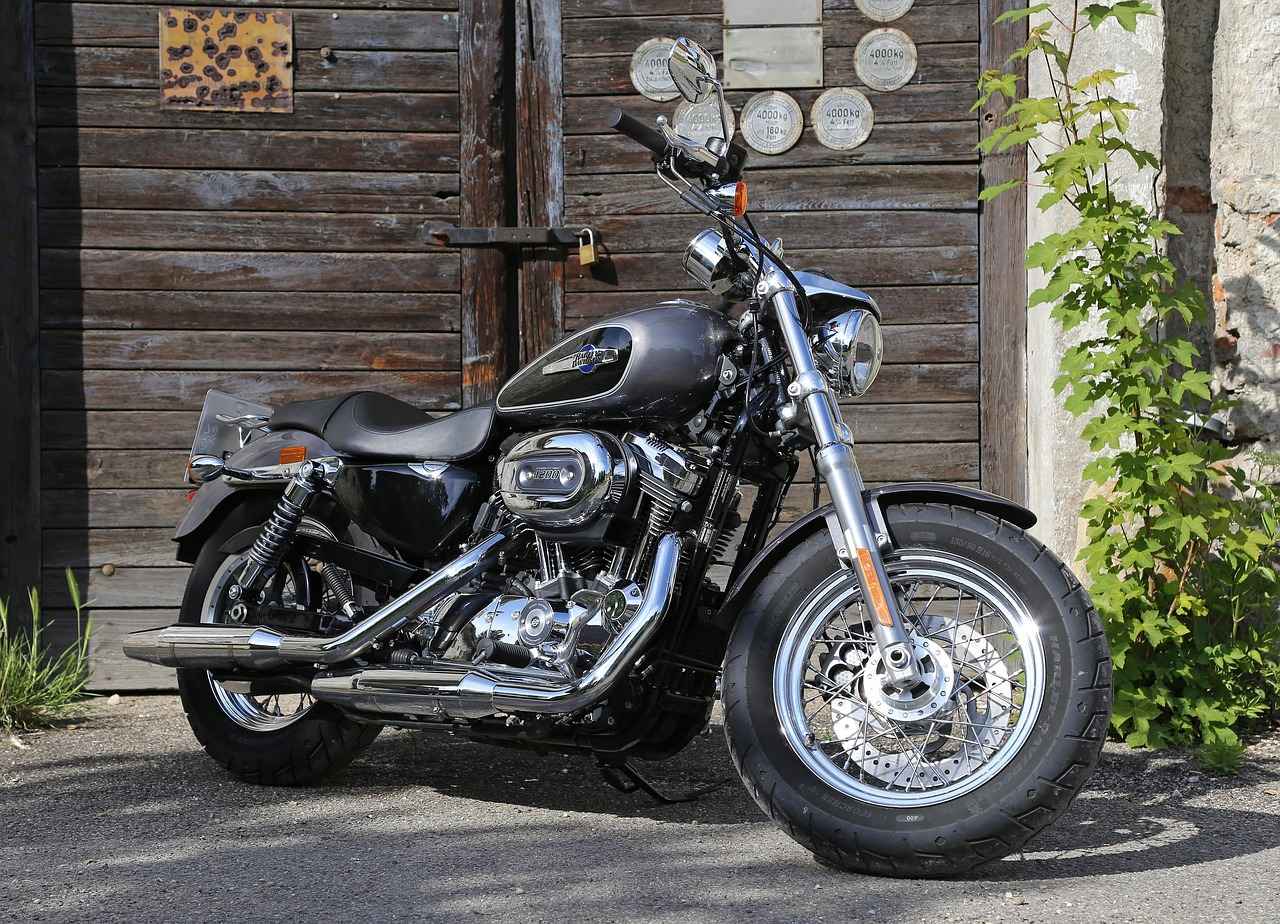
Key Features to Look for in an Action Camera
When it comes to motorcycle vlogging, selecting the right action camera is essential for capturing stunning visuals and delivering engaging content. Understanding key features can significantly enhance your vlogging experience. Here’s a detailed look at the important specifications to consider when choosing an action camera.
Resolution is one of the most critical factors in video quality. A higher resolution allows for clearer images and more details, which is particularly important when filming fast-moving scenes on a motorcycle. Most action cameras offer resolutions ranging from 1080p to 4K. For vlogging, 4K is recommended as it provides exceptional clarity and allows for cropping during editing without losing quality.
Frame rate, measured in frames per second (fps), determines how smooth your video appears. A higher frame rate is crucial for capturing fast-paced action, such as riding at high speeds. Common frame rates include 30fps, 60fps, and even 120fps or higher for slow-motion effects. For motorcycle vlogging, aim for at least 60fps to ensure fluid motion and a professional look.
Stabilization technology is vital for reducing shaky footage, especially when riding on bumpy terrains. Many action cameras come equipped with electronic image stabilization (EIS) or optical image stabilization (OIS). EIS is particularly beneficial as it digitally smooths out the video, creating a more enjoyable viewing experience. Look for cameras that offer advanced stabilization features to enhance your vlogging quality.
- Battery Life: Long battery life is essential for extended rides. Choose a camera that offers at least two hours of recording time.
- Water Resistance: A water-resistant camera can withstand various weather conditions, ensuring your equipment remains safe during unpredictable rides.
- Field of View (FOV): A wider FOV captures more of the surroundings, providing a more immersive experience for your viewers.
- Connectivity Options: Look for cameras with Wi-Fi and Bluetooth capabilities for easy sharing and remote control.
To select the perfect action camera, consider your specific vlogging style and needs. If you prioritize high-quality visuals, opt for models with higher resolutions and frame rates. If you often ride in challenging conditions, focus on durability and stabilization features. Research different models, read reviews, and compare specifications to make an informed decision.
In summary, understanding the essential features of an action camera can greatly impact your motorcycle vlogging experience. By focusing on resolution, frame rate, stabilization, and additional features, you can choose a camera that meets your needs and enhances your content creation.
Best Action Cameras for Motorcycle Vlogging
When it comes to motorcycle vlogging, the choice of an action camera can significantly impact the quality of your content. With numerous options available on the market, selecting the right camera involves considering various factors such as performance, durability, and price. Below, we present a curated list of top-rated action cameras specifically designed for motorcycle vloggers.
Action cameras are renowned for their compact size, robust build quality, and ability to capture stunning video footage in challenging conditions. These features make them a popular choice among motorcycle enthusiasts who want to document their journeys. But which models stand out in the crowded market?
| Camera Model | Video Quality | Stabilization | Price Range |
|---|---|---|---|
| GoPro HERO10 Black | 5.3K at 60fps | HyperSmooth 4.0 | $399 |
| DJI Osmo Action | 4K at 60fps | RockSteady | $329 |
| Insta360 ONE R | 5.7K at 30fps | FlowState | $299 |
| Sony FDR-X3000 | 4K at 30fps | Balanced Optical SteadyShot | $349 |
- GoPro HERO10 Black: Known for its exceptional video quality and advanced stabilization, this camera is a favorite among vloggers for its versatility and ease of use.
- DJI Osmo Action: With a dual-screen setup and impressive stabilization features, the Osmo Action is perfect for capturing dynamic shots while riding.
- Insta360 ONE R: This modular camera offers flexibility with interchangeable lenses, allowing vloggers to switch between standard and 360-degree footage.
- Sony FDR-X3000: Renowned for its optical stabilization, this camera delivers smooth footage even on bumpy rides, making it a reliable choice for motorcycle adventures.
When selecting an action camera for motorcycle vlogging, consider the following factors:
- Video Resolution: Higher resolutions provide clearer and more detailed footage, essential for engaging your audience.
- Stabilization Technology: Effective stabilization reduces shaky footage, which is crucial during fast-paced rides.
- Battery Life: Longer battery life ensures you can capture extended rides without interruptions.
- Durability: Look for cameras that are waterproof and rugged to withstand the elements while riding.
By assessing these features and considering your specific vlogging needs, you can make an informed decision on the best action camera for your motorcycle adventures.
Essential Mounting Options for Action Cameras
When it comes to motorcycle vlogging, proper mounting of your action camera is essential for achieving stable footage. As you navigate through various terrains and speeds, the right mount ensures that your camera remains secure and effective, capturing every thrilling moment without distortion or shake. Below, we delve into the best mounting options available for your motorcycle, helping you make an informed choice.
Choosing the right mount can significantly enhance your vlogging experience. Here are some of the most popular options:
- Helmet Mounts: These mounts attach directly to your helmet, providing a first-person perspective that immerses viewers in your ride. They are excellent for capturing your reactions and the surrounding environment. However, they can be less stable than other options, especially on rough terrain.
- Handlebar Mounts: Mounted on the handlebars, these options offer great stability and easy access to your camera. They provide a clear view of the road ahead and can be adjusted to capture different angles. However, they may not capture the rider’s perspective as effectively as helmet mounts.
- Chest Mounts: These mounts attach to your chest, allowing for a unique angle that showcases both the rider and the surroundings. They are typically more stable than helmet mounts and provide a balanced view of the ride.
- Tail Mounts: Attaching to the rear of the motorcycle, tail mounts offer a unique perspective of the road behind you. This angle can be particularly engaging for viewers who want to see the journey unfold.
- Side Mounts: Side mounts can be attached to the side of the motorcycle or helmet, providing a different viewpoint that captures the bike’s movement and the landscape. They can add variety to your footage.
Regardless of the mount you choose, ensuring your camera is secure is paramount. Here are some tips:
- Use Quality Mounts: Invest in high-quality mounts designed specifically for action cameras. Cheap mounts may not withstand vibrations and can lead to camera loss.
- Check Tightness: Regularly check the tightness of your mounts before each ride. Vibration can loosen screws and fittings, potentially causing your camera to fall off.
- Consider Safety Tethers: Using a safety tether can provide an extra layer of security, preventing your camera from falling even if the mount fails.
When selecting a mounting system, consider the following factors:
- Stability: A stable mount will minimize vibrations and ensure clear footage.
- Adjustability: Look for mounts that allow for angle adjustments, enabling you to capture different perspectives easily.
- Ease of Installation: Choose mounts that are easy to install and remove, allowing for quick setup and adjustments.
- Durability: Ensure that the mount is made from durable materials that can withstand outdoor conditions and the rigors of motorcycle riding.
In summary, selecting the right mounting option for your action camera is crucial for successful motorcycle vlogging. With the right setup, you can capture stunning footage that showcases your adventures while ensuring your camera remains secure. Explore the various options available and choose the one that best fits your riding style and filming needs.
Helmet Mounts: Pros and Cons
Helmet mounts have become a popular choice among motorcycle vloggers looking to capture their riding experiences from a unique perspective. This mounting option allows for immersive footage that closely follows the rider’s point of view, creating an engaging narrative for viewers. However, while helmet mounts offer several advantages, they also come with certain drawbacks that should be considered before making a decision.
- First-Person Perspective: Helmet mounts provide a first-person view that can enhance the storytelling aspect of your vlogs. This perspective allows viewers to feel as if they are riding alongside you.
- Stability: When properly secured, helmet mounts can offer stable footage, especially during high-speed rides or rough terrains. The camera moves with your head, reducing the chances of shaky footage.
- Versatility: Helmet mounts can be adjusted to capture various angles, allowing for creative shots that can make your vlogs more dynamic.
- Hands-Free Operation: With a helmet mount, you can focus on riding without worrying about holding the camera, making it safer and more convenient.
- Wind Noise: One of the main drawbacks of helmet-mounted cameras is the increased wind noise that can affect audio quality. This can be particularly challenging when trying to communicate with your audience.
- Weight and Comfort: Depending on the camera’s size and weight, wearing a helmet mount may cause discomfort during long rides. It’s essential to ensure that the mount does not disrupt your balance or concentration.
- Limited Field of View: While helmet mounts provide a first-person perspective, they may not capture the broader scenery around you. This can limit the visual storytelling of your vlogs.
- Potential for Damage: In the event of a fall or accident, helmet-mounted cameras can be at risk of damage, and the mount itself could pose a hazard.
To maximize the benefits of helmet mounts, consider the following tips:
- Secure Your Camera: Ensure that your camera is securely fastened to avoid any accidents during your ride.
- Use Windshields: Investing in a windscreen or using microphone windshields can help reduce wind noise and enhance audio clarity.
- Experiment with Angles: Try different mounting positions to find the best angle that captures both the ride and the surroundings.
In summary, helmet mounts can significantly enhance your motorcycle vlogging experience by providing a unique perspective and stable footage. However, it’s crucial to weigh the pros and cons carefully and consider your specific needs as a vlogger. By optimizing your setup and being mindful of the potential drawbacks, you can create engaging content that resonates with your audience.
Handlebar Mounts: Stability and Accessibility
Handlebar mounts have become increasingly popular among motorcycle vloggers due to their unique blend of stability and accessibility. These mounts allow riders to capture high-quality footage while keeping their focus on the road. In this section, we will explore the advantages of using handlebar mounts and how they can significantly enhance your motorcycle vlogging experience.
One of the primary reasons to consider handlebar mounts is their ease of installation. Unlike helmet mounts, which can be cumbersome and may obstruct your view, handlebar mounts are straightforward to attach and detach. This feature is particularly beneficial for vloggers who wish to switch between different camera angles quickly.
- Clear View of the Road: Handlebar mounts position your camera in a way that maintains a clear view of the road ahead, ensuring that your audience can enjoy the ride along with you.
- Stability: These mounts are designed to absorb vibrations, providing smoother footage even on bumpy roads. This stability is crucial for maintaining video quality.
- Easy Access: With a handlebar mount, you can quickly adjust your camera settings or change angles without having to stop your motorcycle, allowing for a more dynamic filming experience.
- Versatility: Many handlebar mounts are adjustable, letting you change the camera’s angle easily for different perspectives, whether you’re cruising through scenic routes or navigating city streets.
When selecting a handlebar mount, consider factors such as compatibility with your action camera, durability of materials, and ease of use. Look for mounts that offer a secure grip and can withstand the elements, as motorcycle rides can expose your equipment to various weather conditions.
1. Choose the right location on your handlebars.2. Ensure the mount is securely fastened to prevent any movement.3. Test the camera angle before hitting the road to ensure optimal framing.
Using a handlebar mount not only improves the quality of your footage but also allows you to focus on your ride. By keeping your hands free, you can concentrate on navigating and enjoying the experience, which is essential for creating authentic and engaging content. Additionally, the unique angle provided by the handlebar mount can offer viewers a different perspective that they may not see with traditional helmet mounts.
In summary, handlebar mounts are an excellent choice for motorcycle vloggers looking to enhance their filming experience. With their stability, accessibility, and ability to maintain a clear view of the road, they provide an effective solution for capturing high-quality content. Whether you’re a seasoned vlogger or just starting, investing in a reliable handlebar mount can significantly elevate your motorcycle vlogging journey.

How to Properly Position Your Action Camera
When it comes to capturing breathtaking footage while riding, the position of your action camera is crucial. Proper positioning can make a significant difference in the quality of your videos, ensuring that every twist and turn is documented with clarity and excitement. Below, we explore the best practices for positioning your action camera to achieve optimal results.
The angle and location of your action camera can dramatically influence the perspective and stability of your footage. A well-placed camera can capture the thrill of the ride, while a poorly positioned one may lead to shaky, uninteresting videos. Understanding how to position your camera effectively is essential for any motorcycle vlogger.
- Choose the Right Mount: The type of mount you use can determine how stable and dynamic your footage will be. Popular options include helmet mounts, handlebar mounts, and chest mounts.
- Experiment with Angles: Different angles provide unique perspectives. For example, a helmet mount captures a first-person view, while a handlebar mount offers a wider view of the road ahead.
- Consider the Field of View: Adjust the camera’s field of view (FOV) to include more of your surroundings. A wider FOV can create a more immersive experience for viewers.
- Secure Your Camera: Ensure that your camera is tightly secured to avoid any vibrations or movements that could affect the footage quality. Use rubber grommets or padded mounts for added stability.
Helmet mounts provide a unique viewpoint, allowing viewers to see exactly what the rider sees. However, they can sometimes lead to a shaky perspective if not mounted securely. It’s essential to test the mount before a long ride to ensure it captures smooth footage.
Handlebar mounts are popular for their stability and ease of access. They allow you to quickly adjust the camera angle while riding, providing flexibility in capturing different scenes. However, they may not offer the same immersive experience as helmet mounts.
Chest mounts can provide a balanced view of the rider and the road, making them an excellent option for vlogging. Additionally, consider using suction mounts on the motorcycle’s body for unique shots. These can provide dynamic angles but ensure they are securely attached to avoid accidents.
When riding in various environments, adjusting your camera position can help optimize footage quality. For instance, in low-light conditions, positioning the camera to capture more natural light can enhance video clarity. Similarly, during high-speed rides, a lower angle may help stabilize the footage.
Before embarking on a long journey, take the time to test your camera setup. Go for a short ride and review the footage to determine if adjustments are needed. Tweaking the camera’s position can make all the difference in achieving the desired quality.
Ultimately, the key to capturing stunning motorcycle vlogs lies in the careful positioning of your action camera. By following these best practices, you can enhance your footage and engage your audience with captivating visuals that showcase your riding adventures.
Camera Settings for the Best Vlogging Experience
When it comes to motorcycle vlogging, the settings on your action camera can make all the difference in the quality of your footage. Understanding how to adjust these settings based on your environment and the type of action you are capturing is crucial for creating engaging content. Below, we will explore the essential camera settings that can elevate your vlogging experience.
Camera settings play a vital role in determining the quality of your videos. Proper settings ensure that your footage is clear, stable, and visually appealing, which is essential for keeping your audience engaged. With the right adjustments, you can adapt to various lighting conditions and action sequences, resulting in a more professional-looking vlog.
One of the first decisions you need to make involves the resolution and frame rate settings. Most action cameras offer multiple resolutions, such as 1080p, 2.7K, and 4K. While higher resolutions provide more detail, they also require more storage space and processing power. For motorcycle vlogging, a resolution of 1080p at 60 frames per second (fps) is often ideal, as it balances quality with file size.
Lighting can vary dramatically during your rides. Whether you are filming at dawn, dusk, or in bright sunlight, adjusting your camera settings accordingly is essential. Use the ISO setting to control the camera’s sensitivity to light. A lower ISO (100-200) is suitable for bright conditions, while a higher ISO (800-1600) can help in low-light situations. Additionally, consider using the exposure compensation feature to fine-tune brightness levels.
Stabilization is another critical aspect of action camera settings. Many modern cameras come with built-in stabilization features that help reduce shakiness in your footage. Ensure that you enable these features, especially when riding on rough terrain. Some cameras offer different stabilization modes, so experiment with these to find the one that works best for your riding style.
For vibrant and realistic colors in your vlogs, adjusting the white balance is essential. Most action cameras allow you to set the white balance manually or choose from presets like ‘Sunny,’ ‘Cloudy,’ or ‘Tungsten.’ For outdoor rides, the ‘Sunny’ preset often provides the best results. However, if you are riding through shaded areas, adjust the white balance to avoid color casting.
While video quality is crucial, don’t overlook the importance of audio. Many action cameras come with built-in microphones, but external microphones can significantly enhance sound quality. If your camera allows, adjust the audio settings to reduce wind noise, which is particularly important when riding at high speeds. Look for features like windscreen or low-cut filter to improve audio clarity.
Finally, the best way to find the ideal settings for your action camera is through experimentation. Take the time to test different resolutions, frame rates, and other settings in various environments. This hands-on approach will help you understand how each setting affects your footage and allow you to make informed adjustments during your rides.
In summary, setting up your action camera correctly is vital for capturing high-quality video content. By understanding and adjusting your camera settings for different lighting conditions and action sequences, you can create engaging motorcycle vlogs that resonate with your audience.
Resolution and Frame Rate Settings
When it comes to capturing stunning motorcycle vlogs, understanding the resolution and frame rate settings on your action camera is crucial. These two factors play a significant role in determining the overall quality of your video, impacting both clarity and smoothness. Let’s delve deeper into how to choose the right settings for an optimal vlogging experience.
Resolution refers to the amount of detail that your video captures, typically measured in pixels. The higher the resolution, the clearer and more detailed your footage will be. Common resolutions for action cameras include:
- 1080p (Full HD)
- 1440p (2.7K)
- 2160p (4K)
For motorcycle vlogging, opting for at least 1080p is recommended to ensure your viewers can appreciate the scenery and details of your ride. However, if your camera supports 4K, utilizing this resolution can significantly enhance the visual experience, especially during high-speed rides.
Frame rate, measured in frames per second (FPS), is another critical setting that affects how smooth your video appears. Common frame rates include:
- 30 FPS
- 60 FPS
- 120 FPS
For motorcycle vlogging, a frame rate of 60 FPS is often ideal, as it provides a smoother motion that is particularly beneficial when capturing fast-moving scenes. Higher frame rates, like 120 FPS, can also be useful for creating slow-motion effects during editing, adding an artistic touch to your videos.
It’s important to remember that resolution and frame rate are interdependent. A higher resolution may require more processing power, which can impact the frame rate. Therefore, finding a balance that suits your specific vlogging style is essential. For instance, if you choose to shoot in 4K, you may need to lower your frame rate to 30 FPS to maintain a smooth recording.
Choosing the right resolution and frame rate not only affects the technical quality of your footage but also influences viewer engagement. High-quality videos are more likely to keep your audience’s attention, encouraging them to watch longer and share your content. In contrast, low-quality videos may lead to viewer drop-off and reduced engagement.
Here are some best practices to help you choose the ideal settings:
- Test different resolutions and frame rates to see what works best for your style.
- Consider the lighting conditions; higher resolutions and frame rates may require better lighting.
- Always check your camera’s specifications to ensure it can handle the settings you choose.
In conclusion, understanding resolution and frame rate settings is vital for creating high-quality motorcycle vlogs. By selecting the appropriate settings, you can enhance the clarity and smoothness of your footage, ultimately leading to greater viewer satisfaction and engagement.
Stabilization Settings: Why They Matter
Stabilization settings are crucial for capturing smooth and professional-looking footage while motorcycle vlogging. When riding on uneven terrain, vibrations and sudden movements can lead to shaky videos that distract viewers. This is where stabilization features come into play, drastically improving the overall quality of your content.
There are several types of stabilization technologies available in action cameras, each offering unique benefits:
- Electronic Image Stabilization (EIS): This digital method uses software algorithms to reduce vibrations and stabilize footage. EIS is particularly effective for action-packed sequences and is commonly found in modern action cameras.
- Optical Image Stabilization (OIS): This hardware-based approach uses physical mechanisms within the camera lens to counteract motion. While OIS is great for still shots, it may not be as effective for high-speed activities like motorcycle vlogging.
- Gimbal Stabilization: A gimbal is a mechanical device that uses motors to keep the camera steady. This is the most effective method for achieving ultra-smooth footage, but it can be bulkier and more expensive.
To make the most of your action camera’s stabilization settings, consider the following tips:
- Choose the Right Mode: Most cameras offer multiple stabilization modes. Experiment with these settings to find the best one for your riding style and the type of footage you want to capture.
- Keep Your Camera Secure: Ensure your camera is mounted securely to minimize additional vibrations. A loose mount can negate the benefits of stabilization.
- Plan Your Shots: Think about the routes you will take and the types of shots you want. Avoid overly bumpy paths if possible, as stabilization can only do so much in extreme conditions.
High-quality, stable footage keeps your audience engaged. Shaky videos can lead to viewer frustration and decreased watch time. By utilizing stabilization features, you enhance the viewing experience, making your vlogs more enjoyable and professional.
Even with the best stabilization features, there are pitfalls to be aware of:
- Over-Reliance on Stabilization: While stabilization can help, it shouldn’t be your only focus. Good framing and composition are equally important.
- Ignoring Lighting Conditions: Stabilization won’t fix poor lighting. Ensure you are filming in well-lit conditions to enhance video quality.
- Neglecting Post-Production: Even stabilized footage can benefit from editing. Use software to further smooth out any remaining shakes and enhance your video.
In conclusion, understanding and effectively using stabilization settings is essential for motorcycle vloggers. By leveraging these features, you can elevate your content, engage your audience, and create a more professional viewing experience.
Editing Tips for Motorcycle Vloggers
Editing is a crucial element that enhances the storytelling aspect of your motorcycle vlogs. It allows you to transform raw footage into a captivating narrative that resonates with your audience. In this section, we will explore essential editing tips and software recommendations to help you create engaging content that keeps viewers coming back for more.
Editing serves multiple purposes in vlogging. First and foremost, it helps to refine your narrative, ensuring that your story flows smoothly. By removing unnecessary footage and focusing on key moments, you can maintain your audience’s interest. Additionally, editing allows you to add effects, transitions, and music, which can significantly enhance the overall viewing experience.
- Keep It Concise: Aim for a length that keeps your viewers engaged. A well-edited vlog should be long enough to tell your story but short enough to maintain interest.
- Focus on Key Moments: Highlight the most exciting parts of your ride. Use slow motion or zoom to emphasize thrilling moments, making them more impactful.
- Add Music and Sound Effects: Background music can set the mood for your vlog. Choose tracks that complement your content and enhance the emotional connection with your audience.
- Use Jump Cuts Wisely: Jump cuts can be effective for maintaining pace, but use them sparingly to avoid jarring transitions that may confuse viewers.
- Incorporate Text and Graphics: Adding text overlays or graphics can help convey important information quickly, such as location names or tips for fellow riders.
Choosing the right editing software is essential for achieving professional results. Here are some popular options:
| Software | Platform | Features |
|---|---|---|
| Adobe Premiere Pro | Windows, Mac | Advanced editing tools, multi-cam editing, and extensive effects library. |
| Final Cut Pro | Mac | Magnetic timeline, powerful color grading, and optimized for performance. |
| DaVinci Resolve | Windows, Mac, Linux | Professional color correction, audio post-production, and visual effects. |
| iMovie | Mac, iOS | User-friendly interface, basic editing tools, and templates for quick edits. |
Even experienced vloggers can make mistakes during the editing process. Here are some common pitfalls to avoid:
- Overusing Effects: While effects can enhance your video, too many can distract from the content. Use them judiciously.
- Neglecting Audio Quality: Poor audio can detract from even the best visuals. Always ensure your sound is clear and well-balanced.
- Skipping the Review Process: Always review your edited footage multiple times. This helps catch errors and ensures a polished final product.
By applying these editing tips and utilizing the right software, you can significantly elevate the quality of your motorcycle vlogs. Engaging content not only captivates your audience but also encourages them to share your adventures with others.
Common Mistakes to Avoid When Vlogging
When it comes to motorcycle vlogging, many enthusiasts dive into the adventure with excitement but often overlook some critical aspects that can hinder their experience. Avoiding common mistakes can significantly enhance your vlogging journey. In this section, we will explore frequent pitfalls that motorcycle vloggers encounter and provide actionable tips on how to sidestep them for better results.
- Neglecting Audio Quality: One of the most significant issues in vlogging is poor audio quality. Wind noise and engine sounds can overshadow your voice. To combat this, consider using an external microphone and windshields to improve sound clarity.
- Inconsistent Video Quality: Many vloggers fail to maintain consistent video quality. This inconsistency can frustrate viewers. Always check your camera settings before starting a ride to ensure you’re capturing at the desired resolution and frame rate.
- Poor Camera Placement: Incorrect camera placement can lead to unflattering angles or missed moments. Experiment with different mounts and positions to find the best view that captures both the rider and the scenery.
- Ignoring Lighting Conditions: Lighting plays a crucial role in video quality. Filming during bright sunlight can cause glare, while low light can make footage grainy. Plan your rides during optimal lighting conditions, and adjust your camera settings accordingly.
- Overlooking Editing: Many vloggers underestimate the power of editing. Raw footage often needs trimming and enhancement to keep the audience engaged. Invest time in learning editing software to create polished videos that tell a story.
- Failing to Engage with the Audience: Vlogging is not just about riding; it’s also about connecting with your viewers. Failing to interact through comments or social media can lead to a lack of engagement. Make it a point to respond to comments and ask for viewer feedback.
To improve your vlogging experience, consider the following strategies:
- Test Your Equipment: Before hitting the road, test your camera and audio equipment to ensure everything is functioning properly.
- Plan Your Routes: Research and plan your routes for the best scenery and lighting. This preparation can significantly enhance the visual appeal of your vlogs.
- Engage Regularly: Make a habit of engaging with your audience. Ask questions in your videos and encourage viewers to share their thoughts.
- Learn Basic Editing Skills: Take time to learn basic video editing techniques. This knowledge will help you create more engaging content and enhance your storytelling.
- Review Your Footage: After each ride, review your footage to identify areas for improvement. This practice will help you refine your skills over time.
By being mindful of these common pitfalls and implementing the suggested strategies, you can significantly improve your motorcycle vlogging experience. Remember, the goal is to share your passion for riding while creating engaging content that resonates with your audience.
Engaging Your Audience: Tips for Successful Vlogging
Engaging your audience is a fundamental aspect of successful motorcycle vlogging. Without a strong connection, your viewers may lose interest, leading to lower engagement and fewer subscribers. To foster a loyal following, consider implementing the following strategies that emphasize storytelling, interaction, and consistent content delivery.
Engaging your audience is not just about gaining views; it’s about building a community. When viewers feel connected to your content, they are more likely to share it, comment, and return for future videos. This creates a virtuous cycle of engagement that can significantly enhance your channel’s growth.
Storytelling is a powerful tool in vlogging. Instead of merely documenting your rides, weave a narrative that resonates with your audience. Ask yourself:
- What challenges did you face during your ride?
- What emotions were triggered by the journey?
- How can you relate your experience to your viewers’ lives?
By sharing personal anecdotes and relatable stories, you can create a deeper emotional connection with your viewers.
Interaction is key to maintaining viewer interest. Encourage your audience to engage by:
- Asking questions at the end of your videos to prompt comments.
- Hosting polls or challenges related to your content.
- Responding to comments to make viewers feel valued.
Creating a dialogue can transform passive viewers into active participants in your vlogging journey.
Consistency is crucial in vlogging. Establish a regular upload schedule that your audience can expect. Whether it’s weekly or bi-weekly, sticking to a schedule helps build anticipation. Here are some tips:
- Plan your content in advance to stay organized.
- Use a content calendar to track your video ideas and release dates.
- Mix up your content to keep it fresh—consider tutorials, ride-alongs, or gear reviews.
Expand your reach by promoting your vlogs on social media platforms. Share behind-the-scenes content, sneak peeks, and engage with your audience through comments and direct messages. Utilize platforms like Instagram and TikTok to showcase short clips or highlights from your vlogs, which can drive traffic back to your main channel.
Utilize analytics tools to understand what content resonates most with your audience. Pay attention to:
- View duration to see which parts of your videos keep viewers engaged.
- Comments for direct feedback on what your audience enjoys or wants to see more of.
- Subscriber growth to identify trends and successful content types.
By being receptive to feedback, you can continuously improve your vlogging strategy.
In conclusion, engaging your audience through storytelling, interaction, and consistent content delivery is essential for successful motorcycle vlogging. By implementing these strategies, you can build a loyal community that supports and shares your adventures.
Frequently Asked Questions
- What is the best action camera for motorcycle vlogging?
The best action camera can vary based on personal preferences, but popular choices include models like the GoPro Hero series and DJI Osmo Action. They offer excellent video quality, stabilization, and durability, making them ideal for motorcycle adventures.
- How do I mount my action camera securely on my motorcycle?
To mount your action camera securely, consider using a helmet mount for a first-person perspective or a handlebar mount for easy access. Ensure that the mount is compatible with your camera and that it is tightly secured to avoid any vibrations or potential falls while riding.
- What settings should I use for the best video quality?
For optimal video quality, set your action camera to the highest resolution possible, typically 4K, and choose a frame rate of 30 or 60 FPS for smooth footage. Don’t forget to enable stabilization features to minimize shakes during your ride!
- How can I avoid common mistakes while vlogging?
To avoid common mistakes, plan your shots ahead of time, ensure your camera is fully charged, and check your settings before hitting the road. Also, remember to engage with your audience through storytelling to keep them captivated!
- What editing software do you recommend for motorcycle vlogs?
Some great editing software options include Adobe Premiere Pro for advanced users and iMovie for beginners. Both offer features that can enhance your vlogs, making them more engaging and polished!
