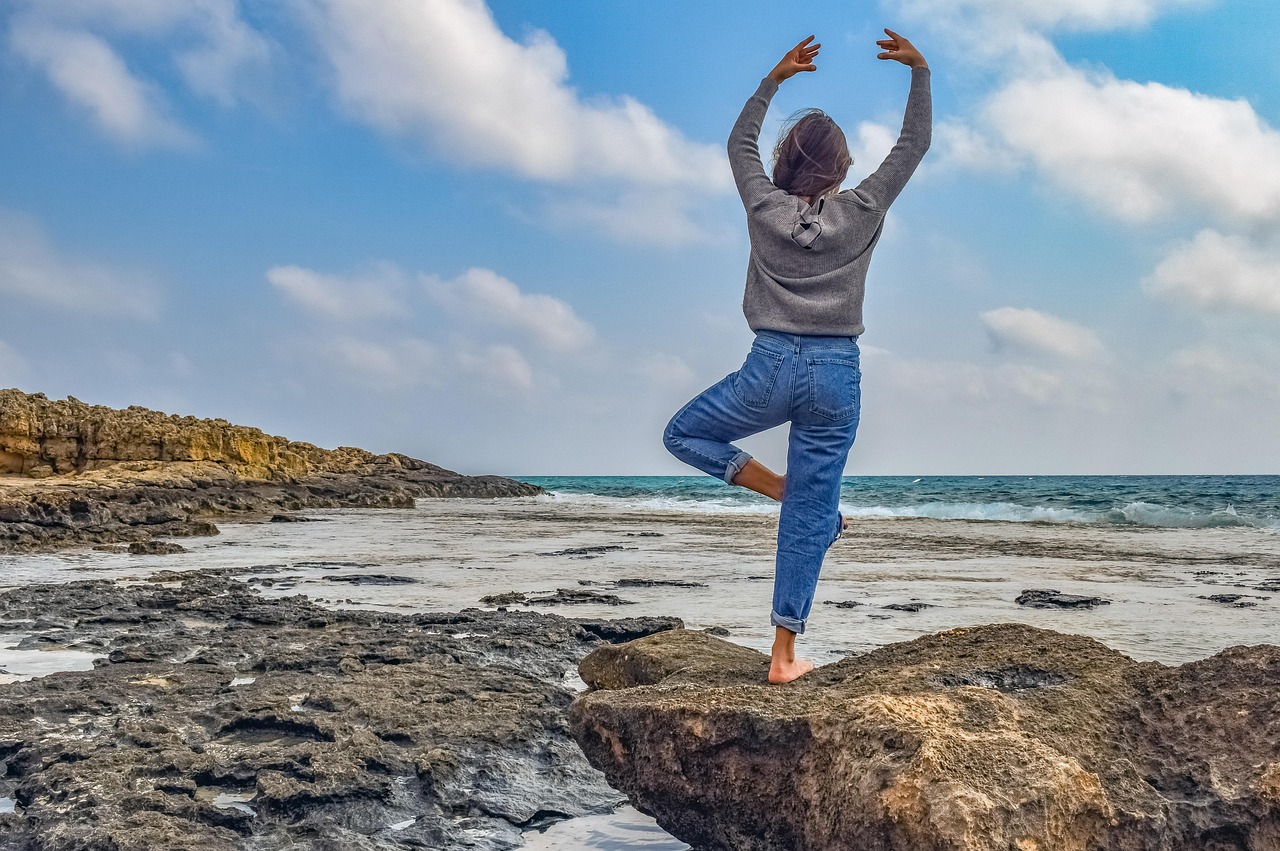
Recording your yoga or dance sessions can be a transformative experience, allowing you to track your progress and share your journey with others. Using an action camera offers a unique way to capture these movements effectively. This guide will provide you with essential tips and techniques to enhance your recording experience.
Action cameras are known for their compact size and versatility, making them ideal for dynamic activities like yoga and dance. Their ability to capture high-quality footage in various environments allows you to document your sessions without the bulk of traditional cameras. Whether you’re performing intricate dance routines or flowing through yoga poses, an action camera can keep up with your movements.
When selecting an action camera, consider features such as resolution, stabilization, and battery life. These elements are crucial for achieving high-quality recordings:
- Resolution: Look for cameras that offer at least 1080p resolution for clear visuals.
- Stabilization: Ensure the camera has built-in stabilization to minimize shaky footage.
- Battery Life: Choose a camera with a long battery life to capture extended sessions.
Proper setup is essential for great recordings. Follow these steps:
- Choosing the Right Angle: Experiment with different angles to find the best perspective that showcases your movements.
- Lighting Considerations: Utilize natural light whenever possible, and avoid harsh shadows that can detract from your video quality.
Using the right accessories can significantly improve your recording quality:
- Tripods and Mounts: Invest in stable tripods or mounts to keep your camera steady during practice.
- External Microphones: Consider using an external microphone to enhance audio clarity, especially if you’re providing instructions.
Editing is crucial for turning raw footage into polished videos. Here are some tips:
- Choosing Editing Software: Look for user-friendly editing software like iMovie or Adobe Premiere Pro that suits your skill level.
- Basic Editing Techniques: Focus on cutting unnecessary footage, adding transitions, and incorporating music to make your videos engaging.
Sharing your videos can inspire others and document your progress:
- Social Media Platforms: Use platforms like Instagram and Facebook to showcase your recordings and connect with a community.
- Creating a YouTube Channel: YouTube is an excellent platform for sharing longer videos. Optimize your channel with relevant tags and descriptions to reach a wider audience.
To continuously enhance your recording skills, consider these practical tips:
- Practice Makes Perfect: Regularly record your sessions to improve your filming techniques over time.
- Seeking Feedback: Share your videos with friends or online communities to gather constructive criticism and refine your skills.
By following these guidelines, you can effectively record your yoga or dance sessions, creating content that not only showcases your skills but also inspires others. Remember, the journey of capturing your practice is just as important as the practice itself.

Why Choose an Action Camera for Yoga or Dance?
When it comes to capturing the grace and fluidity of yoga or dance, action cameras offer unparalleled advantages. These compact devices are not only designed for dynamic activities but also provide a range of features that make them ideal for recording your movements. Let’s explore why an action camera is the perfect choice for documenting your practice.
- Compact and Lightweight: Action cameras are designed to be portable, allowing you to easily carry them to your yoga studio or dance class. Their lightweight nature means you won’t feel bogged down while moving through your routines.
- Wide-Angle Lens: Most action cameras come equipped with a wide-angle lens, which is perfect for capturing the full scope of your movements. This feature allows you to showcase your entire pose or dance sequence without needing to reposition the camera frequently.
- Durability: Built to withstand various conditions, action cameras are often water-resistant and shockproof. This durability ensures that your camera can handle different environments, whether you’re practicing outdoors or in a busy studio.
- Versatile Mounting Options: Action cameras can be mounted in various ways—on tripods, walls, or even worn on your body. This versatility allows you to experiment with different angles and perspectives, enhancing the visual appeal of your recordings.
High-Quality Video and Audio: One of the standout features of action cameras is their ability to record in high resolution. Whether you’re filming in 1080p or 4K, you’ll capture clear and vibrant footage that showcases your movements beautifully. Additionally, many action cameras support external microphones, which can significantly improve audio quality, especially if you’re providing instructions or commentary during your sessions.
Stabilization Technology: A common issue with recording dynamic activities is shaky footage. Fortunately, most action cameras come with advanced stabilization technology that smooths out your recordings, ensuring that viewers can focus on your movements without distraction.
Battery Life: Action cameras are designed for extended use, with many models offering impressive battery life. This feature is particularly beneficial during long yoga sessions or dance performances, allowing you to record without worrying about running out of power.
Sharing Made Easy: In today’s digital age, sharing your practice with others can be incredibly rewarding. Action cameras often come with built-in Wi-Fi or Bluetooth, enabling you to transfer your recordings to your smartphone or computer quickly. This feature makes it easy to edit and share your videos on social media or video platforms like YouTube.
In summary, the combination of portability, high-quality video, and versatile mounting options makes action cameras an excellent choice for recording yoga and dance sessions. By using an action camera, you can capture the essence of your practice, share your journey with others, and continuously improve your skills through self-review.

What Features to Look for in an Action Camera?
When it comes to capturing your yoga or dance sessions, selecting the right action camera is crucial. With a multitude of options available, understanding the key features can significantly enhance your recording experience. Below, we explore essential elements to consider when choosing an action camera.
The resolution of your action camera plays a vital role in determining the clarity and detail of your videos. A higher resolution allows for sharper images, ensuring that every movement is captured with precision. For yoga and dance, where fluidity and detail matter, look for cameras that offer at least 1080p resolution. If you aim for professional-quality videos, consider models that support 4K recording. This ensures that your practice is showcased in the best possible light, allowing viewers to appreciate your technique.
Stabilization technology is another critical feature to consider. Without it, your videos may appear shaky and unprofessional. There are various types of stabilization systems, including optical and digital stabilization. Optical stabilization uses mechanical adjustments to smooth out the footage, while digital stabilization relies on software algorithms. For action-packed yoga or dance sessions, investing in a camera with advanced stabilization technology can make a world of difference, ensuring smooth and enjoyable viewing.
Battery life is essential for uninterrupted recording. Sessions can last longer than expected, and you don’t want to miss capturing a significant moment because of a dead battery. Look for action cameras that offer extended battery life, ideally over two hours of continuous recording. Additionally, consider models that support external battery packs or quick swapping of batteries to ensure you can keep filming without interruptions.
- Water Resistance: If you plan to record outdoors or near water, ensure your camera is water-resistant or comes with a protective case.
- Field of View: A wider field of view allows you to capture more of your surroundings, which can be beneficial for dance and yoga.
- Audio Quality: Built-in microphones may not suffice for clear audio. Look for cameras that allow external microphone connections for better sound quality.
Modern action cameras often come equipped with Wi-Fi and Bluetooth connectivity. These features allow for easy sharing of your videos directly to social media or cloud storage. Additionally, remote control capabilities can be a game-changer, enabling you to start and stop recording without needing to touch the camera. This is particularly useful during yoga or dance sessions where you want to maintain your flow.
In summary, when selecting an action camera, focus on key features such as resolution, stabilization, and battery life. By understanding these elements, you can enhance your recording experience and ensure that your yoga or dance sessions are captured beautifully.
Resolution and Image Quality
When it comes to recording yoga or dance sessions, achieving high resolution is crucial for capturing clear and detailed visuals. The clarity of your movements not only enhances your personal practice but also allows viewers to appreciate the nuances of your technique. In this section, we will delve into the best resolutions for yoga and dance videos, ensuring that your artistry is well-defined and visually appealing.
High resolution plays a significant role in video quality. It refers to the number of pixels that make up the video image, with higher resolutions providing greater detail and clarity. For yoga and dance, where fluid movements and precise positions are key, a high-resolution video can capture every subtlety, making it easier for viewers to learn and engage.
- 1080p (Full HD): This resolution is widely accepted and provides excellent visual quality. It is suitable for most platforms and offers a good balance between file size and clarity.
- 4K (Ultra HD): For those looking to showcase their skills in the best possible light, 4K resolution is ideal. It offers four times the detail of 1080p, making it perfect for capturing intricate movements and expressions.
- 720p (HD): While not as sharp as 1080p, 720p can still be a viable option for casual recordings or when storage space is a concern.
Viewers are more likely to engage with content that is visually appealing. High-resolution videos allow audiences to see the details of your practice, enhancing their understanding and appreciation of the art form. Additionally, if you plan to share your recordings on platforms like YouTube or social media, higher resolutions can improve discoverability and attract more viewers.
- Use the Right Settings: Always check your camera settings before recording. Ensure that you select the highest resolution available on your action camera.
- Invest in Quality Equipment: While many action cameras offer decent resolution, investing in a higher-end model can significantly improve image quality.
- Test Your Setup: Conduct test recordings to find the best settings for your specific environment. Adjust lighting and camera position to enhance clarity.
While high resolution is essential, it shouldn’t come at the expense of other important features like stabilization and frame rate. A well-stabilized video at a lower resolution can often be more effective than a shaky, high-resolution video. Consider your priorities and the type of content you wish to produce.
In the world of yoga and dance, where movement is key, capturing high-resolution videos can greatly enhance your recordings. By understanding the importance of resolution, selecting the appropriate settings, and balancing other features, you can create visually stunning content that resonates with your audience. Remember, the goal is to showcase your practice in the best light possible, allowing others to learn and be inspired by your journey.
Stabilization Technology
is a critical aspect of recording high-quality videos, especially when capturing dynamic activities like yoga or dance. Shaky footage can detract from the beauty and fluidity of your movements, potentially leading to viewer disengagement. Understanding the various stabilization technologies available in action cameras can significantly enhance your recordings, ensuring that your audience appreciates the grace and precision of your practice.
When recording yoga or dance sessions, stabilization helps to maintain a smooth visual experience. Without it, even slight movements can result in jittery footage, making it difficult for viewers to focus on your performance. This is particularly crucial for instructional videos, where clarity is essential for effective learning.
There are several types of stabilization technologies used in action cameras, each with its own advantages:
- Electronic Image Stabilization (EIS): This digital method uses algorithms to reduce shake by cropping the video frame slightly. EIS is effective for moderate movements and is commonly found in many modern action cameras.
- Optical Image Stabilization (OIS): OIS involves physical adjustments to the camera lens or sensor to counteract movement. This technology is typically more effective for larger shakes and is often used in higher-end models.
- Gimbal Stabilization: A gimbal is a mechanical device that keeps the camera steady on multiple axes. This is the most effective method for achieving smooth footage, particularly in fast-paced environments.
Utilizing stabilization technology can lead to several benefits in your recordings:
- Enhanced Visual Quality: Smooth footage allows viewers to appreciate the fluidity of your movements, making your videos more engaging.
- Better Focus: With reduced shake, viewers can concentrate on your technique rather than being distracted by unstable visuals.
- Professional Appearance: High-quality stabilization gives your videos a polished, professional look, which is particularly important if you plan to share them on social media or YouTube.
When selecting an action camera, consider the type of stabilization technology that best suits your needs:
- If you primarily record slower-paced yoga sessions, EIS may suffice.
- For more dynamic dance performances, OIS or a gimbal may be necessary to ensure smooth footage.
- Always check reviews and sample footage to assess the effectiveness of the stabilization features in real-world scenarios.
Even with advanced stabilization technology, there are techniques you can employ to further enhance your recordings:
- Maintain a Steady Hand: While stabilization can correct some shake, starting with a steady hand can improve results.
- Use Tripods or Mounts: Stabilizing accessories can provide additional support, especially during longer recordings.
- Adjust Camera Settings: Experiment with different frame rates and resolutions to find the optimal settings for your specific activity.
In conclusion, understanding and utilizing stabilization technology is essential for capturing high-quality yoga and dance videos. By choosing the right camera and employing effective techniques, you can ensure that your recordings are smooth, engaging, and visually appealing.

How to Set Up Your Action Camera?
Setting up your action camera correctly is essential for capturing stunning footage of your yoga or dance sessions. Whether you are a beginner or an experienced practitioner, understanding how to position and configure your camera can significantly enhance the quality of your recordings. Below, we explore the steps you need to take to ensure optimal results.
Proper setup not only affects the quality of your video but also influences how well you can showcase your movements. A well-positioned camera can highlight your form and technique, making it easier for viewers to follow along. Additionally, good setup minimizes distractions and allows for smoother editing later on.
- Choose the Right Location: Select a space that is free from clutter and distractions. Ensure that the area has enough room for your movements.
- Determine the Best Angle: Position your camera at eye level or slightly above. Experiment with different angles to find the one that best captures your practice.
- Use a Tripod or Mount: Stability is crucial. Utilize a tripod or a mount to keep your camera steady throughout your session. This will help avoid shaky footage.
Once your camera is positioned, it’s time to configure the settings for optimal recording:
- Set the Resolution: Depending on your camera, choose a resolution that balances quality and file size. For yoga or dance, 1080p is often sufficient.
- Adjust Frame Rate: A higher frame rate (like 60fps) can capture fast movements more smoothly, making it ideal for dance.
- Enable Stabilization: If your camera has built-in stabilization, make sure it is turned on to minimize any vibrations or shakes.
Good lighting can dramatically improve the quality of your videos. Here are some tips:
- Utilize Natural Light: If possible, record during the day when natural light is abundant. Position your camera facing the light source for the best results.
- Supplement with Artificial Lighting: If natural light isn’t available, consider using softbox lights or ring lights to evenly illuminate your space.
Before you hit record, perform a quick check:
- Test Your Setup: Do a short test recording to ensure everything looks and sounds good.
- Check Your Battery Life: Ensure your camera is fully charged or connected to a power source to avoid interruptions.
- Clear Memory Space: Make sure you have enough storage on your memory card to capture the entire session.
By following these steps, you can set up your action camera effectively, ensuring that you capture high-quality footage of your yoga or dance sessions. Remember, practice makes perfect, so don’t hesitate to adjust your setup as you gain experience!
Choosing the Right Angle
When it comes to recording yoga or dance sessions, the angle of your camera plays a crucial role in capturing the essence of your movements. The right angle not only showcases your poses and routines effectively but also enhances the overall visual appeal of your video. In this section, we will explore how to find the best angles for your recordings, ensuring that your practice is beautifully highlighted.
The camera angle can dramatically influence how your movements are perceived. A well-chosen angle can emphasize the fluidity of your dance or the precision of your yoga poses. Conversely, a poor angle may obscure your technique or fail to capture the energy of your performance. Thus, understanding the impact of different angles is essential for creating engaging content.
- Side Angle: This angle provides a clear view of your alignment and body positioning, making it ideal for demonstrating poses like Warrior or Tree.
- Front Angle: Capturing your practice from the front allows viewers to see your facial expressions and the full range of your movements.
- High Angle: A bird’s-eye view can be effective for showcasing sequences involving transitions, as it highlights the flow and connection between poses.
- Diagonal Angle: This angle adds depth to your performance, allowing viewers to appreciate the choreography’s dynamics and spatial awareness.
- Low Angle: Positioning the camera low to the ground can create a dramatic effect, emphasizing your movements and giving a sense of power.
- Wide Shot: A wide shot captures the entire dance space, showcasing group routines and formations effectively.
Don’t hesitate to experiment with various angles during your practice. Try different heights, distances, and perspectives to find what works best for your style. Using multiple cameras or repositioning your single camera can provide diverse footage that keeps your videos interesting.
To achieve the best angles, consider using a tripod. A sturdy tripod allows you to maintain a consistent angle and stability throughout your recording, minimizing shaky footage. Additionally, some tripods come with adjustable heights and angles, giving you the flexibility to experiment.
While selecting the right angle is vital, it’s equally important to consider lighting. Natural light can enhance your video quality significantly. Position your camera so that the light source illuminates your movements, avoiding harsh shadows that can detract from your performance.
After recording, take the time to review your footage. Analyze which angles worked best and why. This feedback loop will help you refine your technique and improve future recordings. Remember, the goal is to create content that resonates with your audience and showcases your skills.
In summary, for your yoga or dance recording can transform your videos from ordinary to extraordinary. By understanding the importance of angles, experimenting, and utilizing tools like tripods, you can elevate your practice and share it with the world in a compelling way.
Lighting Considerations
When it comes to recording yoga or dance sessions, lighting plays a crucial role in determining the quality of your video. Whether you are using natural or artificial light, understanding how to effectively utilize these sources can significantly enhance your recordings. Below are some essential tips to help you achieve the best lighting for your sessions.
Good lighting not only improves visibility but also adds depth and dimension to your videos. Poor lighting can lead to grainy visuals and make it difficult for viewers to appreciate your movements. By ensuring adequate lighting, you can create a more engaging and professional-looking video.
Natural light is often the best option for recording, as it provides a soft and flattering illumination. Here are some tips for making the most of natural light:
- Time of Day: The golden hours—shortly after sunrise and before sunset—offer the best lighting conditions. Aim to record during these times for a warm, inviting glow.
- Location: Position yourself near windows or in well-lit areas. Avoid direct sunlight, which can create harsh shadows and overexposed spots.
- Reflectors: Use reflectors to bounce light onto your subject, reducing shadows and enhancing overall brightness.
While natural light is ideal, it’s not always available. Here’s how to effectively use artificial lighting:
- Softbox Lights: These provide diffused light that mimics natural sunlight. They are excellent for creating an even and flattering illumination.
- LED Panels: These lights are adjustable and can be placed at various angles to achieve the desired effect. Look for panels with adjustable color temperatures to match your environment.
- Three-Point Lighting: This technique involves using a key light, fill light, and backlight to create depth and dimension. The key light is the main source, the fill light softens shadows, and the backlight adds separation from the background.
For optimal results, consider combining both natural and artificial light sources. This hybrid approach can help you achieve a balanced and visually appealing look. Here’s how:
- Fill in Shadows: Use artificial lights to fill in any shadows created by natural light, ensuring your movements are clearly visible.
- Adjust Color Temperature: Make sure the color temperature of your artificial lights matches that of the natural light to maintain a cohesive look.
- Experiment with Angles: Try different placements for both natural and artificial lights to find the perfect combination that highlights your practice.
Being aware of common pitfalls can help you achieve better lighting:
- Overexposure: Avoid placing lights too close to your subject, which can wash out details.
- Uneven Lighting: Ensure that your lighting is consistent across your recording area to avoid distracting shadows.
- Ignoring Background: Pay attention to your background lighting, as it can affect your overall video quality.
By applying these lighting considerations, you can significantly improve the quality of your yoga or dance recordings. Remember, the right lighting can transform your videos from ordinary to extraordinary, making them more enjoyable for your audience.

What Accessories Enhance Your Recording?
When it comes to recording yoga or dance sessions, accessories play a crucial role in enhancing your overall video quality. The right accessories not only help you achieve better visuals but also improve sound and stability, making your recordings more professional and enjoyable to watch. Here, we explore some essential accessories that can elevate your action camera recordings.
Accessories are vital for action cameras because they allow for greater flexibility and functionality. Whether you’re practicing yoga or dancing, having the right tools can help you capture your movements more effectively. Below are some must-have accessories:
Stability is key when recording any physical activity. A tripod or stabilizer can significantly reduce shaky footage, ensuring your videos look polished and professional. Consider options like:
- Flexible Tripods: These can be adjusted to various surfaces and angles, making them versatile for different recording environments.
- Gimbals: These advanced stabilizers provide smooth motion, perfect for capturing dynamic movements during dance or yoga.
While video quality is important, audio clarity should not be overlooked. An external microphone can dramatically improve sound quality, especially if you’re providing instructions or commentary. Look for:
- Lavalier Microphones: These clip-on mics are ideal for capturing voice clearly without being intrusive.
- Shotgun Microphones: These are great for directional sound capture, minimizing background noise.
Good lighting can transform your recordings from dull to vibrant. Consider investing in:
- LED Light Panels: These provide consistent lighting and can be adjusted for brightness and color temperature.
- Ring Lights: Perfect for even illumination, especially when recording close-up shots.
To capture your movements from different perspectives, camera mounts are essential. Try these options:
- Chest Mounts: Ideal for a first-person view, allowing viewers to see exactly what you see.
- Head Mounts: These provide a unique angle, perfect for dance routines where full-body movement is essential.
When you’re on the go, having a reliable carrying case ensures your equipment is safe and organized. Look for cases that offer:
- Water Resistance: Protects your gear from unexpected weather conditions.
- Customizable Compartments: Allows you to arrange your accessories in a way that suits your needs.
In summary, investing in the right accessories can significantly enhance your recording experience. From tripods and microphones to lighting equipment and mounts, each accessory contributes to a more professional and engaging video. By utilizing these tools, you can effectively capture your yoga or dance sessions, allowing you to share your journey with others while ensuring high-quality content.
Tripods and Mounts
are essential tools for anyone looking to capture high-quality video footage during yoga or dance sessions. Stability is crucial for clear footage, as shaky recordings can detract from the beauty of your movements. In this section, we’ll explore various types of tripods and mounts that can help keep your camera steady during practice.
When selecting a tripod or mount, consider the following factors:
- Height and Adjustability: Look for tripods that can extend to various heights. This feature allows you to capture different angles and perspectives, enhancing the visual appeal of your videos.
- Weight and Portability: If you plan to move your setup frequently, opt for lightweight and portable tripods. Many models are designed for easy transport, making them ideal for outdoor sessions or studio classes.
- Stability Features: Choose tripods with sturdy legs and a reliable locking mechanism. Some models come with rubber feet or spikes to ensure stability on different surfaces.
In addition to traditional tripods, consider these specialized mounts:
- Gimbal Stabilizers: These devices use motors to counteract movement, providing smooth footage even during dynamic actions. They are perfect for dance routines or fast-paced yoga flows.
- Wall and Ceiling Mounts: For a unique perspective, wall or ceiling mounts allow you to capture overhead shots. This setup is particularly effective for group classes or larger spaces.
- Flexible Tripods: These versatile tripods can be wrapped around various objects, enabling creative angles and shots that traditional tripods may not allow.
To further enhance stability, consider the following tips:
- Use Weights: Adding weight to your tripod can prevent it from tipping over, especially in windy conditions or during vigorous movements.
- Practice Setup: Spend time practicing your camera setup before recording. Familiarity with your equipment will help you adjust it quickly and effectively during your sessions.
- Monitor Your Footage: Always review your recordings to assess stability and adjust your setup as needed. This practice will help you refine your techniques over time.
In conclusion, investing in a quality tripod or mount is essential for capturing stunning yoga or dance videos. By selecting the right equipment and employing best practices for stability, you can create clear and engaging content that showcases your skills beautifully. Remember, the right tools can make all the difference in your recording experience, allowing you to focus on your practice while ensuring that your camera remains steady.
External Microphones
When recording yoga or dance sessions, audio quality is just as important as the visuals. Many creators often overlook this aspect, but clear sound can significantly enhance the viewer’s experience. In this section, we will explore how can elevate the audio clarity of your recordings, particularly for instructional videos.
Using an external microphone can drastically improve the sound quality of your recordings. Built-in microphones on action cameras tend to pick up background noise and may not capture your voice clearly, especially in dynamic environments like yoga studios or dance classes. By investing in an external microphone, you can:
- Reduce Background Noise: External microphones are designed to focus on the speaker’s voice while minimizing ambient sounds.
- Enhance Voice Clarity: They provide better sound reproduction, making your instructions clearer for viewers.
- Offer Versatility: Different types of microphones (e.g., lapel, shotgun, handheld) allow for various recording setups depending on your needs.
Choosing the right type of external microphone for your action camera can make a significant difference. Here are some popular options:
- Lavalier Microphones: These small, clip-on mics are perfect for instructors as they can be attached to clothing, ensuring hands-free operation.
- Shotgun Microphones: Ideal for capturing sound from a specific direction, these mics are excellent for reducing noise from the sides and back.
- Handheld Microphones: If you prefer a more traditional approach, handheld mics can be used for interviews or demonstrations during your sessions.
Connecting an external microphone to your action camera may vary depending on the model. Here are general steps to follow:
1. Check the camera's audio input options (e.g., 3.5mm jack, USB-C).2. Choose a compatible microphone that matches the input type.3. Use an adapter if necessary.4. Test the microphone before starting your recording to ensure proper functionality.
To achieve the best audio quality, consider the following tips:
- Positioning: Place the microphone close to your mouth for clearer sound and less background interference.
- Windshields: If recording outdoors, use a windshield to minimize wind noise.
- Monitor Audio Levels: If your camera allows, monitor audio levels to avoid clipping or distortion.
Incorporating external microphones into your recording setup can significantly enhance the audio quality of your yoga or dance videos. Clear sound not only improves viewer engagement but also ensures that your instructions are effectively communicated. By selecting the right microphone and following best practices, you can take your recordings to the next level, making them more professional and enjoyable for your audience.

How to Edit Your Yoga or Dance Videos?
Editing your yoga or dance videos is a crucial step in ensuring they are polished and engaging. This process not only enhances the visual appeal of your footage but also contributes to the overall storytelling of your practice. Whether you’re a beginner or an experienced editor, understanding the basics of video editing can significantly improve your content quality.
Editing allows you to refine your footage by removing unnecessary parts, adding transitions, and enhancing audio quality. This process results in a more cohesive and professional final product. By editing your videos, you create a compelling narrative that keeps viewers engaged and encourages them to return for more.
Selecting the appropriate editing software is essential for a smooth editing experience. There are various options available, ranging from beginner-friendly tools to advanced software. Some popular choices include:
- Adobe Premiere Pro: A professional-grade software with extensive features.
- Final Cut Pro: Ideal for Mac users, offering powerful editing capabilities.
- iMovie: A user-friendly option for beginners on Apple devices.
- DaVinci Resolve: A free tool with advanced color correction features.
Understanding basic editing techniques can elevate your videos significantly. Here are some essential skills to master:
- Cutting and Trimming: Remove unwanted segments and keep only the best parts of your performance.
- Transitions: Use smooth transitions to connect different clips and maintain flow. Popular options include fades, wipes, and dissolves.
- Adding Music: Background music can enhance the emotional impact of your videos. Choose tracks that complement the mood of your yoga or dance routine.
- Color Correction: Adjusting brightness, contrast, and saturation can make your videos visually striking.
Good audio quality is just as important as video quality. Here are some tips to improve the sound in your recordings:
- Use External Microphones: Investing in an external microphone can significantly enhance audio clarity, especially for instructional videos.
- Background Noise Reduction: Use software tools to minimize background noise, ensuring your voice or music is clear and prominent.
Once you have completed the editing process, it’s time to export your video. Choose the right format and resolution based on where you plan to share it. Common formats include MP4 for online sharing, as it offers a good balance between quality and file size.
In conclusion, mastering the art of video editing is essential for anyone looking to share their yoga or dance sessions effectively. By utilizing the right tools and techniques, you can create videos that not only showcase your skills but also inspire and engage your audience. Remember, practice makes perfect, so keep experimenting with different styles and techniques to find what works best for you.
Choosing Editing Software
Editing your yoga or dance videos can transform them into captivating visual stories. Choosing the right editing software is crucial for both beginners and advanced users, as it can significantly streamline your workflow and enhance the final product. In this section, we will explore various software options, their features, and how they cater to different editing needs.
Editing software allows you to manipulate your footage creatively. From cutting unnecessary clips to adding effects and transitions, the right tools can help you showcase your skills effectively. Understanding the features that various software offers is key to making an informed choice.
- iMovie: This user-friendly software is ideal for Mac users. It offers a straightforward interface, allowing beginners to easily cut, trim, and add music to their videos.
- Filmora: Known for its intuitive design, Filmora provides a range of features such as drag-and-drop editing, filters, and overlays, making it perfect for novice editors.
- Adobe Premiere Rush: A simplified version of Adobe Premiere Pro, this software is great for beginners who want to create professional-looking videos without a steep learning curve.
- Adobe Premiere Pro: This industry-standard software offers advanced features like multi-camera editing, color correction, and extensive audio editing capabilities, catering to professional editors.
- Final Cut Pro: Exclusively for Mac users, it provides powerful editing tools and supports high-resolution formats, making it suitable for serious filmmakers.
- DaVinci Resolve: Known for its exceptional color grading tools, this software combines editing, visual effects, and audio post-production in one package, ideal for advanced users.
When selecting editing software, consider the following features:
- User Interface: A clean and intuitive interface can significantly reduce the learning curve.
- Support for Multiple Formats: Ensure the software can handle various video formats to avoid compatibility issues.
- Export Options: Look for software that offers various export settings for different platforms, including social media.
- Community and Support: A strong user community and customer support can be invaluable for troubleshooting and learning new techniques.
Consider your editing goals and the complexity of your projects. If you’re just starting, opt for software that offers tutorials and a user-friendly interface. As you gain experience, you may wish to transition to more advanced tools that provide greater flexibility and control over your editing process.
- Take Advantage of Tutorials: Many software platforms offer tutorials that can help you familiarize yourself with their features.
- Experiment with Features: Don’t be afraid to explore different tools and effects to find what works best for your style.
- Practice Regularly: The more you edit, the more comfortable you will become with the software, enhancing your skills over time.
In conclusion, the right editing software can make a significant difference in the quality of your yoga or dance videos. By understanding your needs and exploring various options, you can find a tool that enhances your editing experience and helps you create stunning content.
Basic Editing Techniques
Editing your yoga or dance videos is a crucial step in showcasing your skills and creativity. By mastering , you can transform raw footage into engaging content that captivates your audience. This section will explore essential editing skills such as cutting, transitions, and adding music, which can significantly enhance viewer engagement.
Understanding the fundamental techniques of video editing is essential for anyone looking to improve their content quality. Here are some of the most important editing techniques you should master:
- Cutting: This involves removing unnecessary parts of your video to create a more concise and engaging narrative. Cutting allows you to focus on the most impactful moments of your yoga or dance routine.
- Transitions: Smooth transitions between clips can enhance the flow of your video. Experiment with different transition effects, such as fades or wipes, to maintain viewer interest and provide a professional touch.
- Adding Music: The right background music can elevate your video, setting the tone and enhancing the emotional impact. Choose tracks that complement the rhythm and energy of your performance.
Cutting is one of the most basic yet powerful editing techniques. To cut effectively:
1. Review your footage and identify the key moments that showcase your skills.2. Use editing software to trim the clips, removing any unnecessary pauses or mistakes.3. Ensure that the cuts are smooth and maintain the video's overall flow.
Transitions serve as the glue that holds your video together. They help to:
- Maintain viewer engagement by providing a seamless viewing experience.
- Enhance storytelling by visually linking different segments of your video.
- Introduce a professional feel to your content, making it more appealing to your audience.
Music selection is crucial in setting the mood of your video. Here are some tips:
1. Consider the style of your yoga or dance routine and choose music that matches its energy.2. Use royalty-free music to avoid copyright issues.3. Adjust the volume levels to ensure your movements and instructions remain clear.
The choice of editing software can significantly impact your editing experience. Here are some popular options:
- iMovie: A user-friendly option for beginners, ideal for basic editing tasks.
- Adobe Premiere Pro: A more advanced tool that offers extensive features for professional editing.
- Final Cut Pro: A favorite among Mac users, known for its powerful editing capabilities.
By mastering these basic editing techniques, you can elevate your yoga or dance videos, making them more engaging and enjoyable for your viewers. Remember, the key to successful editing is practice and experimentation, so don’t hesitate to try new styles and techniques!

How to Share Your Recorded Sessions?
Sharing your recorded yoga or dance sessions is a powerful way to inspire others and document your personal progress. In this digital age, there are numerous platforms and strategies available to effectively share your videos, ensuring they reach the right audience. Below, we explore the best practices for sharing your recordings.
Choosing the right platform is crucial for maximizing the impact of your videos. Here are some of the most popular options:
- Social Media: Platforms like Instagram, Facebook, and TikTok are excellent for quick sharing and engaging with your audience. Short clips or teasers can draw viewers in and encourage them to explore more of your content.
- YouTube: As one of the largest video-sharing platforms, YouTube allows for longer content and detailed tutorials. Creating a dedicated channel can help you build a community around your practice.
- Vimeo: For those seeking a more professional presentation, Vimeo offers high-quality video hosting and customization options. It’s ideal for artists and instructors who want to showcase their work in a polished manner.
To ensure your videos are engaging and reach a wider audience, consider the following strategies:
- Use Eye-Catching Thumbnails: An appealing thumbnail can significantly increase click-through rates. Make sure your thumbnail reflects the content and is visually striking.
- Craft Compelling Titles and Descriptions: Use keywords relevant to your audience. A good title should be descriptive and inviting, while the description should provide context and encourage viewers to watch.
- Engage with Your Audience: Respond to comments and encourage viewers to share their thoughts. Building a community fosters loyalty and encourages more interaction with your content.
To expand your reach, consider these effective strategies:
- Collaborations: Partnering with other creators can introduce your content to their audience. Look for individuals with similar interests or complementary styles.
- Hashtags: Utilize relevant hashtags to increase visibility on social media platforms. Research trending hashtags in your niche for maximum exposure.
- Consistency: Regularly posting content helps keep your audience engaged. Create a content calendar to maintain a steady flow of videos.
Understanding how your videos perform is essential for growth. Use analytics tools provided by platforms like YouTube and Instagram to track:
- View Counts: Monitor how many people are watching your videos to gauge interest.
- Engagement Rates: Look at likes, shares, and comments to assess viewer interaction.
- Audience Demographics: Understanding who is watching your content can help tailor future videos to better meet their needs.
By utilizing these platforms and strategies, you can effectively share your yoga or dance recordings, inspiring others while documenting your journey. Remember, the key to successful sharing lies in engaging content, strategic optimization, and consistent interaction with your audience.
Social Media Platforms
Social media has transformed the way we share our lives, and for yoga and dance enthusiasts, it serves as a vital platform for showcasing their skills and creativity. With the right strategies, you can effectively engage a larger audience and inspire others through your recorded sessions. Below, we explore the best social media platforms to share your videos and connect with a community of like-minded individuals.
- Instagram – Known for its visual appeal, Instagram is perfect for short clips and engaging stories. Utilize features like Reels to share quick tutorials or snippets of your practice.
- Facebook – With its vast user base, Facebook allows for longer videos and community building. Join groups focused on yoga and dance to share your content and receive feedback.
- YouTube – As the leading video platform, YouTube is ideal for posting full-length tutorials or performances. Optimize your videos with keywords to enhance discoverability.
- TikTok – This rapidly growing platform is perfect for creative, short-form videos. Use trending sounds and challenges to increase your reach and engagement.
- Pinterest – Although primarily an image-sharing platform, Pinterest can drive traffic to your video content. Create eye-catching pins that link back to your videos.
To maximize engagement, it’s crucial to optimize your videos for each platform. Here are some tips:
- Use Engaging Thumbnails: Create visually appealing thumbnails that capture attention.
- Incorporate Hashtags: Utilize relevant hashtags to increase visibility and reach a broader audience.
- Engage with Your Audience: Respond to comments and messages to build a community around your content.
- Post Consistently: Regularly update your followers with fresh content to keep them engaged.
Consider diversifying your content to keep your audience interested:
- Tutorials: Break down complex poses or dance moves into easy-to-follow steps.
- Live Sessions: Host live classes or Q&A sessions to interact with your audience in real-time.
- Behind-the-Scenes: Share your practice routine or preparation for performances to give followers a glimpse into your journey.
- Challenges: Create fun challenges that encourage participation from your followers.
Tracking your performance is essential for understanding what works. Utilize analytics tools provided by each platform to monitor:
- Engagement Rates: Measure likes, shares, and comments to gauge audience interaction.
- Follower Growth: Keep an eye on your follower count to assess the effectiveness of your content strategy.
- Video Views: Analyze which videos receive the most views to identify popular topics.
In conclusion, leveraging social media effectively can significantly enhance your visibility and engagement in the yoga and dance community. By choosing the right platforms, optimizing your content, and actively engaging with your audience, you can inspire others while documenting your journey.
Creating a YouTube Channel
Creating a YouTube channel can be an exciting venture, especially for those looking to share their yoga or dance sessions with a broader audience. This platform not only allows you to showcase your skills but also connects you with like-minded individuals. In this guide, we will explore how to create and optimize your YouTube channel for maximum visibility and engagement.
YouTube is the largest video-sharing platform in the world, making it an ideal space for content creators. With over 2 billion logged-in monthly users, your videos have the potential to reach a vast audience. Additionally, YouTube’s search engine capabilities allow users to discover your content through keywords and tags, enhancing your visibility.
Creating a channel on YouTube is straightforward. Follow these steps:
- Sign in to YouTube using your Google account.
- Click on your profile picture and select Create a Channel.
- Choose a channel name that reflects your content.
- Add a profile picture and banner image to make your channel visually appealing.
- Write a compelling channel description that outlines what viewers can expect from your videos.
Once your channel is created, optimization is key to attracting viewers:
- Use Keywords: Incorporate relevant keywords in your channel description and video titles to improve searchability.
- Create Playlists: Organize your videos into playlists to make it easier for viewers to find related content.
- Engage with Your Audience: Respond to comments and encourage viewers to subscribe to build a community.
- Thumbnails Matter: Design eye-catching thumbnails that accurately represent your videos to increase click-through rates.
Engagement is crucial for the success of your YouTube channel. Here are some strategies:
- Call to Action: Encourage viewers to like, comment, and subscribe at the end of your videos.
- Consistent Posting Schedule: Regular uploads keep your audience engaged and coming back for more.
- Collaborate with Other Creators: Partnering with other YouTubers can expose your channel to a wider audience.
Utilizing YouTube Analytics is essential for understanding your audience and improving your content:
- Monitor Watch Time: This metric shows how long viewers are watching your videos and helps identify which content resonates.
- Traffic Sources: Understanding where your views are coming from can inform your promotional strategies.
- Audience Demographics: Knowing who your viewers are can help tailor your content to their preferences.
In conclusion, creating a YouTube channel for your yoga or dance sessions is a fantastic way to share your passion with the world. By following these steps and optimizing for visibility and engagement, you can build a successful channel that inspires and connects with others.

Tips for Improving Your Recording Skills
Improving your recording skills is essential for creating high-quality videos, especially when capturing your yoga or dance sessions. This section will explore practical tips and techniques that can help you enhance your recording abilities over time, ensuring that your videos are not only visually appealing but also engaging for your audience.
Continuous improvement in your recording skills allows you to adapt to new techniques and technologies, which can significantly enhance the quality of your videos. By regularly refining your skills, you can achieve better video clarity, improved audio quality, and more engaging content.
One of the most effective ways to improve your recording skills is through consistent practice. The more you record, the more you will understand what works and what doesn’t. Set aside time each week to experiment with different techniques, angles, and settings. This will help you become more comfortable with your equipment and enhance your overall filming technique.
Receiving feedback from peers or mentors can provide valuable insights into your recording style. Share your videos with friends or fellow practitioners and ask for their honest opinions. Constructive criticism can help you identify areas for improvement, whether it’s adjusting your camera angles or enhancing your lighting.
After recording, take the time to review your videos critically. Look for aspects that you can improve, such as framing, lighting, and overall presentation. Note what works well and what doesn’t, and use this analysis to guide your future recordings.
The world of videography is constantly evolving, with new techniques and technologies emerging regularly. Stay informed by following videography blogs, forums, and social media channels. Engaging with the community can expose you to new ideas and methods that can elevate your recording skills.
While skill is essential, having the right equipment can make a significant difference in your recording quality. Invest in a good action camera with features like image stabilization and high resolution. Additionally, consider accessories such as tripods and external microphones to enhance your recordings further.
There are numerous online resources available that can help you improve your recording skills. Websites like YouTube offer tutorials on various aspects of videography, from basic filming techniques to advanced editing tips. Additionally, online courses can provide structured learning opportunities to further develop your skills.
Don’t be afraid to experiment with different recording styles. Try various angles, lighting setups, and editing techniques to see what resonates best with your audience. This experimentation can lead to unique and engaging content that stands out.
Understanding your audience is crucial for improving your recording skills. Pay attention to the types of videos that receive the most engagement and feedback. This insight can guide your future recordings, helping you tailor your content to meet your viewers’ preferences.
By implementing these tips and continuously striving for improvement, you can elevate your recording skills significantly. Remember, the journey of enhancing your videography abilities is ongoing, and every recording is an opportunity to learn and grow.
Practice Makes Perfect
When it comes to recording yoga or dance sessions, regular practice is essential for achieving better results. Just like any skill, consistency can greatly enhance your filming techniques and overall video quality. In this section, we will explore how dedicated practice can lead to significant improvements in your recordings.
Consistency in your recording practice not only helps in mastering the technical aspects of filming but also allows you to develop a unique style. By regularly filming your sessions, you become more familiar with your action camera’s features, such as resolution settings, stabilization, and lighting adjustments. This familiarity translates into smoother, higher-quality videos.
- Technical Proficiency: The more you film, the more comfortable you become with the camera settings. This leads to better control over factors like focus, exposure, and framing.
- Creative Exploration: Regular practice allows you to experiment with different angles and techniques. You might discover new ways to capture your movements that resonate better with your audience.
- Confidence Boost: As you see improvements in your recordings, your confidence will grow. This newfound confidence can enhance your performance during yoga or dance sessions, making your videos even more engaging.
To reap the benefits of consistent practice, consider the following strategies:
- Set a Schedule: Dedicate specific times each week to film your sessions. This could be as simple as a 30-minute practice every Saturday morning.
- Review Your Footage: After each recording, take the time to review your footage critically. Look for areas of improvement, such as shaky shots or poor lighting, and make notes for your next session.
- Seek Feedback: Share your videos with friends or fellow practitioners and ask for constructive feedback. This can provide valuable insights and encourage you to refine your technique.
Utilizing the right tools can further enhance your practice. Here are some recommendations:
- Editing Software: Familiarize yourself with basic editing software to polish your videos. This will help you understand what works visually and what doesn’t.
- Tripods and Stabilizers: Investing in a good tripod or stabilizer can ensure that your footage is smooth and professional-looking, which is especially important for dynamic movements.
- Lighting Equipment: Consider adding external lights to your setup. Proper lighting can dramatically improve the quality of your videos, making them more visually appealing.
In summary, consistent practice is a powerful tool in enhancing your recording skills for yoga or dance sessions. By dedicating time to film regularly, you not only improve your technical abilities but also cultivate a unique style that resonates with viewers. Remember, each session is an opportunity to learn and grow, so embrace the journey of becoming a better videographer.
Seeking Feedback
Feedback is an essential component of growth, especially in creative pursuits like recording yoga or dance sessions. from peers can provide invaluable insights that help refine your skills and improve your overall recording quality. This guide will explore effective methods for gathering constructive criticism and leveraging it to enhance your recording techniques.
Receiving feedback from fellow practitioners or videographers can offer fresh perspectives on your work. Peers may notice details that you might overlook, such as awkward camera angles or poor lighting. By understanding their viewpoints, you can make informed adjustments to improve future recordings.
When seeking feedback, it’s important to ask specific questions. This helps your peers focus on the areas you want to improve. Consider these approaches:
- Be Specific: Instead of asking, “What do you think?”, try “How was the lighting in my last video?”
- Choose the Right Audience: Select people familiar with yoga or dance to ensure they provide relevant feedback.
- Create a Safe Environment: Encourage honesty by assuring your peers that their constructive criticism is welcome and appreciated.
Once you receive feedback, it’s crucial to analyze it thoughtfully. Here are some steps to help you make the most of the insights provided:
- Take Notes: Document the feedback during discussions to refer back to it later.
- Identify Patterns: Look for common themes in the feedback. If multiple peers mention the same issue, it’s likely an area that needs attention.
- Prioritize Changes: Focus on the most impactful suggestions first. This will help you see significant improvements without becoming overwhelmed.
Establishing a feedback loop can significantly enhance your recording skills over time. Consider the following strategies:
- Regular Check-ins: Schedule periodic review sessions with your peers to discuss your progress and gather new feedback.
- Share Your Improvements: When you implement changes based on feedback, share the results with your peers. This not only shows that you value their input but also fosters a collaborative learning environment.
- Encourage Peer Feedback: Offer to provide feedback in return. This reciprocal relationship can enhance the learning experience for everyone involved.
Integrating feedback into your recording practice is essential for continuous improvement. Here are a few practical tips:
- Experiment: Don’t be afraid to try new techniques based on the feedback you receive. Experimentation can lead to unexpected and positive results.
- Stay Open-Minded: Accept that not all feedback will resonate with you. Be open to different viewpoints while staying true to your unique style.
- Review Your Progress: Regularly revisit your previous recordings to assess how much you’ve improved based on the feedback received.
In summary, seeking feedback from peers is a powerful way to enhance your recording skills. By actively requesting constructive criticism and creating a feedback loop, you can continually refine your techniques, ultimately leading to better yoga or dance recordings that inspire both you and your audience.
Frequently Asked Questions
- What is the best resolution for recording yoga or dance sessions?
For yoga and dance videos, a resolution of at least 1080p is recommended. This ensures that your movements are captured clearly and the details are well-defined, making your videos visually appealing.
- How can I stabilize my action camera footage?
To stabilize your footage, look for action cameras with built-in stabilization technology like electronic image stabilization (EIS). Additionally, using a tripod or a gimbal can help keep your camera steady during recording.
- What accessories do I need for better video quality?
Essential accessories include tripods for stability, external microphones for improved audio clarity, and lens filters to enhance lighting. These tools can significantly elevate the quality of your recordings.
- How can I edit my yoga or dance videos easily?
Using user-friendly editing software like iMovie or Adobe Premiere Rush can make the process simple. Focus on basic techniques like cutting unnecessary footage, adding transitions, and incorporating background music to create engaging content.
- What platforms are best for sharing my recorded sessions?
Social media platforms like Instagram and Facebook are great for quick sharing. For longer videos, consider creating a YouTube channel where you can reach a wider audience and document your progress over time.