Capturing breathtaking mountain biking videos can be a thrilling endeavor, especially with the right action camera in hand. This article delves into essential tips and techniques that will help enthusiasts not only enhance their filming skills but also effectively share their adventurous experiences with a wider audience.
Choosing the right action camera is fundamental for capturing high-quality footage. Look for cameras that offer durability, as they need to withstand rugged terrains and potential impacts. Additionally, prioritize video quality and stabilization features to ensure smooth recordings, even during the most intense rides.
Proper mounting is crucial for achieving dynamic shots. Consider various mounting options:
- Helmet mounts for a first-person perspective.
- Chest mounts for a lower angle that captures the bike and surroundings.
- Handlebar mounts for a unique viewpoint of the trail ahead.
Experiment with these options to find the best perspective that showcases your biking adventures.
Understanding camera settings is essential for optimizing video quality. Use a higher resolution (at least 1080p) for clarity, and choose a frame rate that suits your action—60fps is ideal for fast movements. Adjust the field of view settings to capture more of your surroundings, enhancing the immersive experience for viewers.
Stability is vital in action sports videography. To minimize shake and vibrations, consider using cameras with advanced stabilization technology. Additionally, try to maintain a smooth riding style and avoid sudden jerks. You can also use a gimbal for additional stability during your rides.
Lighting significantly impacts video quality. Aim to film during the golden hours—shortly after sunrise or before sunset—when natural light is soft and flattering. Overcast days can also provide even lighting, reducing harsh shadows that can detract from your footage.
Editing is where your raw footage transforms into captivating stories. Utilize user-friendly software like Adobe Premiere Pro or Final Cut Pro to trim clips, adjust colors, and add music. Incorporate transitions and effects judiciously to maintain viewer engagement without overwhelming them.
Each terrain presents unique challenges. For instance:
- Forests: Use a wide-angle lens to capture the dense surroundings.
- Mountain trails: Focus on elevation changes and sweeping views.
- Urban environments: Highlight obstacles and urban features for a different vibe.
To capture thrilling stunts and maneuvers, timing is everything. Anticipate the action and adjust your camera settings for fast shutter speeds. Experiment with different angles to find the most impactful shots that showcase your skills.
Enhance your filming with essential accessories:
- External microphones for better audio quality.
- Extra batteries to ensure you don’t miss a moment.
- Protective cases to safeguard your camera from the elements.
Sharing your videos is crucial for reaching a broader audience. Optimize your content for platforms like YouTube and Instagram by using appropriate tags and descriptions. Engage with your audience through comments and social media to build a community around your adventures.
Avoid common pitfalls such as poor framing, shaky footage, and neglecting audio quality. Review your footage regularly to identify areas for improvement, ensuring you capture the best possible content every time.
Incorporating storytelling elements can captivate viewers. Create a narrative arc by introducing challenges, showcasing triumphs, and sharing personal insights throughout your rides. This approach not only entertains but also resonates with your audience, encouraging them to return for more.
What Action Camera Should You Choose for Mountain Biking?
When it comes to mountain biking, capturing the thrill and excitement of your rides is essential. An action camera can be your best companion in documenting these adventures. However, selecting the right action camera is crucial to ensure that it meets the demands of this exhilarating sport. Here, we will explore key factors to consider when choosing an action camera for mountain biking.
- Durability: Mountain biking often involves rough terrains and unpredictable weather conditions. Therefore, it’s vital to choose a camera that is rugged and waterproof. Look for models that have a high IP rating, indicating their resistance to dust and water.
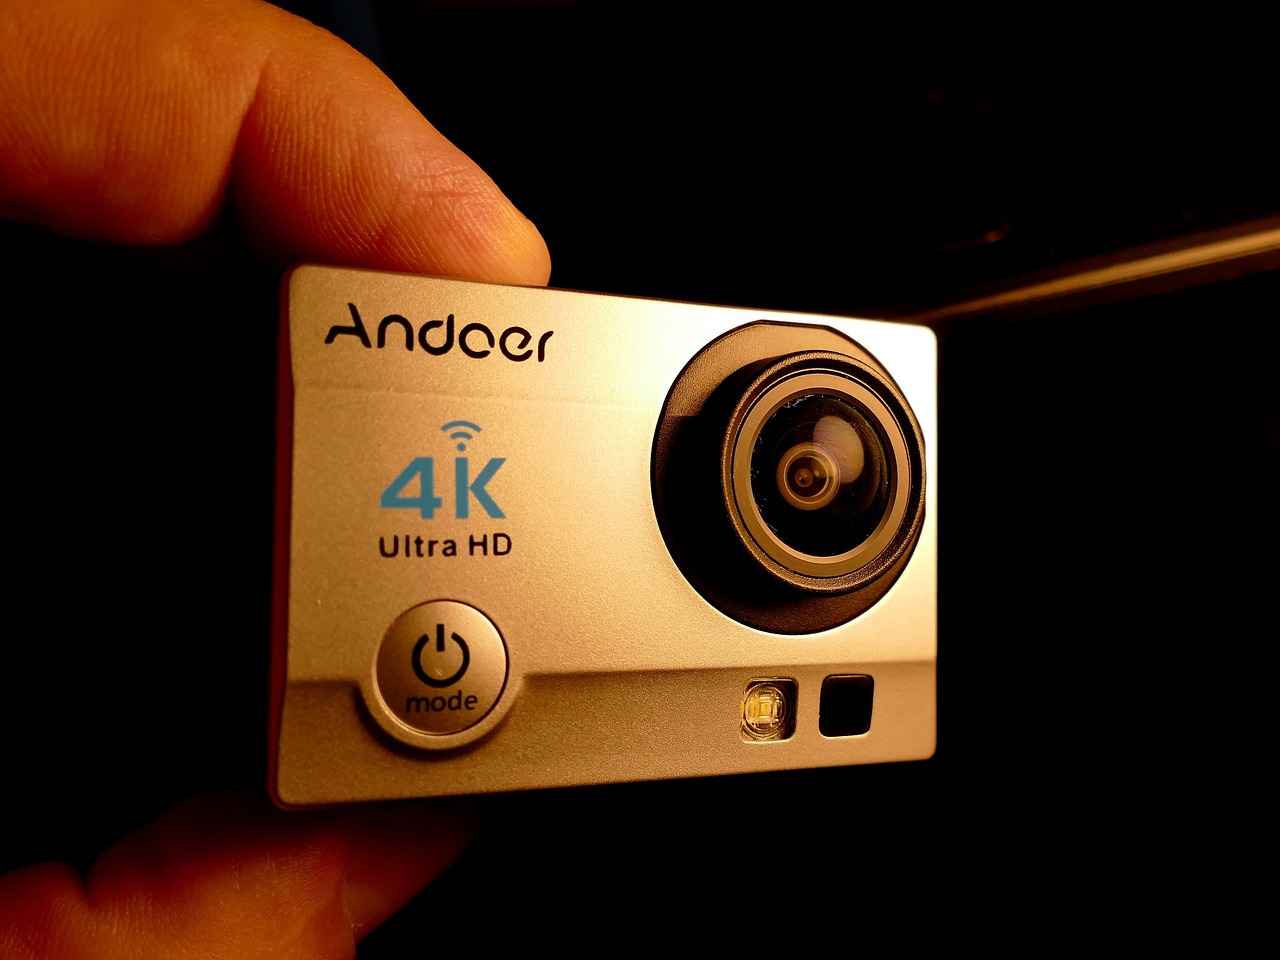
- Video Quality: The quality of the footage is paramount. Opt for cameras that offer at least 1080p resolution or higher, such as 4K. This will ensure that your videos are crisp and vibrant, capturing every detail of your ride.
- Stabilization Features: One of the biggest challenges in action sports videography is achieving steady footage. Look for cameras with advanced image stabilization technology, such as electronic image stabilization (EIS). This feature minimizes shake and vibrations, providing smooth and professional-looking videos.
- Battery Life: Long rides require cameras with extended battery life. Consider models that allow for interchangeable batteries or have a long-lasting built-in battery to ensure you can capture your entire adventure without interruptions.
- Field of View: A wider field of view can help you capture more of the action. Look for cameras that offer adjustable fields of view, allowing you to switch between standard and wide-angle settings depending on your shooting needs.
- Mounting Options: Versatility in mounting options is essential for capturing different perspectives. Ensure the camera is compatible with various mounts, such as helmet mounts, chest mounts, or even handlebar mounts, to achieve dynamic angles.
- Ease of Use: An intuitive interface can make a significant difference, especially while on the move. Choose a camera with a user-friendly design, allowing for quick adjustments and easy access to settings without disrupting your ride.
In addition to these features, it’s beneficial to read user reviews and consult expert opinions to gauge the performance of different models in real-world conditions. Brands like GoPro, DJI, and Insta360 are popular choices among mountain bikers for their reliability and high-quality performance.
By carefully considering these factors, you can select an action camera that not only meets your filming needs but also enhances your overall mountain biking experience. The right camera will help you capture stunning visuals and share your adventures with fellow enthusiasts.
How to Mount Your Action Camera for Optimal Angles?
When it comes to capturing the thrill of mountain biking, proper mounting of your action camera is essential for achieving stunning and dynamic shots. The right angle can significantly enhance your footage, making it more engaging and visually appealing. In this section, we will explore various mounting options, including helmet mounts and chest mounts, to help you find the best perspective for your biking adventures.
Mounting your action camera correctly allows for a unique viewpoint that can showcase the excitement and speed of your ride. Different perspectives can tell different stories and highlight various aspects of your biking experience. Whether you want to capture the breathtaking scenery or the intricate maneuvers you perform, the right mount can make all the difference.
Helmet mounts are one of the most popular choices among mountain bikers. They provide a first-person perspective that immerses viewers in the action. Here are some benefits of using a helmet mount:
- Stability: Helmet mounts tend to be more stable than other mounts, reducing shake and vibrations.
- Field of View: They offer a wide field of view, capturing not just the trail ahead but also your body movements.
- Versatility: You can easily adjust the angle of the camera to capture different shots, such as jumps or turns.
Chest mounts provide a different angle that showcases your bike and the trail simultaneously. This mount is particularly effective for capturing the interaction between the rider and the bike. Here are some advantages:
- Dynamic Shots: Chest mounts create dynamic footage that emphasizes the bike’s movement and the terrain.
- Less Obstruction: Unlike helmet mounts, chest mounts are less likely to obstruct your field of view.
- Natural Movement: This perspective allows for a more natural representation of your riding style and techniques.
While helmet and chest mounts are popular, you might also consider handlebar or seat post mounts. These options can provide unique angles that capture the bike’s movement:
- Handlebar Mounts: These are great for capturing the trail ahead and can also be adjusted for different angles.
- Seat Post Mounts: These can provide a rear-facing perspective, showcasing the trail behind you and your biking companions.
Ultimately, the best mount for you will depend on your personal style and the type of footage you want to capture. Consider experimenting with different mounts to discover which perspective resonates most with your audience. Additionally, combining multiple mounts in a single ride can provide a more comprehensive view of your biking experience.
In conclusion, the way you mount your action camera can greatly influence the quality and impact of your mountain biking videos. By exploring various options like helmet, chest, and handlebar mounts, you can find the perfect angle that captures the essence of your adventures. So gear up, mount your camera, and get ready to share your thrilling biking experiences with the world!

What Settings Should You Use for High-Quality Video?
When it comes to capturing breathtaking mountain biking videos, the settings on your action camera play a crucial role in determining the final quality of your footage. Understanding how to optimize these settings can elevate your videos from average to stunning. In this section, we will delve into the essential camera settings that every mountain biking enthusiast should know.
The resolution of your video is one of the most significant factors affecting quality. For action sports like mountain biking, shooting in 4K resolution is highly recommended. This provides incredible detail and clarity, allowing viewers to appreciate the stunning landscapes and the thrill of the ride. If 4K is not available, 1080p is still a solid choice, offering good quality while conserving storage space.
Frame rate, measured in frames per second (fps), directly influences how smooth your video appears. For mountain biking, a frame rate of 60 fps is ideal for capturing fast-paced action. This setting helps to minimize motion blur, ensuring that every jump and turn is depicted clearly. If you plan to include slow-motion shots, consider shooting at 120 fps or higher, allowing for stunning slow-motion effects during editing.
The field of view (FOV) determines how much of the scene your camera captures. Most action cameras offer different FOV settings, typically categorized as wide, medium, and narrow. For mountain biking, a wide FOV is generally preferred as it captures more of the environment, enhancing the immersive experience. However, be cautious of distortion at the edges; some cameras offer settings to correct this.
- ISO: Keep your ISO as low as possible to reduce noise, especially in bright conditions. A setting of 100-400 is usually sufficient.
- Shutter Speed: A good rule of thumb is to set your shutter speed at double your frame rate. For instance, if filming at 60 fps, set your shutter speed to 1/120.
- White Balance: Adjust your white balance according to the lighting conditions to ensure accurate color representation. Use the auto setting for convenience or adjust manually for specific environments.
Before heading out on a ride, it’s essential to test your camera settings in similar lighting conditions. Take a few practice shots and review them to ensure that the resolution, frame rate, and FOV are set correctly. This practice will help you make quick adjustments on the fly, ensuring you capture the best moments without any hassle.
In summary, the right camera settings can make a significant difference in the quality of your mountain biking videos. By understanding and adjusting resolution, frame rate, field of view, and other important settings, you can optimize your action camera to create stunning visuals that showcase your adventures. With these tips in mind, you are well on your way to capturing breathtaking footage that you can share with friends and fellow biking enthusiasts.
How to Ensure Steady Footage While Riding?
When it comes to capturing action-packed moments in mountain biking, stability is essential for creating smooth and professional-looking footage. Any shake or vibrations can detract from the excitement of your ride and lead to disappointing results. Here, we will explore various techniques to ensure your videos remain steady, allowing you to focus on the thrill of the ride.
In action sports, viewers expect dynamic and engaging footage. Shaky videos can make it hard for the audience to follow the action, leading to a loss of interest. By ensuring stability while filming, you can enhance the overall viewing experience, making your videos more enjoyable and shareable.
- Use a Gimbal: A gimbal stabilizer is a fantastic tool for reducing shake. It uses motors to keep the camera steady, even during fast movements. This is especially useful when navigating rough terrains.
- Opt for Built-in Stabilization: Many modern action cameras come equipped with electronic image stabilization (EIS). Make sure to enable this feature to help smooth out any minor shakes.
- Choose the Right Mount: The way you mount your camera can significantly affect stability. Consider using a chest mount or a handlebar mount, as they provide a more stable platform compared to helmet mounts.
- Maintain a Steady Grip: If you’re holding the camera, keep your elbows close to your body and use both hands to minimize movement. A firm grip will help in reducing shake.
- Practice Smooth Movements: When filming, practice making smooth, controlled movements. Avoid sudden jerks or rapid shifts in direction, which can introduce unwanted vibrations.
Even with the best stabilization techniques, some footage may still require post-production adjustments. Use editing software to apply stabilization filters, which can help smooth out any remaining jitters. This can be particularly effective for action shots where the camera might have experienced some shake.
Different terrains can affect how stable your footage will be. For example, riding on rocky trails may introduce more vibrations than smooth paths. When filming in rough conditions, prioritize stabilization techniques and be mindful of your camera settings to capture the best possible footage.
Like any skill, improving your filming stability takes practice. Regularly filming your rides will help you identify what works best for you and your equipment. Experiment with different mounts, settings, and techniques to find the optimal combination that yields smooth, captivating footage.
Steady footage not only improves the aesthetic quality of your videos but also enhances viewer engagement. High-quality, smooth visuals can lead to more shares and likes on social media, ultimately expanding your audience. Additionally, stable footage allows you to showcase your riding skills more effectively, making your content more appealing to potential sponsors or collaborators.
In conclusion, ensuring steady footage while riding is crucial for creating high-quality mountain biking videos. By employing various stabilization techniques, making smart equipment choices, and practicing regularly, you can significantly enhance the professionalism of your footage, leading to more enjoyable viewing experiences for your audience.
What Lighting Conditions Are Best for Filming?
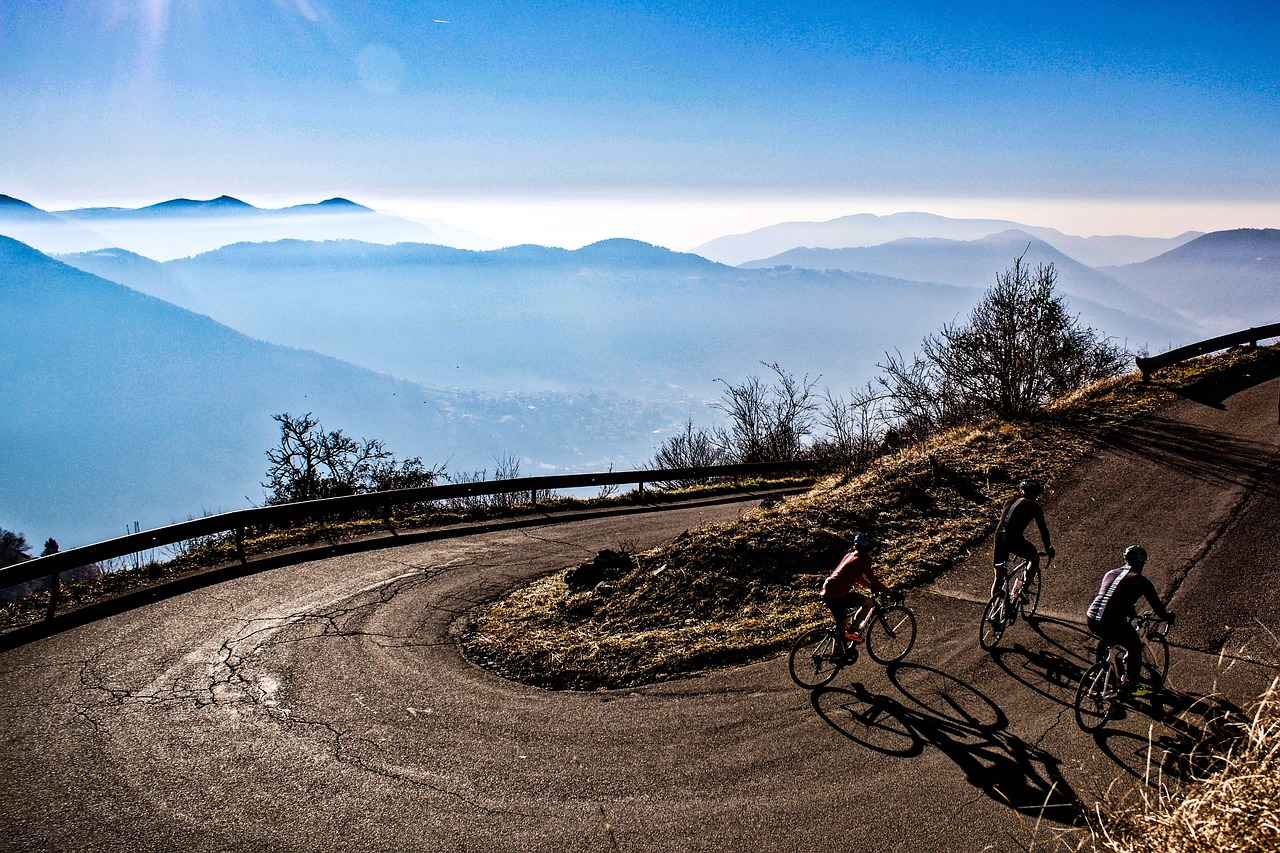
When it comes to capturing stunning mountain biking videos, lighting conditions are paramount. The right lighting not only enhances the visual appeal of your footage but also significantly impacts the overall quality of your video. Understanding how different times of day and weather conditions affect lighting can help you create captivating visuals that truly showcase your biking adventures.
Lighting sets the mood and tone of your video. It can highlight the natural beauty of the landscape, enhance colors, and create depth. Poor lighting, on the other hand, can result in grainy, washed-out footage that fails to engage viewers. Therefore, selecting the right time and conditions for filming is crucial.
- Golden Hour: This is the period shortly after sunrise and before sunset. The sunlight is soft and diffused, creating a warm glow that enhances colors and reduces harsh shadows. Shooting during the golden hour can result in breathtaking visuals.
- Midday: While the sun is high, the light can be harsh, leading to overexposed highlights and deep shadows. If you must film at this time, consider using filters to manage the brightness.
- Overcast Days: Cloudy skies provide even lighting, reducing harsh contrasts and allowing for rich colors. This is particularly beneficial in forested areas where dappled sunlight can create uneven lighting.
The weather can dramatically influence lighting conditions. Here are some factors to consider:
- Clear Skies: Bright, sunny days can produce vibrant colors but may also create harsh shadows. To mitigate this, shoot during the golden hour or use reflectors to balance the light.
- Rain: Filming in light rain can create a unique atmosphere. The wet surfaces reflect light beautifully, adding a dynamic element to your footage. However, ensure your camera is protected from moisture.
- Fog: Fog can add a mystical quality to your videos. It softens the light and can create a dramatic backdrop for your biking shots.
Here are some practical tips to help you manage lighting effectively:
- Use ND Filters: Neutral density filters can help control the amount of light entering your camera, allowing you to shoot at wider apertures for a shallower depth of field.
- Adjust Camera Settings: Experiment with your camera settings, such as ISO and shutter speed, to adapt to changing lighting conditions.
- Monitor the Weather: Stay updated on weather forecasts to plan your shoots during optimal conditions.
By understanding the significance of lighting conditions and how they affect your mountain biking videos, you can enhance the visual quality of your footage. Remember to experiment with different times of day and weather scenarios to discover what works best for your style and the story you want to tell. With the right lighting, your mountain biking adventures can truly shine on screen.
How to Use Editing Software to Enhance Your Videos?
Editing plays a pivotal role in transforming raw footage into captivating stories that resonate with viewers. For mountain biking enthusiasts, the journey doesn’t end with filming; it continues in the editing room. In this section, we will explore user-friendly editing software options and essential techniques that can significantly enhance your mountain biking videos.
When it comes to editing mountain biking videos, choosing the right software is crucial. Here are some popular options:
- Adobe Premiere Pro: A professional-grade software offering advanced features and flexibility for serious editors.
- Final Cut Pro: Ideal for Mac users, this software combines powerful tools with a user-friendly interface.
- iMovie: A great choice for beginners, providing basic editing tools that are easy to navigate.
- DaVinci Resolve: Known for its color grading capabilities, this software is free and suitable for both beginners and professionals.
Editing is not just about cutting clips; it’s about telling a story. Here are some techniques to consider:
- Cutting for Impact: Use quick cuts to create excitement during action sequences. This keeps the viewer engaged and emphasizes the thrill of mountain biking.
- Adding Music and Sound Effects: Background music can set the tone of your video. Choose tracks that complement the mood of your footage. Sound effects, like the crunch of gravel or the whoosh of wind, can enhance the immersive experience.
- Color Grading: Adjusting the colors in your video can make it more visually appealing. Enhance the greens of the forest or the blues of the sky to create stunning visuals.
- Incorporating Text and Graphics: Adding titles, captions, or graphics can provide context and engage viewers. Consider including stats about your ride or tips for viewers.
To keep your audience engaged, structure your video thoughtfully:
- Start with a Hook: Capture attention in the first few seconds with an exciting clip or a compelling question.
- Build a Narrative: Create a storyline that takes viewers on a journey. Introduce challenges, showcase successes, and highlight scenic moments.
- End with a Call to Action: Encourage viewers to like, comment, or subscribe at the end of your video to foster community engagement.
Even experienced editors can make mistakes. Here are some common pitfalls to avoid:
- Over-Editing: Avoid excessive transitions and effects that can distract from the content.
- Ignoring Audio Quality: Poor audio can ruin a great video. Always ensure your audio is clear and balanced.
- Neglecting to Review: Take the time to review your edits multiple times. Fresh eyes can catch errors that you might have missed.
By utilizing the right software and techniques, you can elevate your mountain biking videos from simple recordings to engaging visual stories. The editing process allows you to showcase not just the ride, but the emotions and experiences that come with it. Embrace the art of editing, and let your creativity shine!
What Are the Best Practices for Filming in Different Terrains?
When it comes to mountain biking, the terrain you choose can significantly impact your filming experience. Each environment presents its own set of challenges and opportunities. Understanding how to adapt your filming strategies according to the terrain is essential for capturing stunning footage that showcases your biking skills.
Forests offer a unique atmosphere, but they can also present lighting challenges. The dense canopy can create uneven lighting conditions, making your footage appear dark or washed out. To combat this, try to film during the golden hour—shortly after sunrise or before sunset—when the light is softer and more flattering. Additionally, using a camera with good low-light performance can help you capture the intricate details of the forest floor and the vibrant colors of the foliage.
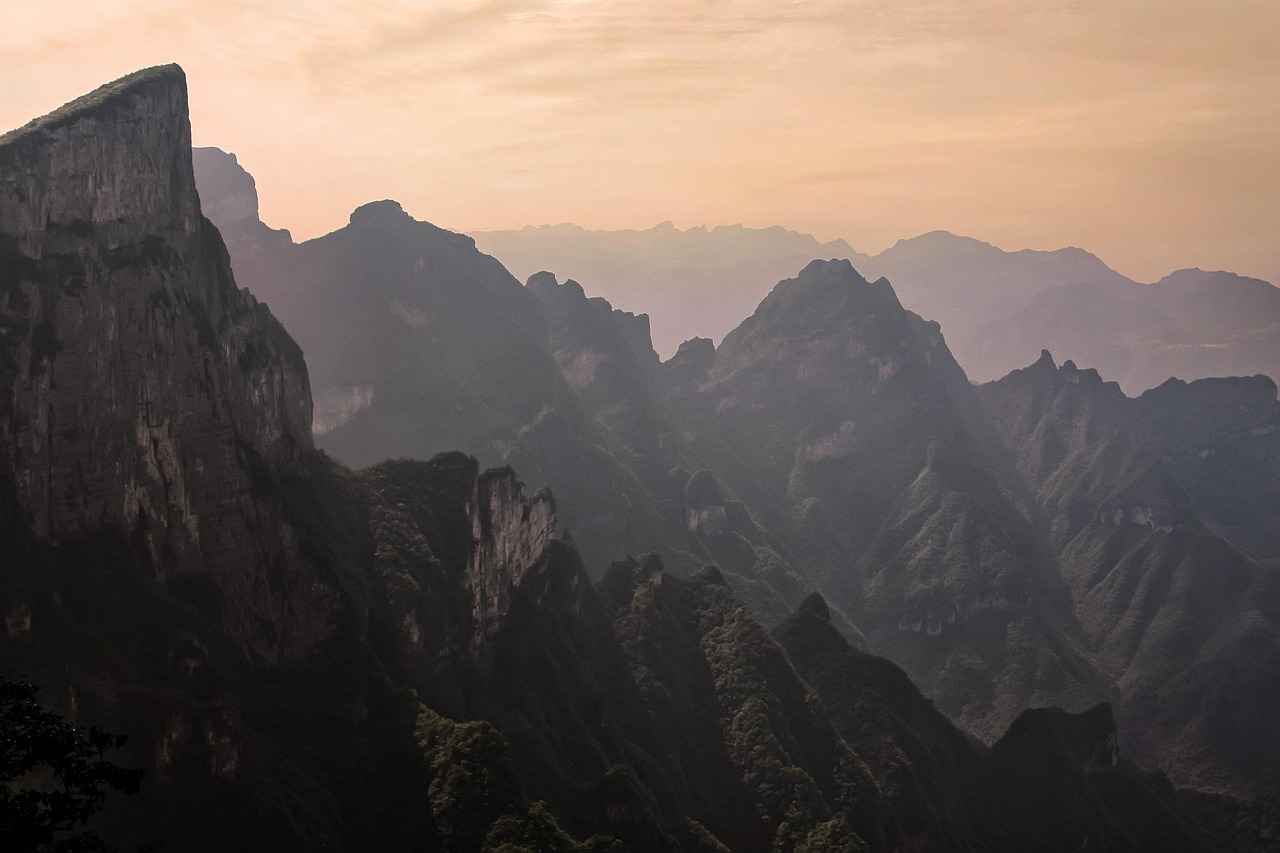
When filming in mountainous regions, the sheer scale and rugged beauty can be breathtaking. To effectively showcase this, consider using wide-angle shots that capture the vast landscape. Stabilization is crucial here; ensure your camera is mounted securely to minimize shake as you navigate steep inclines and rocky paths. Using a drone can also provide stunning aerial perspectives that highlight the dramatic elevation changes.
Urban environments present a different set of challenges, including crowded spaces and varying light conditions. To capture the essence of biking in the city, focus on dynamic shots that emphasize speed and agility. Utilize helmet mounts or handlebar mounts to get close-up action shots as you navigate through traffic or perform tricks. Pay attention to the time of day; filming during dusk can enhance the visual appeal with city lights coming to life.
Filming in desert areas can be rewarding due to the stunning landscapes, but the heat can be a challenge. Ensure your camera is kept cool and avoid filming during the hottest parts of the day. Early mornings or late afternoons are ideal. The stark contrast between the sand and the sky can create visually striking footage, so consider using filters to enhance color saturation.
Rain or mud can add an exciting element to your mountain biking footage, but it also requires preparation. Use protective housing for your camera to prevent water damage. Capture the action of splashing through puddles or navigating slippery trails to convey the thrill of the ride. Experiment with slow-motion shots to emphasize the intensity of the conditions.
- Plan Your Shots: Before you head out, visualize the shots you want to capture based on the terrain.
- Stay Flexible: Be prepared to adapt your strategy as conditions change.
- Engage with Your Surroundings: Incorporate elements of the terrain into your filming to enhance storytelling.
- Practice Safety: Always prioritize safety, both for yourself and your equipment.
By understanding the unique challenges and opportunities presented by different terrains, you can enhance your filming techniques and create compelling mountain biking videos that resonate with your audience. Each environment offers a chance to showcase your skills in new and exciting ways, so embrace the adventure!
How to Capture Action Shots and Tricks Effectively?
Capturing stunning action shots while mountain biking is an art that can significantly enhance your video content. These thrilling moments not only showcase your skills but also engage viewers, making them feel part of the adventure. Here, we delve into effective techniques for timing, angles, and camera settings to help you capture those exhilarating stunts and maneuvers on your bike.
Timing plays a vital role in capturing action shots. Anticipating the right moment to press the record button can make the difference between a mediocre shot and an exhilarating one. Practice makes perfect; familiarize yourself with the rhythm of your ride. Observe when you perform your best tricks or stunts, and be ready to capture those moments. A good rule of thumb is to start recording a few seconds before executing a trick to ensure you don’t miss the action.
The angle from which you shoot can dramatically alter the perception of speed and excitement. Here are some effective angles to consider:
- Low Angle: Shooting from a low perspective can exaggerate the height of jumps and the speed of the rider.
- Side Angle: A side shot captures the full motion of the bike and rider, showcasing techniques and body movements.
- Overhead Shots: Using a drone or a high vantage point can provide a unique perspective, especially during complex maneuvers.
Camera settings are crucial for achieving high-quality action shots. Here are some essential settings to consider:
- Frame Rate: Use a higher frame rate (60fps or more) for smooth slow-motion effects.
- Resolution: Opt for at least 1080p to ensure clarity and detail in your footage.
- Field of View: A wider field of view can capture more of the action, making the viewer feel immersed in the experience.
To ensure your action shots are steady and professional-looking, consider the following techniques:
- Use Stabilization Features: Many action cameras come with built-in stabilization. Make sure this feature is activated to reduce shake.
- Maintain a Steady Hand: If you’re not using a mount, keep your hands steady and follow the action smoothly.
- Practice Panning: When following the rider, practice panning your camera smoothly to keep the subject in frame without abrupt movements.
Utilizing the right accessories can significantly enhance your filming experience. Consider investing in:
- Gimbals: These stabilize your camera during movement, resulting in smooth footage.
- External Microphones: Capture the sound of the ride, adding an extra layer of immersion to your videos.
- Extra Batteries: Ensure you have enough power for longer rides, so you don’t miss capturing any thrilling moments.
By mastering the art of timing, selecting the right angles, adjusting your camera settings, and utilizing helpful accessories, you can capture breathtaking action shots that elevate your mountain biking videos. With practice and creativity, you’ll be able to share your thrilling adventures in a way that resonates with viewers, making them feel as if they are right there with you on the trail.
What Accessories Can Improve Your Filming Experience?
When it comes to capturing stunning mountain biking videos, having the right accessories can significantly improve your filming experience. These tools not only enhance the functionality of your action camera but also ensure that you capture the best moments in high quality. Below, we explore some essential accessories that every action camera user should consider.
While action cameras are great for video, their built-in microphones often fail to capture high-quality audio, especially in noisy environments. External microphones can dramatically enhance sound quality, allowing you to record clear audio while riding. This is particularly beneficial for capturing your thoughts during a ride or the natural sounds of the environment.
Nothing is worse than running out of battery during an epic ride. Having additional batteries on hand ensures that you can keep filming without interruptions. Opt for high-capacity batteries that are compatible with your action camera model, and consider investing in a portable charger for extended outings.
Mountain biking can be rough on equipment. A sturdy protective case not only shields your action camera from drops and scratches but also protects it from dust and moisture. Look for cases that offer waterproof capabilities if you plan to ride in wet conditions. This investment can prolong the life of your camera and ensure it performs optimally.
For those moments when you want to capture steady shots or time-lapse sequences, tripods and stabilizers are invaluable. A tripod allows for stable filming on flat surfaces, while a gimbal stabilizer minimizes shakes during dynamic movements. These tools can help you achieve professional-looking footage, even in challenging environments.
Lens filters can enhance your footage by reducing glare and improving color saturation. A polarizing filter is particularly useful for outdoor filming, as it helps to cut through reflections and enhance the vibrancy of the landscape. This accessory can make a significant difference in the overall quality of your videos.
- Mounting Kits: Various mounts allow you to attach your camera to your bike, helmet, or even your body for unique angles.
- Carrying Cases: A dedicated carrying case makes it easier to transport your gear safely.
- Screen Protectors: Protect your camera’s screen from scratches and damage during rides.
In conclusion, investing in the right accessories can elevate your mountain biking videos from ordinary to extraordinary. By enhancing audio quality, ensuring battery longevity, and protecting your gear, you can focus on capturing the thrill of your ride. Explore these accessories to fully optimize your action camera experience and share your adventures with the world.
How to Share Your Mountain Biking Videos Online?
Sharing your mountain biking videos is crucial for connecting with a broader audience and showcasing your skills. In today’s digital age, simply creating great content isn’t enough; you need to effectively upload, optimize, and promote your videos across various platforms to maximize their reach. Here are some effective strategies to help you share your mountain biking adventures.
Choosing the right platform is essential for reaching your target audience. Popular options include:
- YouTube: The largest video-sharing platform, perfect for long-form content and tutorials.
- Instagram: Ideal for short clips and engaging with followers through Stories and Reels.
- Facebook: Great for community engagement and sharing with friends and groups.
- TikTok: Best for short, entertaining clips that can go viral.
Optimization is key to ensuring your videos are easily discoverable. Consider the following:
- Titles: Use clear, descriptive titles that include relevant keywords.
- Descriptions: Write detailed descriptions that provide context and include hashtags.
- Thumbnails: Create eye-catching thumbnails that attract viewers’ attention.
Once your videos are uploaded, promoting them effectively is essential:
- Social Media: Share your videos on all your social media channels, encouraging followers to engage.
- Collaborations: Partner with other bikers or influencers to reach new audiences.
- Engagement: Respond to comments and engage with your viewers to build a community.
Monitoring your video performance helps refine your strategy:
- Analytics Tools: Use built-in analytics on platforms like YouTube to track views, watch time, and audience demographics.
- Feedback: Pay attention to viewer comments and feedback to understand what resonates with your audience.
Avoiding common pitfalls can enhance your video-sharing experience:
- Neglecting SEO: Failing to optimize your titles and descriptions can limit visibility.
- Inconsistent Posting: Regular uploads keep your audience engaged and eager for more.
- Ignoring Engagement: Not responding to comments can alienate viewers and reduce community growth.
By implementing these strategies, you can effectively share your mountain biking videos, reach a wider audience, and foster a community of fellow enthusiasts. Remember, the key is to maintain consistency and engage with your viewers actively. Happy biking and filming!
What Are the Common Mistakes to Avoid When Filming?
When embarking on the exciting journey of mountain biking videography, many beginners often encounter a variety of common pitfalls that can hinder the quality of their footage. By identifying these frequent mistakes and learning how to avoid them, you can significantly enhance your filming experience and produce stunning videos that showcase your adventures. Here are some critical errors to watch out for:
- Neglecting Camera Settings: One of the most significant blunders is failing to adjust your camera settings according to the environment. Always ensure that you are using the right resolution, frame rate, and field of view to capture the best possible footage.
- Poor Mounting Choices: Choosing the wrong mounting position can lead to awkward angles or shaky footage. Experiment with various mounts, such as helmet or chest mounts, to find the most dynamic perspectives.
- Ignoring Lighting Conditions: Filming in poor lighting can result in grainy and unappealing videos. Aim to shoot during the golden hour—shortly after sunrise or before sunset—when natural light is soft and flattering.
- Overlooking Stability: Shaky footage can ruin an otherwise great video. To ensure smooth shots, consider using a gimbal or stabilizer, or practice techniques that minimize vibrations while riding.
- Forgetting About Audio Quality: Many beginners focus solely on video quality, neglecting audio. Wind noise and other distractions can detract from your footage. Invest in an external microphone or use windshields to improve sound quality.
- Failing to Plan Shots: Spontaneity can be exciting, but without a plan, you may miss crucial moments. Take time to scout locations and plan your shots to capture the action effectively.
- Not Reviewing Footage: After filming, it’s essential to review your footage. This practice allows you to identify any mistakes and learn from them, ensuring better results in future shoots.
By being aware of these common mistakes, you can take proactive steps to improve your filming skills. Remember, practice makes perfect; the more you film, the better you will become at capturing the thrilling essence of mountain biking. With these tips in mind, you can create breathtaking videos that not only document your adventures but also inspire others in the biking community.
How to Engage Your Audience with Storytelling in Videos?
In the realm of mountain biking videos, storytelling serves as a powerful tool to captivate and retain viewers’ attention. A well-crafted narrative not only showcases the thrill of the ride but also connects emotionally with the audience. By incorporating storytelling techniques, you can transform your biking footage into an immersive experience that resonates deeply with viewers.
To effectively engage your audience, consider the following techniques:
- Establish a Clear Theme: Begin your video with a defined theme or message. Whether it’s adventure, overcoming challenges, or the beauty of nature, a clear theme provides a foundation for your narrative.
- Introduce Characters: If possible, introduce characters in your video. These could be fellow bikers, local guides, or even yourself. Sharing personal stories or experiences adds a layer of relatability and keeps viewers invested in the outcome.
- Build a Narrative Arc: Like any good story, your video should have a beginning, middle, and end. Start with setting the scene, build up the action during the ride, and conclude with a reflection or a memorable moment. This structure helps maintain viewer interest.
- Incorporate Visual and Audio Elements: Use visuals that enhance your story. For instance, slow-motion shots during a jump or close-ups of facial expressions can evoke emotions. Additionally, background music and sound effects can amplify the storytelling experience.
- Use Voiceover Effectively: A voiceover can guide viewers through your narrative, providing context and insights that visuals alone may not convey. Share thoughts, challenges faced, or even humorous anecdotes to enrich the story.
- Engage with the Environment: Highlight the unique features of the terrain you are riding on. Whether it’s a breathtaking mountain view or a challenging trail, engaging with the environment adds depth to your narrative and showcases your biking skills.
- Encourage Audience Interaction: Invite your viewers to share their own biking stories or experiences in the comments. Creating a community around your content fosters engagement and encourages viewers to return for future videos.
By weaving these storytelling techniques into your mountain biking videos, you can create a compelling narrative that not only entertains but also inspires your audience. Remember, the goal is not just to showcase your biking skills but to share an experience that viewers can connect with on a personal level.
In summary, storytelling in mountain biking videos is about more than just the ride; it’s about creating an emotional journey for your audience. By employing these techniques, you can ensure that your videos resonate, leaving a lasting impression that encourages viewers to come back for more.
Frequently Asked Questions
- What should I look for when choosing an action camera for mountain biking?
When selecting an action camera, focus on its durability, video quality, and stabilization features. These factors are essential to withstand the rigors of mountain biking while ensuring you capture clear and steady footage.
- How can I achieve the best angles for my mountain biking videos?
Experiment with different mounting options like helmet mounts and chest mounts. Each provides unique perspectives and can dramatically change the feel of your videos, making them more dynamic and engaging.
- What settings should I use for filming high-quality mountain biking videos?
To optimize your action camera, adjust settings such as resolution, frame rate, and field of view. Higher resolutions and frame rates will give you smoother and more detailed footage, perfect for capturing those thrilling rides.
- How can I ensure my footage is steady while riding?
To minimize shake and vibrations, consider using a gimbal or ensure your camera has built-in stabilization. Additionally, practice smooth riding techniques to enhance the overall quality of your footage.
- What are the best lighting conditions for filming mountain biking?
Filming during the golden hour—shortly after sunrise or before sunset—provides soft, warm lighting that enhances video quality. Avoid harsh midday sun, which can create unflattering shadows and overexposure.
