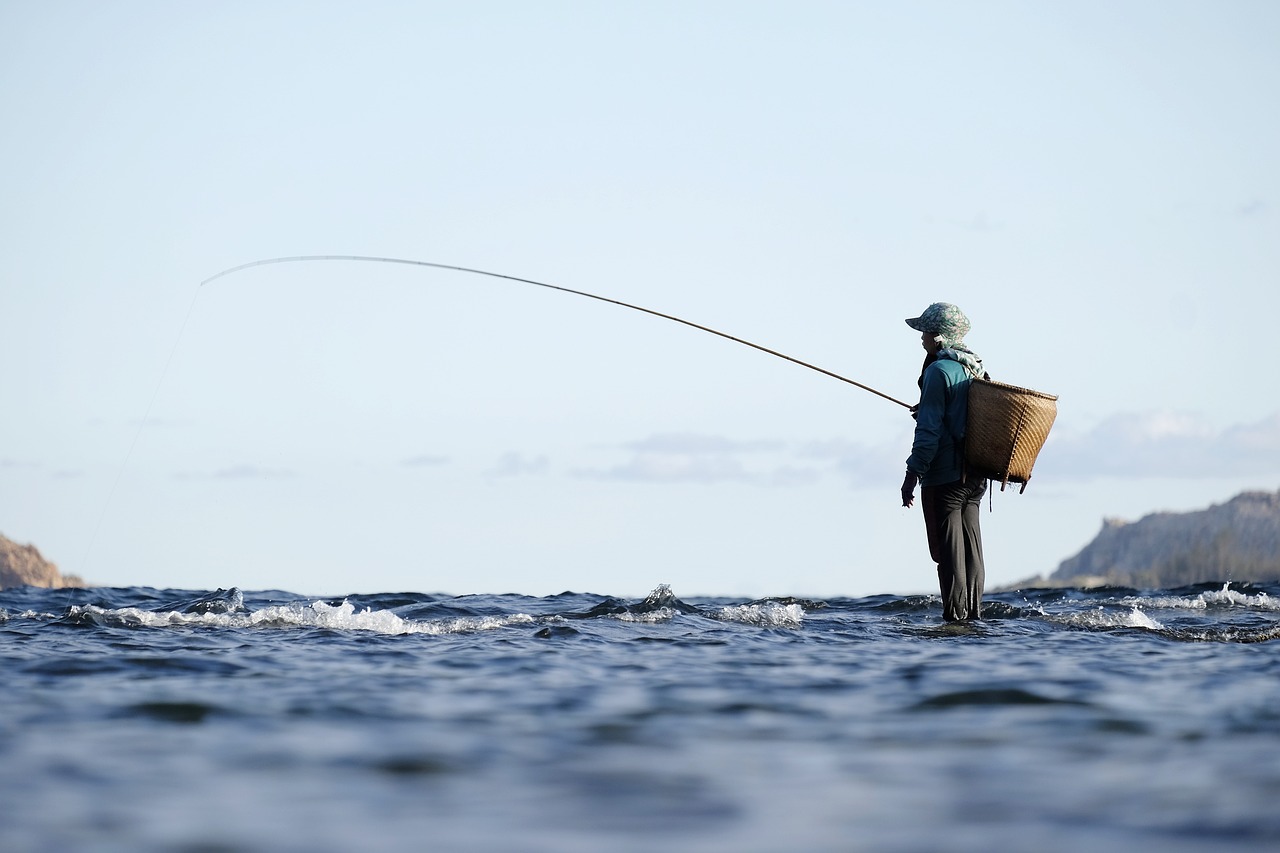
This article delves into effective methods for attaching an action camera to a fishing rod, allowing anglers to capture breathtaking underwater footage while fishing. By utilizing these techniques, you can enhance your fishing experience and document your adventures like never before.
Action cameras are designed to provide unique perspectives and high-quality video, making them an ideal choice for fishing enthusiasts. They allow you to document your fishing experiences, showcasing both the thrill of the catch and the serene beauty of underwater life. With features such as waterproof capabilities and high-definition recording, these cameras can withstand the elements and deliver stunning visuals.
When selecting an action camera for fishing, consider the following factors:
- Resolution: Aim for at least 1080p for clear visuals.
- Waterproof Rating: Ensure it can handle depths relevant to your fishing locations.
- Battery Life: Longer battery life is essential for extended fishing trips.
To securely attach your action camera to a fishing rod, it’s crucial to use the right mounting accessories. Here are some popular options:
- Rod Mounts: Specifically designed to fit various rod sizes.
- Clamp Mounts: Versatile and can be adjusted to different angles.
- Adhesive Mounts: Great for permanent setups but ensure they are waterproof.
Proper attachment is vital to prevent your camera from falling into the water. Follow these steps:
1. Choose an appropriate mount based on your fishing rod type.2. Clean the area where the mount will be attached.3. Secure the mount tightly, ensuring it won’t shift during use.4. Test the mount by gently shaking the rod before heading out.
A rod mount is a straightforward solution for attaching your action camera. These mounts are designed to fit snugly on the rod and can be adjusted to achieve the desired angle. Make sure to follow the manufacturer’s instructions for installation to ensure a secure fit.
If you’re looking for cost-effective options, consider DIY methods to attach your action camera. Common materials include:
- Zip Ties: Securely fasten the camera to the rod.
- Velcro Straps: Allow for easy attachment and removal.
- Rubber Bands: Offer a flexible, adjustable solution.
The angle of your camera significantly impacts the quality of the footage. Experiment with different angles to find what works best for capturing underwater action. A lower angle often provides a more immersive view of the fish and surrounding environment.
Recording underwater footage requires specific techniques to ensure clarity and stability. Here are some tips:
- Keep the Camera Steady: Use a stabilizer or choose a stable position on the rod.
- Adjust Settings: Modify your camera settings for underwater conditions, focusing on lighting and resolution.
- Practice Patience: Wait for the right moment to capture the action.
Once you’ve captured your footage, editing is essential for creating a polished final product. Utilize user-friendly editing software to trim clips, adjust colors, and add music or effects to enhance the viewing experience.
Sharing your underwater footage can inspire others and connect with fellow anglers. Consider using popular platforms like YouTube or Instagram to showcase your videos, and engage with your audience by responding to comments and sharing tips.
Why Use an Action Camera for Fishing?
When it comes to fishing, capturing the essence of the experience can elevate your adventures to a whole new level. Action cameras have revolutionized the way anglers document their fishing trips, providing a unique perspective that traditional cameras simply cannot match. In this section, we will explore the various benefits of using an action camera while fishing, and why it has become an essential tool for both amateur and professional anglers alike.
One of the primary reasons to use an action camera for fishing is the ability to capture high-quality video and images from angles that are often impossible to achieve with standard cameras. These compact devices are designed to be lightweight and durable, making them perfect for outdoor activities. Here are some key advantages:
- Versatility: Action cameras can be mounted on various surfaces, including fishing rods, boats, and even on your body. This flexibility allows for a wide range of creative shots.
- Waterproof Capabilities: Many action cameras are built to withstand water exposure, enabling you to film underwater without worrying about damaging your equipment.
- Wide-Angle Lens: The wide-angle lens of action cameras captures more of the scene, ensuring that you don’t miss any thrilling moments during your fishing escapades.
- High Frame Rates: Action cameras often support high frame rates, which is ideal for capturing fast-moving subjects, such as fish jumping out of the water.
Using an action camera can transform your fishing experience in several ways:
- Documenting Catch and Release: By recording your fishing sessions, you can document your catches and releases, providing valuable data for personal records or conservation efforts.
- Sharing Your Passion: With the ability to capture stunning footage, you can share your fishing adventures on social media platforms, inspiring others to take up the sport.
- Improving Techniques: Reviewing your footage can help you analyze your fishing techniques, allowing you to improve your skills over time.
When selecting an action camera for fishing, it’s important to consider several features:
- Resolution: Look for cameras that offer at least 1080p resolution for clear and detailed footage.
- Battery Life: Choose a camera with a long battery life to ensure you can capture your entire fishing trip without interruptions.
- Stabilization Technology: Cameras with built-in stabilization will help reduce shaky footage, resulting in smoother videos.
In conclusion, the advantages of using an action camera while fishing are numerous. From capturing breathtaking underwater footage to sharing your experiences with a broader audience, these cameras are invaluable tools for any angler. Whether you’re looking to document your adventures or improve your skills, investing in a quality action camera can significantly enhance your fishing experience.

Choosing the Right Action Camera
When it comes to fishing, capturing those memorable moments is essential, and the right action camera can make all the difference. is critical for ensuring that you capture high-quality footage of your fishing adventures. With numerous options available on the market, it’s vital to consider several key factors to select the best equipment suited for your needs.
The resolution of your action camera plays a significant role in the quality of your footage. Most modern action cameras offer resolutions ranging from 1080p (Full HD) to 4K. For fishing, where you might want to capture the intricate details of underwater life or the excitement of a catch, opting for a camera with at least 1080p resolution is advisable. This ensures that your videos are crisp and clear, allowing you to relive those moments vividly.
Another critical feature to consider is the waterproof capability of the action camera. Since fishing often involves water, having a camera that can withstand submersion is essential. Look for cameras that are rated to be waterproof up to a certain depth, typically 10 meters (33 feet) or more. This feature allows you to film underwater scenes without worrying about damaging your equipment.
Battery life is a crucial consideration, especially during long fishing trips. You don’t want to miss out on capturing a big catch because your camera ran out of battery. Choose an action camera with a battery life that can last at least two to three hours of continuous recording. Additionally, consider options that allow for external battery packs or interchangeable batteries for extended use.
Beyond resolution, waterproof capabilities, and battery life, there are several other features that can enhance your experience:
- Image Stabilization: This feature is essential for reducing shaky footage, especially when you’re on a moving boat or in rough waters.
- Wide-Angle Lens: A camera with a wide-angle lens can capture more of the scene, making it ideal for showcasing the beautiful landscapes and action during fishing.
- Wi-Fi Connectivity: This allows you to easily transfer your footage to your smartphone or computer for quick editing and sharing.
Some of the most reputable brands in the action camera market include GoPro, DJI, and Insta360. Each brand offers a variety of models that cater to different needs and budgets. Researching user reviews and expert opinions can also help you make an informed decision.
In summary, selecting the right action camera for your fishing adventures involves careful consideration of several factors, including resolution, waterproof capabilities, battery life, and additional features. By investing in a quality action camera, you can ensure that your fishing experiences are beautifully documented, allowing you to share your adventures with fellow anglers and friends.
Essential Mounting Accessories for Fishing Rods
When it comes to capturing breathtaking underwater footage while fishing, using the right mounting accessories is essential for securely attaching your action camera to your fishing rod. This not only ensures that your camera stays in place but also allows you to focus on your fishing experience without worrying about losing your equipment.
There are various types of mounts available, each designed to cater to different fishing rod styles and personal preferences. Here’s an overview of the most popular mounting accessories that can enhance your fishing adventures:
- Clamp Mounts: These versatile mounts can be securely attached to the rod without any damage. They are adjustable and compatible with most rod sizes, making them a popular choice among anglers.
- Side Mounts: Ideal for anglers who prefer a lower profile. These mounts attach to the side of the rod, allowing for a more streamlined look while capturing footage from a unique angle.
- Universal Mounts: Designed to fit a variety of action cameras, universal mounts offer flexibility and ease of use. They can be adjusted to different angles, ensuring that you can capture the perfect shot.
- Customizable Mounts: For those who enjoy DIY projects, customizable mounts can be tailored to fit specific fishing rods. This allows for personalized setups that cater to individual fishing styles.
It’s important to consider the compatibility of these mounts with your specific fishing rod type. For instance, heavier rods may require more robust mounting solutions, while lightweight rods can benefit from simpler attachments. Additionally, always ensure that the mount you choose provides a secure grip to prevent any accidental drops into the water.
Another factor to consider is the location of the mount. Placing the camera too close to the reel may obstruct your casting technique, while positioning it too far may lead to shaky footage. Finding the right balance is crucial for capturing smooth and engaging videos.
Furthermore, many anglers find that using a swivel mount allows for greater flexibility in capturing dynamic shots. This type of mount can rotate, enabling you to follow the action without having to reposition the camera constantly.
In addition to standard mounts, there are also adhesive mounts that can be attached to the rod. These are particularly effective for anglers who want a permanent setup. However, it’s essential to ensure that the adhesive is strong enough to withstand the rigors of fishing, including exposure to water and potential impacts.
Ultimately, the choice of mounting accessories will depend on your specific fishing style and the type of footage you wish to capture. By evaluating the various options available, you can select the best mounting solution that meets your needs and enhances your fishing experience.
In summary, using the right mounting accessories for your action camera is vital for capturing stunning underwater footage. By exploring various mounts and their compatibility with different types of fishing rods, you can ensure that your camera stays secure and your fishing adventures are well-documented.
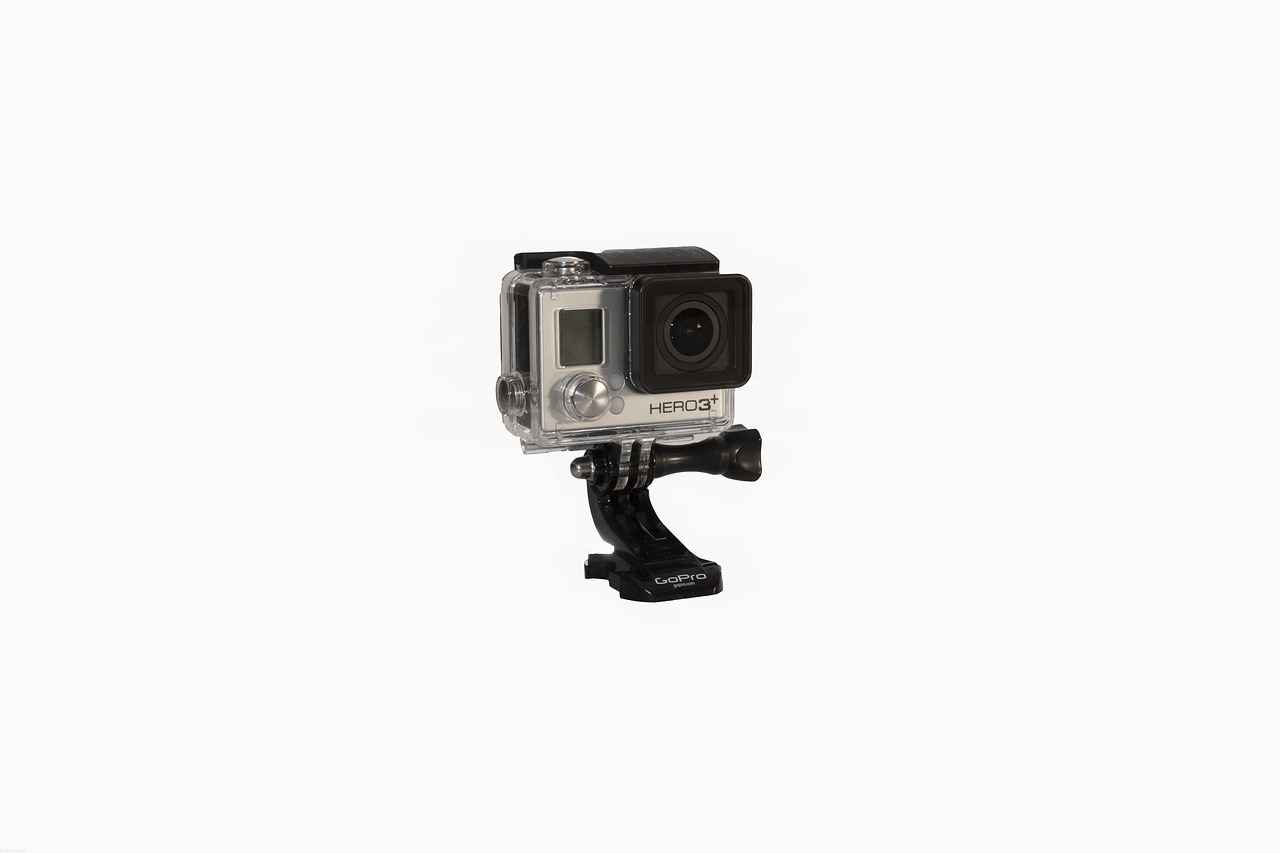
How to Securely Attach Your Camera to the Rod
When it comes to capturing breathtaking underwater footage while fishing, securely attaching your action camera to your fishing rod is crucial. Proper attachment techniques not only enhance your filming experience but also prevent the unfortunate event of your camera falling into the water. Below are detailed methods and tips to ensure your camera is fastened securely.
Action cameras are designed to withstand various conditions, but they are not immune to accidents. A secure attachment is vital to avoid losing your camera during a fishing trip. Water can cause irreversible damage, and replacing a high-quality camera can be costly. Thus, understanding how to properly fasten your camera is essential.
- Choose the Right Mount: Select a mount specifically designed for fishing rods. Options include clamp mounts and universal mounts that can be adjusted to fit various rod sizes.
- Positioning the Camera: Position your camera at a suitable angle to capture the best footage. A 45-degree angle is often ideal for underwater shots.
- Secure the Mount: Ensure the mount is tightly secured to the rod. Use a screwdriver to tighten any screws, making sure it does not shift during use.
- Double-Check Connections: Before heading out, double-check all connections. Ensure that the camera is firmly attached and that all locking mechanisms are engaged.
- Use Safety Tethers: For added security, consider using a safety tether. This is a simple line that connects your camera to the fishing rod, providing a backup in case the mount fails.
If you’re looking for cost-effective ways to attach your camera, there are several DIY methods you can explore. Here are some creative ideas:
- Using Velcro Straps: Velcro can be a great way to secure your camera. Wrap the strap around the rod and the camera for a snug fit.
- Rubber Bands: In a pinch, rubber bands can provide a temporary hold. Just ensure they are thick enough to handle the weight of your camera.
- Custom Mounts: If you have access to 3D printing, consider designing a custom mount that fits your specific rod and camera model.
Before you embark on your fishing adventure, it’s essential to test your setup. Take your rod with the attached camera to a safe location, such as a backyard or park. Simulate the conditions you expect to encounter while fishing. This will help you identify any weaknesses in your attachment method.
Securing your action camera to your fishing rod is a straightforward process that can significantly enhance your filming experience. By following the steps outlined above and utilizing reliable mounting accessories, you can capture stunning underwater footage without the fear of losing your camera. Remember, the more secure your attachment, the more enjoyable your fishing experience will be!
Using a Rod Mount
When it comes to capturing breathtaking underwater footage while fishing, using a rod mount for your action camera is an excellent option. This device allows you to securely attach your camera to your fishing rod, providing a unique perspective that enhances your fishing experience. In this section, we will delve into the different types of rod mounts available, their installation techniques, and tips for optimal use.
Rod mounts come in various designs, each tailored to different fishing styles and preferences. Here are a few popular types:
- Clamp-On Rod Mounts: These mounts attach directly to the rod using a clamping mechanism. They are versatile and can be easily adjusted or removed.
- Fixed Rod Mounts: These mounts are permanently attached to the rod, providing a stable platform for your camera. They are ideal for those who regularly film their fishing trips.
- Adjustable Angle Rod Mounts: These mounts allow you to change the angle of your camera, which is beneficial for capturing different perspectives of your catch.
Installing a rod mount is a straightforward process, but it requires careful attention to ensure that your camera remains secure throughout your fishing trip. Follow these steps for effective installation:
1. Choose the Right Location: Select a spot on your rod that won’t interfere with your casting or reeling.2. Clean the Area: Ensure the rod surface is clean and dry for optimal adhesion if using adhesive mounts.3. Attach the Mount: Follow the manufacturer's instructions to securely attach the mount, whether it’s clamped or glued.4. Test Stability: Before heading out, give the mount a gentle tug to ensure it’s securely fastened.
To maximize the effectiveness of your rod mount, consider the following tips:
- Balance Your Setup: Ensure that your camera’s weight is balanced with your rod to avoid any strain during fishing.
- Check Compatibility: Make sure your mount is compatible with your specific action camera model for a snug fit.
- Regular Maintenance: Periodically check the mount’s stability and clean any debris that may affect its performance.
Rod mounts offer several advantages compared to other mounting solutions. They provide a stable and secure attachment point, allowing for hands-free filming while you focus on your catch. Additionally, they are designed to withstand the rigors of fishing environments, including exposure to water and varying weather conditions. This makes them a preferred choice for many anglers looking to document their fishing adventures.
In conclusion, using a rod mount is a practical and effective solution for attaching an action camera to your fishing rod. By understanding the different types available and following proper installation techniques, you can enhance your fishing experience and capture stunning underwater footage. Whether you’re a seasoned angler or a beginner, investing in a quality rod mount will undoubtedly elevate your fishing adventures.
DIY Attachment Solutions
When it comes to capturing stunning underwater footage while fishing, having a reliable mounting solution for your action camera is essential. For those seeking cost-effective options, there are numerous DIY methods available that can help you securely attach your camera using materials you likely already have at home. This section explores some creative and practical DIY attachment solutions that can enhance your fishing experience.
Using household items to create a custom mount can save you money while providing a secure way to capture footage. Here are some innovative ideas:
- Zip Ties and a PVC Pipe: If you have a small section of PVC pipe, you can create a custom mount. Cut the pipe to a suitable length, then use zip ties to secure your action camera to the pipe. Attach the pipe to your fishing rod with additional zip ties for a sturdy setup.
- Adhesive Velcro Strips: Velcro strips can be a versatile solution. Attach one side to your camera and the other to your fishing rod. This method allows for easy removal and repositioning of the camera as needed.
- Old Smartphone Mount: Repurpose an old smartphone mount that you no longer use. These mounts often have adjustable grips that can fit various rod sizes, making them a great option for securing your action camera.
- Rubber Bands: If you’re in a pinch, rubber bands can hold your camera in place. Simply wrap the rubber bands around the camera and the rod, ensuring it’s tight enough to prevent slipping.
- Clamps and Brackets: If you have any small clamps or brackets lying around, consider using them to attach your camera to your rod. This method provides a solid grip and can be adjusted as needed.
DIY solutions not only save money but also allow for greater customization to suit your specific needs. Many store-bought mounts can be expensive and may not fit your fishing rod perfectly. By using materials you already own, you can create a setup that is both functional and tailored to your fishing style.
Regardless of which DIY method you choose, it’s crucial to ensure that your action camera is securely attached to avoid losing it in the water. Here are some tips:
- Test Before Use: Always test your setup before heading out on the water. Give it a good shake to ensure everything is secure.
- Use Backup Safety Lines: Consider adding a safety line to your camera that attaches to your fishing rod. This way, if the camera does come loose, it won’t fall into the water.
- Check for Stability: Make sure your camera is stable and won’t move excessively while you’re casting or reeling in fish.
By utilizing these DIY attachment solutions, you can enhance your fishing adventures and capture incredible underwater footage without breaking the bank. Experiment with different methods to find what works best for you, and enjoy the thrill of documenting your fishing experiences.
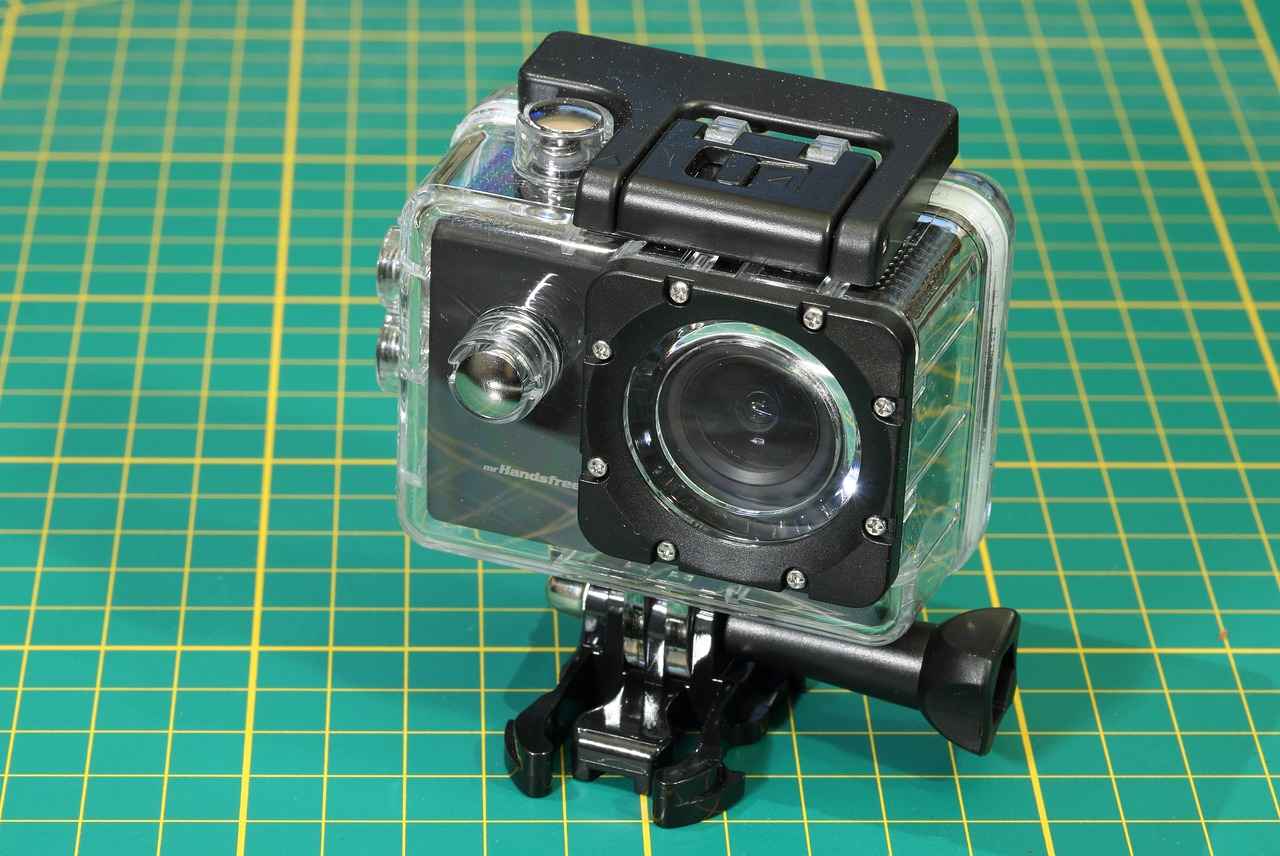
Optimal Camera Angles for Underwater Footage
When it comes to capturing breathtaking underwater footage while fishing, the angle of your camera plays a pivotal role in determining the quality and excitement of your visuals. Understanding how to position your camera can significantly enhance the storytelling aspect of your fishing adventures. In this section, we will explore the best camera angles to capture dynamic underwater action, ensuring that your footage is not only clear but also engaging.
The right camera angle can transform ordinary footage into extraordinary visual experiences. It can help to showcase the thrill of the catch, the beauty of the underwater world, and the interaction between the angler and the fish. By experimenting with different angles, you can create a narrative that resonates with viewers, making them feel as if they are part of the action.
- Eye-Level Angle: Positioning the camera at eye level with the fish can create an intimate perspective, allowing viewers to connect with the subject. This angle is particularly effective when capturing the moment of the catch.
- Low Angle: Placing the camera close to the water surface can provide a dramatic view of the fish swimming below. This angle emphasizes the fish’s movements and can highlight the underwater environment.
- Overhead Angle: This angle allows you to capture a top-down view of the action. It’s great for showing the relationship between the angler and the fish, especially during the fight.
- Wide Angle: Using a wide-angle lens can help capture more of the underwater scenery, showcasing the habitat and adding context to the fishing experience.
Don’t hesitate to experiment with various angles to discover what works best for your style and the specific fishing scenario. For example, if you’re fishing in a river with strong currents, a low angle might emphasize the power of the water and the struggle of the fish. Conversely, if you’re in a calm lake, a wide angle could beautifully capture the serene environment.
- Stabilization: Ensure your camera is stable to avoid shaky footage. Use mounts designed for water activities and consider using gimbals for smooth shots.
- Lighting: Underwater lighting can be tricky. Be mindful of the time of day and water clarity, as these factors can influence color and visibility.
- Practice: Before your fishing trip, practice different angles in controlled environments to understand how they affect your footage.
By understanding and applying these camera angles, you can significantly improve the quality of your underwater footage. Remember, the goal is to tell a story through your visuals, capturing the excitement and beauty of your fishing adventures.
Best Practices for Recording Underwater Footage
Recording underwater footage can be an exhilarating experience, but it also presents unique challenges. To achieve clarity and stability in your videos, it’s essential to adopt specific techniques tailored for underwater environments. Below are the best practices to enhance your underwater filming experience.
Water absorbs light differently than air, which can lead to poor visibility in your footage. To combat this, consider the following:
- Use External Lighting: Invest in underwater lights or use your camera’s built-in light to illuminate your subject.
- Choose the Right Depth: Filming closer to the surface can enhance light quality, while deeper waters may require additional lighting.
- Adjust White Balance: Modify your camera’s white balance settings to compensate for the blue-green hues of underwater scenes.
Stability is crucial for capturing smooth footage. Here are some effective techniques:
- Use a Stabilizer: Employ a handheld stabilizer or gimbal to minimize camera shake.
- Anchor Your Position: If possible, use a float or anchor to maintain a steady position while filming.
- Practice Steady Movements: Move your camera slowly and deliberately to avoid jarring motions.
Framing your shots effectively can significantly enhance the visual appeal of your footage. Consider these tips:
- Rule of Thirds: Position your subject off-center to create a more dynamic composition.
- Focus on Action: Capture the movement of fish or other underwater life to add excitement to your footage.
- Experiment with Angles: Try various angles, such as low shots or top-down views, to provide unique perspectives.
Adjusting your camera settings can greatly impact the quality of your footage:
- Increase ISO: In low-light conditions, increasing the ISO can help capture brighter images, though be cautious of noise.
- Use a Faster Shutter Speed: This can help freeze motion and reduce blur, especially in turbulent waters.
- Experiment with Frame Rates: Higher frame rates can provide smoother playback for fast-moving subjects.
Being aware of common mistakes can save you time and frustration:
- Check Your Equipment: Always ensure your camera is securely attached and waterproofed before entering the water.
- Avoid Overexposure: Bright sunlight can cause overexposed images; consider using ND filters to mitigate this.
- Monitor Battery Life: Cold water can drain batteries faster, so keep an eye on your power levels during filming.
By following these best practices, you can significantly improve the quality of your underwater footage. With careful planning and the right techniques, your videos will not only capture the beauty of the underwater world but also provide an engaging experience for your viewers.
Adjusting Settings for Underwater Conditions
When capturing stunning underwater footage, adjusting your camera settings is essential for achieving the best results. Underwater environments present unique challenges, including varying light conditions, different focus requirements, and the need for optimal resolution. This section will guide you through the necessary adjustments to ensure your footage is as vibrant and clear as possible.
Underwater lighting can be tricky, as water absorbs light and colors differently. To counteract this, consider the following:
- Use a Wide Aperture: A wider aperture allows more light to enter the camera, which is crucial in dim underwater settings.
- Adjust ISO Settings: Increasing the ISO can help brighten your images, but be cautious of introducing noise. Aim for a balance that minimizes grain.
- Utilize External Lights: If you plan to film in deeper waters, external lights can enhance visibility and color vibrancy.
Maintaining focus is critical when shooting underwater. The water can distort images and create a hazy effect. Here are tips to ensure sharp focus:
- Manual Focus: Whenever possible, switch to manual focus to avoid the camera’s autofocus getting confused by the water.
- Use Focus Peaking: If your camera supports it, focus peaking can help you see which parts of the image are in focus.
- Test Different Distances: Experiment with different focal lengths to find the sweet spot for your specific underwater environment.
Resolution plays a significant role in the quality of your underwater footage. To maximize clarity:
- Choose the Highest Resolution: Always shoot at the highest resolution your camera allows to capture the finest details.
- Frame Rate Considerations: Higher frame rates can provide smoother motion. Consider shooting at 60 fps if your camera supports it, especially for fast-moving subjects.
- Aspect Ratio: Experiment with different aspect ratios to see which best suits your footage and the platforms you plan to share it on.
In summary, understanding how to adjust your camera settings for underwater conditions is crucial for capturing breathtaking footage. By focusing on lighting, ensuring proper focus, and optimizing resolution, you can significantly enhance the quality of your underwater videos. With practice and experimentation, you’ll be able to create stunning visuals that showcase the beauty of the underwater world.
Maintaining Stability While Fishing
is crucial for capturing high-quality, smooth footage with your action camera. When you’re out on the water, various factors can contribute to camera shake, which can ruin an otherwise perfect shot. Here, we will explore effective techniques to minimize camera movement and ensure that your action shots remain steady, even in challenging fishing conditions.
One of the primary causes of camera shake is the natural movement of the fishing rod. As you cast, reel in, or even adjust your position, the rod experiences vibrations and shifts that can affect the footage. To combat this, consider the following techniques:
- Use a Stabilizing Mount: Investing in a high-quality stabilizing mount can greatly reduce unwanted movement. Look for mounts specifically designed for action cameras that provide a secure grip and absorb shocks.
- Employ a Gimbal: A gimbal is an excellent tool for maintaining stability. This device uses motors to counteract any movement, allowing for smooth footage even when the fishing rod is in motion.
- Practice Smooth Movements: When handling your fishing rod, try to make your movements as smooth and deliberate as possible. Quick jerks or sudden movements can lead to shaky footage.
- Positioning the Camera: The placement of your camera can also impact stability. Position it closer to the rod’s handle for better balance, which can help minimize the effects of vibrations.
Additionally, understanding the environmental conditions can help you prepare for stability challenges. For instance, windy days can create more shake than calm conditions. On such days, try to anchor your boat or find a sheltered spot to reduce movement from waves and wind.
Another effective technique is to use image stabilization settings available on many modern action cameras. This feature electronically compensates for camera shake, resulting in smoother footage. Make sure to familiarize yourself with your camera’s settings before heading out.
Moreover, using a tripod or a stable surface when filming from the shore can provide a solid base for your camera, reducing the risk of shake. If you’re fishing from a boat, consider using a stabilizing device that can attach to the boat itself.
Lastly, be mindful of your body posture while filming. Maintaining a solid stance with your feet planted can help reduce the amount of shake transferred to the camera. If you’re standing, keep your knees slightly bent and your body relaxed to absorb any movements better.
By implementing these techniques, you can significantly enhance the stability of your footage while fishing. With practice and the right equipment, you will be able to capture stunning, smooth action shots that showcase the thrill of your fishing adventures.
Editing Your Underwater Footage
Editing your underwater footage is a crucial step in transforming raw clips into a captivating fishing video. The editing process allows you to enhance the visual appeal, improve storytelling, and ensure that your audience remains engaged. Here, we will explore essential editing techniques and recommend software options to elevate your fishing videos.
Editing is not just about cutting out mistakes; it’s about enhancing the overall quality of your footage. A well-edited video can highlight the excitement of catching fish, showcase the beauty of underwater life, and provide viewers with an immersive experience. By applying various editing techniques, you can create a polished final product that resonates with your audience.
- Cutting and Trimming: Remove unnecessary parts of your footage to keep the action flowing. Focus on the most exciting moments.
- Transitions: Use smooth transitions between clips to maintain viewer interest. Fade-ins and fade-outs can help in creating a seamless flow.
- Color Correction: Adjust the colors to enhance the underwater visuals. Brightening the footage and correcting color balance can make a significant difference.
- Adding Music and Sound Effects: Incorporate background music that complements the mood of your video. Sound effects can also enhance the viewer’s experience.
- Text Overlays: Use text to provide context, such as the type of fish caught or tips for viewers. This can make your video more informative.
Selecting the appropriate software is essential for effective editing. Here are some popular options:
| Software | Features | Best For |
|---|---|---|
| Adobe Premiere Pro | Advanced editing tools, multi-track editing | Professional editors |
| Final Cut Pro | Magnetic timeline, intuitive interface | Mac users |
| iMovie | User-friendly, basic features | Beginners |
| DaVinci Resolve | Color grading, audio post-production | Filmmakers |
- Organize Your Footage: Before you start editing, organize your clips into folders. This will save time and help you find the right footage quickly.
- Watch Tutorials: Make use of online tutorials to learn specific techniques and features of your editing software.
- Seek Feedback: Share your rough cuts with friends or fellow anglers to get constructive feedback before finalizing your video.
In conclusion, effective editing can significantly enhance your underwater fishing videos. By employing basic editing techniques and utilizing the right software, you can create engaging content that captures the thrill of your fishing adventures. Remember, practice makes perfect, so keep refining your editing skills to produce stunning videos that will inspire others in the fishing community.
Sharing Your Fishing Adventures Online
In today’s digital age, sharing your fishing adventures online can be a rewarding experience that not only showcases your skills but also connects you with a community of fellow anglers. The thrill of capturing stunning underwater footage can inspire others to explore the depths of their fishing potential. This article delves into the best practices for sharing your fishing videos, highlighting popular platforms, and offering tips for engaging your audience effectively.
Sharing your underwater footage can serve multiple purposes. It allows you to document your experiences, share your passion, and even educate others about fishing techniques and aquatic life. By showcasing your unique angles and methods, you can inspire beginners and seasoned anglers alike. The right video can spark interest in fishing as a hobby or encourage conservation efforts among viewers.
- YouTube: As the largest video-sharing platform, YouTube provides a vast audience. You can create a dedicated channel focused on fishing, offering tutorials, vlogs, and underwater footage.
- Instagram: With its visual-centric approach, Instagram is perfect for sharing short clips and highlights. Utilize stories and reels to engage your followers with quick, eye-catching content.
- Facebook: This platform allows for community building. Join fishing groups to share your footage, exchange tips, and connect with other enthusiasts.
- TikTok: The rise of short-form video content makes TikTok an excellent choice for quick, engaging clips that can go viral.
To effectively engage with your audience, consider the following strategies:
- Be Authentic: Share your genuine experiences, including both successes and failures. Authenticity resonates with viewers.
- Use Captivating Thumbnails: A visually appealing thumbnail can significantly increase clicks on your videos. Make sure it reflects the content accurately.
- Engage with Comments: Respond to comments on your videos to create a sense of community. This interaction can foster loyalty among your viewers.
- Utilize Hashtags: Use relevant hashtags to increase the visibility of your posts, making it easier for others to discover your content.
Quality is key when sharing your underwater footage. Ensure your videos are well-edited, with clear visuals and sound. Consider the following:
- Invest in Editing Software: Use user-friendly editing software to enhance your videos. Basic adjustments like trimming, color correction, and adding music can elevate your content.
- Tell a Story: Rather than just showcasing fish catches, narrate your journey. Share tips, insights, and even the challenges you face while fishing.
Collaborating with fellow anglers can broaden your reach and introduce you to new audiences. Partner with others for joint fishing trips or video projects. This not only diversifies your content but also builds a network of support within the fishing community.
By embracing these strategies, you can effectively share your fishing adventures online, inspire others, and foster connections within the fishing community. Whether you’re a novice or an experienced angler, your unique perspective can contribute to the rich tapestry of fishing culture. Start sharing today and watch your community grow!
Frequently Asked Questions
- What type of action camera is best for fishing?
When choosing an action camera for fishing, look for one with high resolution, good waterproof capabilities, and a long battery life. Cameras like the GoPro HERO series or the DJI Osmo Action are popular choices among anglers.
- How do I securely attach my camera to the fishing rod?
To securely attach your camera, use a rod mount designed for action cameras. Make sure it fits snugly and check that all screws and attachments are tightened. Alternatively, consider DIY methods using materials like zip ties or adhesive mounts.
- What are the best angles for capturing underwater footage?
The optimal angles for underwater footage often depend on what you want to capture. Aiming slightly downward can provide a better view of the fish and underwater landscape. Experimenting with different angles while fishing can yield exciting results!
- How can I prevent camera shake while filming?
To minimize camera shake, keep your rod steady and try using a stabilizer or gimbal. Additionally, filming in calmer waters can help maintain stability, resulting in smoother footage.
- What editing software is recommended for my fishing videos?
For editing your fishing videos, user-friendly software like iMovie or more advanced options like Adobe Premiere Pro can do the trick. These programs offer various features to enhance your footage and create a polished final product.
