Filming in low light conditions can be a daunting task for action camera enthusiasts. However, with the right techniques and knowledge, you can capture stunning footage even when the sun goes down. This article will guide you through essential tips and techniques for achieving high-quality low-light footage while minimizing noise and blur.
Low light environments present unique challenges, including:
- Insufficient Light: A lack of natural light can lead to grainy footage.
- Motion Blur: Movement in low light can cause blurriness.
- Camera Settings: Incorrect settings can worsen the quality of your video.
Selecting an action camera that excels in low light is crucial. Look for models that feature:
- Larger Sensors: These can capture more light, improving overall quality.
- Wide Aperture: A wider aperture allows more light to hit the sensor.
- Advanced Image Processing: This helps in reducing noise and enhancing clarity.
Familiarity with your camera’s settings is key to optimizing performance in dim conditions. Pay attention to:
- ISO Settings: Increasing ISO can enhance light sensitivity, but be wary of noise.
- Shutter Speed: A slower shutter speed captures more light but may introduce blur.
- Aperture Control: Adjusting the aperture can help manage light intake and depth of field.
Incorporating additional lighting can significantly enhance your footage. Consider using:
- LED Panels: Provide consistent lighting without overheating.
- Portable Softboxes: These help diffuse light for a softer look.
Placement is also critical. Experiment with different angles and distances to achieve the desired effect.
To avoid unwanted blur, stability is essential. Techniques include:
- Using Gimbals: These devices stabilize your camera during movement.
- Tripods or Monopods: Great for stationary shots in low light.
Implementing practical strategies can enhance your filming experience:
- Timing Your Shoots: Filming during twilight or under moonlight can provide natural illumination.
- Experimenting with Angles: Different viewpoints can lead to better lighting conditions.
By following these guidelines, you can master low-light filming with your action camera, ensuring your footage is both clear and vibrant. Remember that practice is key, so don’t hesitate to experiment with different settings and techniques to find what works best for you.
 1")
What Makes Low Light Filming Challenging?
Filming in low light presents a unique set of challenges that can significantly affect the quality of your video. Whether you’re capturing stunning night scenes or documenting events in dimly lit environments, understanding the intricacies of low-light filming is essential for achieving professional results. Factors such as lighting conditions, camera settings, and sensor sensitivity are critical in determining the overall video quality.
Low-light environments often lack sufficient natural light, making it difficult for cameras to capture clear and vibrant images. The primary issues include:
- Insufficient Light: In low-light settings, cameras struggle to gather enough light, leading to grainy footage.
- Increased Noise: Higher ISO settings, while necessary for low-light filming, can introduce unwanted noise that diminishes video quality.
- Motion Blur: Slow shutter speeds, required to capture more light, can result in motion blur if the camera or subject moves.
Understanding how different elements interact in low-light conditions can help you make informed decisions while filming:
- Lighting Conditions: The type of available light—be it artificial or natural—plays a substantial role. Soft, diffuse light sources are preferable as they reduce harsh shadows.
- Camera Settings: Adjusting settings such as ISO, shutter speed, and aperture can help optimize your camera’s performance in low light.
- Sensor Sensitivity: Cameras with larger sensors typically perform better in low light, as they can capture more light and provide better image quality.
To enhance your low-light filming experience, consider the following camera settings:
- ISO: Increasing ISO can improve light sensitivity, but be cautious of excessive noise. Striking a balance is essential.
- Aperture: A wider aperture (lower f-stop number) allows more light to enter the lens, which is beneficial in dark environments.
- Shutter Speed: Slower shutter speeds can capture more light but may lead to motion blur. Experiment to find the right speed for your scene.
Implementing practical strategies can greatly enhance your low-light filming experience:
- Use External Lighting: Incorporating additional light sources, such as LED panels, can significantly improve image quality.
- Stabilization Techniques: Using gimbals or tripods can help reduce camera shake and enhance the clarity of your footage.
- Timing Your Shoots: Filming during twilight or using moonlight can provide natural lighting that enhances your video quality.
In summary, understanding the challenges of low-light filming is crucial for achieving high-quality results. By optimizing your camera settings, utilizing external lighting, and employing stabilization techniques, you can create stunning footage even in the darkest environments. With practice and experimentation, you will be able to master the art of low-light filming.
 2")
Choosing the Right Action Camera for Low Light
When venturing into the world of low-light filming, selecting the right action camera is crucial for achieving optimal results. Low-light conditions can present unique challenges, and having a camera that excels in these environments can make all the difference. This section will delve into the key features to consider when choosing an action camera that performs well in low-light situations.
Low-light performance is essential for capturing high-quality footage during nighttime adventures or dimly lit environments. A camera’s ability to handle low light can significantly affect the clarity, color accuracy, and overall quality of your videos. Thus, understanding what to look for in an action camera is vital for any filmmaker.
- Larger Sensors: Cameras with larger sensors can capture more light, which is crucial for low-light performance. A larger sensor typically means better image quality and less noise.
- Better Lenses: High-quality lenses with wider apertures allow more light to enter the camera. This feature is particularly important for shooting in dark conditions.
- Advanced Image Processing: Look for cameras that offer sophisticated image processing capabilities. These features can help reduce noise and improve image clarity in low-light situations.
- High ISO Range: A camera that can handle high ISO settings without introducing significant noise is essential for low-light filming. This allows you to capture clear images even in darker environments.
- Image Stabilization: Optical or electronic stabilization can help mitigate blur caused by camera shake, which is especially beneficial when filming in low light.
Several action cameras are renowned for their low-light capabilities. Models like the GoPro Hero series and DJI Osmo Action are frequently recommended by professionals for their exceptional performance in dim environments. These cameras often come equipped with the features mentioned above, making them ideal choices for low-light scenarios.
Even with the best equipment, understanding your camera settings is crucial for maximizing low-light performance. Adjusting settings such as ISO, shutter speed, and aperture can significantly enhance your footage quality.
- ISO: Increasing the ISO can improve light sensitivity, but be cautious of introducing noise. Finding a balance is key.
- Shutter Speed: A slower shutter speed allows more light to hit the sensor, but it may also introduce motion blur. Experimenting with different speeds can help find the right setting for your scene.
- Aperture: A wider aperture lets more light in, which is beneficial for low-light conditions. Look for lenses with low f-stop numbers.
Incorporating external lighting sources can dramatically improve your low-light footage. Whether it’s LED panels or portable softboxes, understanding how to use these tools effectively can elevate your filming experience.
Implementing practical strategies can make a significant difference in your low-light filming experience. From planning your shoots to testing settings, these tips will help ensure success:
- Timing Your Shoots: Choose the right time for filming, such as during twilight or moonlight, to take advantage of natural light sources.
- Experimenting with Angles: Varying your shooting angles can lead to unique perspectives and improved lighting conditions.
By focusing on these essential features and tips, you can enhance your low-light filming capabilities and capture stunning footage in challenging environments.
Key Features to Look For
When it comes to capturing stunning footage in low light, selecting the right action camera is paramount. In this section, we will explore the key features you should prioritize to enhance your filming experience.
When shopping for an action camera, prioritize features that significantly impact your ability to film effectively in low-light conditions. Here are the essential elements to consider:
- Aperture Size: A larger aperture allows more light to enter the camera, which is crucial for low-light filming. Look for cameras with a wide aperture (e.g., f/1.8 or f/2.8) to ensure better performance in dim environments.
- ISO Range: The ISO setting determines the camera’s sensitivity to light. A broader ISO range (e.g., 100-3200 or higher) enables you to adjust your camera settings based on the available light, helping to minimize noise while capturing clear images.
- Image Stabilization: To avoid blurry footage caused by camera shake, choose an action camera with advanced image stabilization technology. Optical or electronic stabilization can significantly enhance the quality of your low-light videos.
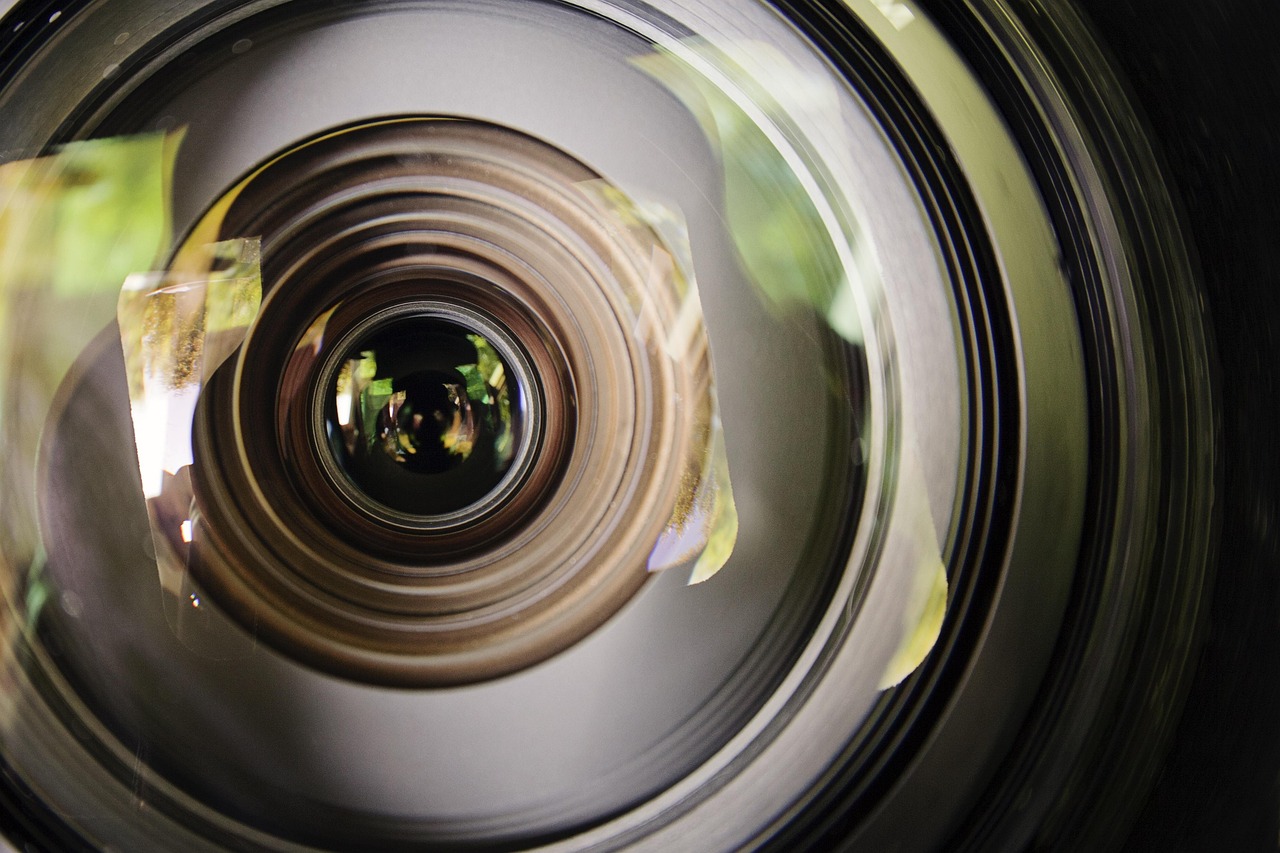
The aperture size of your action camera’s lens plays a critical role in how well it performs in low light. A wider aperture allows for more light to hit the sensor, which is essential when shooting in darker conditions. This feature not only improves exposure but also enhances the overall sharpness of your footage.
ISO settings can be a double-edged sword. While increasing the ISO can help capture more light, it can also introduce noise into your footage. Therefore, understanding how to balance ISO settings is crucial for achieving the best results. Look for cameras that allow you to manually adjust ISO levels to find the perfect compromise between brightness and clarity.
When filming in low light, any movement can lead to blurry footage. This is where image stabilization becomes invaluable. Action cameras equipped with advanced stabilization features can smooth out the bumps and shakes, ensuring your videos remain clear and focused. Whether you choose optical stabilization (which uses physical components) or electronic stabilization (which relies on software), having this feature is essential for low-light filming.
Beyond the basics, consider other features that can enhance your low-light filming experience:
- Low-Light Performance: Some cameras are specifically designed to excel in low-light conditions, featuring larger sensors that capture more detail.
- Manual Controls: Having the ability to manually adjust settings like shutter speed and ISO can give you greater control over your footage.
- Built-in Filters: Some action cameras come with built-in ND filters that can help manage exposure in bright conditions, allowing for smoother filming in various lighting scenarios.
In conclusion, choosing the right action camera with the appropriate features is essential for capturing high-quality low-light footage. By focusing on aspects like aperture size, ISO range, and image stabilization, you can significantly improve your filming capabilities, ensuring that your videos are clear and visually appealing even in challenging lighting conditions.
Popular Models for Low Light Filming
When it comes to low-light filming, the choice of action camera can significantly impact the quality of your footage. Certain models stand out in this regard, offering exceptional performance even in challenging lighting conditions. Popular models like the GoPro Hero series and DJI Osmo Action are frequently recommended by professionals for their ability to capture stunning nighttime shots.
The GoPro Hero series is celebrated for its advanced sensor technology and image processing capabilities. These features allow it to handle low-light situations with remarkable finesse. The camera’s ability to adjust settings automatically ensures that users can focus on capturing the moment without worrying about technical adjustments.
Similarly, the DJI Osmo Action has gained a reputation for its dual-screen feature and impressive stabilization, which makes it easier to film in dimly lit environments. Both cameras are equipped with wide apertures that allow more light to hit the sensor, resulting in clearer and more vibrant footage.
- Larger Sensors: A larger sensor can capture more light, which is crucial for low-light environments.
- Wide Aperture: A wider aperture allows more light to enter the camera, enhancing image quality in dark settings.
- High ISO Range: A camera with a high ISO range can adjust to varying light conditions without compromising quality.
- Advanced Image Stabilization: This feature helps reduce blur from camera shake, particularly important in low-light conditions.
Both the GoPro Hero series and DJI Osmo Action have unique strengths. The GoPro excels in ruggedness and versatility, making it suitable for extreme sports and outdoor adventures. In contrast, the Osmo Action’s dual-screen setup makes it user-friendly for vlogging and creative shots.
GoPro Hero Series:- Best for: Action sports, rugged use- Notable feature: HyperSmooth stabilizationDJI Osmo Action:- Best for: Vlogging, creative filming- Notable feature: Dual-screen for easy framing
Whether you are capturing nighttime adventures or shooting events in dimly lit venues, these cameras provide the flexibility needed for high-quality footage. Many filmmakers and content creators have successfully utilized the GoPro Hero and DJI Osmo Action for projects that require excellent low-light performance.
For example, filmmakers have used these cameras to document concerts and nighttime cityscapes, taking advantage of their ability to produce clear images without excessive noise. The results often exceed expectations, showcasing the capabilities of modern action cameras in low-light situations.
When selecting an action camera for low-light filming, consider your specific needs and the environments you plan to shoot in. The GoPro Hero series and DJI Osmo Action are both excellent choices, each with unique features that cater to different filming styles. By understanding the strengths of these models, you can make an informed decision and elevate your low-light filming experience.
 3")
Understanding Camera Settings for Low Light
When it comes to capturing stunning footage in low-light conditions, understanding your camera settings is paramount. Familiarizing yourself with the various settings on your action camera can dramatically enhance your ability to film effectively in challenging environments. This section will delve into the critical settings that can optimize your camera’s low-light performance.
Low-light conditions present unique challenges, such as increased noise and motion blur. By mastering your camera settings, you can mitigate these issues and achieve clearer, more vibrant footage. The key settings to focus on include:
- ISO
- Shutter Speed
- Aperture
ISO is a critical setting that affects your camera’s sensitivity to light. Increasing the ISO allows your camera to pick up more light, which is essential in darker environments. However, be mindful that higher ISO values can introduce noise, which can degrade the quality of your footage. The goal is to find a sweet spot where you maximize sensitivity without compromising clarity. A good starting point is to experiment with ISO settings between 400 and 1600, depending on your specific lighting conditions.
Shutter speed controls how long your camera’s sensor is exposed to light. In low-light situations, a slower shutter speed can help capture more light, but it also increases the risk of motion blur, especially if there is movement in the scene. A common rule of thumb is to use a shutter speed that is at least double the frame rate you are shooting at. For instance, if you are filming at 30 frames per second, aim for a shutter speed of 1/60 seconds.
Aperture refers to the size of the opening in your lens through which light passes. A wider aperture (indicated by a lower f-stop number) allows more light to enter, making it easier to film in dim conditions. For optimal results, consider using a lens with a wide aperture, such as f/2.8 or wider. This setting not only enhances light intake but also creates a pleasing depth of field, helping your subject stand out against the background.
To achieve the best results in low-light filming, it’s essential to balance your ISO, shutter speed, and aperture. For example, if you increase your ISO to brighten your footage, you may need to adjust your shutter speed to prevent blur. Similarly, if you opt for a wider aperture, you might be able to lower your ISO, thus reducing noise. Experimentation is key—take the time to test different combinations to see what works best for your specific shooting environment.
Here are some practical tips to help you master your camera settings for low-light filming:
- Always shoot in manual mode to have full control over your settings.
- Use a tripod to stabilize your camera during longer exposures.
- Consider using a neutral density filter to manage light intake without changing your settings drastically.
- Regularly review your footage to assess noise levels and clarity, making adjustments as necessary.
By understanding and effectively utilizing your camera settings, you can significantly improve your low-light filming capabilities. Mastery of ISO, shutter speed, and aperture will not only enhance the quality of your footage but also empower you to tackle any low-light situation with confidence.
How to Adjust ISO Settings
When it comes to filming in low light conditions, understanding how to adjust your camera’s ISO settings is crucial for achieving high-quality results. The ISO setting on your action camera determines its sensitivity to light, and adjusting this setting can make a significant difference in the quality of your footage.
ISO stands for International Standards Organization, and it is a measure of your camera sensor’s sensitivity to light. A higher ISO allows your camera to capture more light, which is particularly beneficial in dim environments. However, increasing the ISO can also introduce noise into your footage, which can detract from the overall quality. Therefore, it’s essential to find the right balance between sensitivity and clarity.
- Start Low and Increase Gradually: Begin with the lowest ISO setting and gradually increase it until you achieve the desired exposure. This approach minimizes noise.
- Monitor Your Footage: Regularly check your footage on a larger screen to assess noise levels. This will help you determine the optimal ISO for your specific shooting conditions.
- Use Manual Mode: Switching to manual mode allows you to have full control over your ISO settings, enabling you to make adjustments based on the environment.
Noise appears as grainy or pixelated spots in your video, particularly in darker areas. It can be distracting and may require post-processing to reduce. To minimize noise:
- Limit ISO Increase: Only raise the ISO as much as necessary. If you can achieve sufficient exposure with a lower ISO, do so.
- Use Noise Reduction Tools: Many editing software options offer noise reduction features that can help clean up your footage after shooting.
ISO doesn’t work in isolation; it interacts with other settings like shutter speed and aperture. Here’s how to balance them:
- Adjust Shutter Speed: A slower shutter speed allows more light to hit the sensor, which can compensate for a lower ISO setting.
- Open the Aperture: Using a lens with a larger aperture (lower f-stop number) can also help gather more light, allowing for a lower ISO.
Every shooting environment is different, so testing various ISO settings is critical. Spend time experimenting with different settings in similar lighting conditions to find what works best for your camera and style. Take notes on how each adjustment affects your footage, allowing for more informed decisions in the future.
Adjusting your camera’s ISO settings is a vital skill for capturing stunning low-light footage. By understanding ISO’s role, effectively increasing it, and balancing it with other camera settings, you can minimize noise and enhance the quality of your videos. Remember, practice makes perfect, so don’t hesitate to experiment to find the ideal settings for your unique shooting conditions.
Shutter Speed and Its Impact
When filming in low light, understanding shutter speed is crucial for achieving the best results. It directly affects both motion blur and exposure, two key factors that can make or break your footage. In this section, we will explore how shutter speed impacts your filming experience and provide practical tips for finding the right balance.
Shutter speed refers to the amount of time the camera’s sensor is exposed to light. It’s measured in seconds or fractions of a second. A faster shutter speed allows less light to hit the sensor, which is ideal for capturing fast-moving subjects without blur. Conversely, a slower shutter speed allows more light, making it easier to capture details in dim conditions but at the risk of introducing motion blur.
In low-light situations, using a slower shutter speed can help you capture more light, which is essential for achieving a well-exposed image. However, this comes with the drawback of potential motion blur. When the subject moves while the shutter is open, it can result in a blurred image. This is particularly problematic with action shots or when filming subjects in motion.
- Fast Shutter Speeds: Typically 1/500s or faster, these settings freeze motion and prevent blur.
- Slow Shutter Speeds: Ranging from 1/30s to several seconds, these settings allow more light but can blur moving subjects.
To achieve optimal results, it’s important to find a suitable compromise between shutter speed and exposure. Here are some strategies to consider:
- Experiment with Different Settings: Test various shutter speeds in your shooting environment to see what works best. A good starting point might be around 1/60s for moderate motion.
- Use Image Stabilization: Many action cameras come equipped with image stabilization features that can help mitigate the effects of motion blur when using slower shutter speeds.
- Adjust ISO and Aperture: Balancing shutter speed with ISO and aperture settings can help you achieve the desired exposure without compromising clarity.
Here are some practical tips to help you effectively manage shutter speed while filming in low light:
- Use a Tripod: Stabilizing your camera on a tripod can allow you to use slower shutter speeds without introducing blur, which is particularly useful for static scenes.
- Plan Your Shots: Consider the movement of your subjects and the overall scene. If you anticipate fast motion, opt for a faster shutter speed.
- Utilize External Lighting: Adding external lights can help you increase your exposure without needing to slow down your shutter speed, thus reducing the risk of blur.
In conclusion, understanding the impact of shutter speed on motion blur and exposure is essential for capturing stunning low-light footage. By experimenting with different settings and using stabilizing techniques, you can find the right balance that suits your shooting conditions. Remember, the key is to adapt your approach based on the specific requirements of each scene.
 4")
Utilizing External Lighting Sources
When it comes to filming in low-light conditions, can be a game changer. In this section, we will explore the various types of lighting options available, their placement, and how they can elevate the quality of your footage significantly.
Filming in dim environments can often lead to grainy, noisy, and blurry footage. By incorporating additional lighting, you can dramatically improve the clarity and vibrancy of your shots. External lights not only enhance the overall exposure but also allow for greater control over shadows and highlights, providing a more professional look.
- LED Panels: These are versatile and energy-efficient, providing a continuous light source that is easy to adjust. They come in various sizes and can be mounted on tripods or held by hand for dynamic shots.
- Portable Softboxes: Ideal for diffusing light, softboxes create a softer, more flattering illumination that reduces harsh shadows. This is particularly useful for close-up shots.
- Ring Lights: Popular among vloggers and beauty influencers, ring lights provide even lighting and are perfect for face shots or product close-ups.
- On-Camera Lights: These compact lights attach directly to your camera, making them ideal for mobility and quick setups. They are perfect for capturing spontaneous moments in low light.
The placement and direction of your lights play a critical role in the quality of your footage. Here are some tips to consider:
- Key Light: This is your main light source. Position it at a 45-degree angle to your subject to create depth and dimension.
- Fill Light: Use this to soften shadows created by your key light. Position it opposite the key light and at a lower intensity.
- Back Light: Placing a light behind your subject can help separate them from the background, adding depth and interest to your shot.
Don’t be afraid to experiment with different angles and distances. Adjusting the height and angle of your lights can dramatically change the mood of your footage. For instance, a low angle can create dramatic shadows, while a high angle can produce a more natural look.
In low-light situations, you can also combine natural light with your external lighting for a more balanced exposure. For example, shooting during the golden hour can provide a warm, natural glow that complements your artificial lights.
Incorporating external lighting sources is essential for achieving high-quality low-light footage. By understanding the types of lights available, their proper placement, and how to experiment with angles, you can elevate your filming game significantly. Remember, the right lighting can transform your action camera footage from ordinary to extraordinary.
Types of External Lights to Consider
When it comes to filming in low light conditions, the right lighting can make a world of difference. Choosing the appropriate external lights not only enhances the quality of your footage but also sets the mood and atmosphere of your scenes. Below, we explore various types of external lights that can be utilized for low-light filming, along with their specific applications.
In low-light environments, having the right lighting tools is essential. Here are some popular options:
- LED Panels: LED panels are versatile and provide a consistent light source. They are energy-efficient and can be adjusted for brightness and color temperature, making them ideal for various filming situations.
- Portable Softboxes: Softboxes diffuse light, creating a softer, more flattering illumination. They are particularly useful for interviews or close-up shots, as they minimize harsh shadows and create a more professional look.
- Ring Lights: Commonly used for beauty and vlogging videos, ring lights provide even lighting around the subject. Their circular design helps eliminate shadows and enhances facial features, making them perfect for low-light conditions.
- On-Camera Lights: These compact lights attach directly to your camera, providing immediate illumination. They are great for quick setups and can be adjusted for intensity, making them suitable for spontaneous shooting situations.
- Fresnel Lights: Known for their focusable beam, Fresnel lights allow you to control the direction and intensity of light. They are often used in film productions for creating dramatic effects and can be particularly useful in low-light scenarios.
Selecting the right lighting option depends on your specific needs. Here are some factors to consider:
- Purpose of the Shoot: Identify the mood you want to create. For a soft, natural look, consider softboxes. For a more dramatic effect, Fresnel lights may be more appropriate.
- Portability: If you plan to shoot in various locations, lightweight and portable lighting options like LED panels or on-camera lights are ideal.
- Budget: Lighting equipment varies in price. Determine your budget and look for options that provide the best value for your needs.
To maximize the effectiveness of your external lights, consider the following tips:
- Positioning: Experiment with the placement of your lights to find the optimal angles. Side lighting can create depth, while frontal lighting is great for even illumination.
- Diffusion: Use diffusion materials to soften harsh light. This can be achieved with softboxes or by placing a white sheet in front of the light source.
- Color Temperature: Adjust the color temperature of your lights to match the ambient light conditions. This ensures a consistent look throughout your footage.
By understanding the various types of external lights available and how to use them effectively, you can significantly enhance your low-light filming capabilities. Remember, the right lighting not only improves visibility but also adds depth and emotion to your storytelling.
Placement and Direction of Light
plays a crucial role in the quality of your footage, especially in low-light conditions. The way you position your lights can significantly affect the shadows and highlights in your shots. By experimenting with various angles and distances, you can create a desired mood and enhance the clarity of your footage.
Understanding the importance of light direction is essential. Light can either illuminate your subject beautifully or create unwanted shadows that detract from the overall quality of your video. Here are some key considerations for effective light placement:
- Angle of Light: The angle at which light hits your subject can dramatically change the appearance of textures and shapes. For instance, frontal lighting tends to flatten features, while side lighting can add depth and dimension.
- Distance from Subject: The distance between your light source and the subject affects both the intensity and quality of the light. Closer lights create softer, more flattering illumination, while lights positioned further away can produce harsher shadows.
- Height of Light: The height at which you place your lights is also critical. Lights positioned above the subject can mimic natural sunlight, creating a more dynamic look, while lights placed at eye level can lead to a more even and flat appearance.
To achieve the best results, consider using a combination of lighting techniques:
- Key Light: This is your main light source, and it should be the most powerful. Position it at a 45-degree angle to your subject for optimal shadow play.
- Fill Light: To reduce harsh shadows created by the key light, use a fill light. This light should be softer and positioned closer to the camera.
- Back Light: Adding a back light can create separation between your subject and the background, enhancing the three-dimensional feel of your footage.
Experimenting with these elements allows you to discover what works best for your specific shooting conditions. Remember, the goal is to create a balanced lighting setup that highlights your subject while minimizing any distracting shadows.
Additionally, utilizing reflectors can help manipulate light direction without introducing additional light sources. Reflectors bounce light back onto your subject, filling in shadows and providing a more even illumination. This technique is particularly useful in low-light scenarios where you want to maintain the natural ambiance while enhancing visibility.
Lastly, don’t forget about the color temperature of your lights. Different light sources have varying color temperatures, which can affect the mood of your footage. Warmer lights (around 3200K) can create a cozy, inviting atmosphere, while cooler lights (around 5600K) can lend a more clinical, modern feel. Adjusting this aspect can further refine the emotional tone of your videos.
In conclusion, the placement and direction of light are fundamental to achieving high-quality low-light footage. By understanding and manipulating these factors, you can create stunning visuals that capture the essence of your subject, all while maintaining clarity and minimizing noise.
 5")
Stabilization Techniques for Clear Footage
When filming in low-light conditions, achieving stability is crucial to prevent unwanted blur and ensure that your footage is sharp and clear. The challenges posed by dim lighting can be exacerbated by camera shake, making the use of effective stabilization techniques all the more important. Here, we will explore various methods to stabilize your shots, enhancing the overall quality of your videos.
Why is Stability Important in Low-Light Filming?
In low-light environments, your camera’s shutter speed often needs to be slower to allow more light to hit the sensor. This slower shutter speed increases the risk of motion blur caused by camera movements. By employing stabilization techniques, you can mitigate this effect and produce clearer, more professional-looking footage.
Types of Stabilization Techniques
- Mechanical Stabilization: This involves using physical devices such as gimbals or steadicams. These tools are designed to counteract camera shake, allowing for smoother movements and reducing the impact of any unintended motions.
- Digital Stabilization: Many modern action cameras come equipped with built-in digital stabilization features. This technology analyzes the footage and compensates for shake by cropping the image and adjusting the frame. While this can be effective, it may result in a slight loss of resolution.
- Tripods and Monopods: Using a tripod or monopod can provide a stable base for your camera, especially in static shots. This is particularly useful when filming in low-light conditions, as it allows for longer exposure times without the risk of shake.
Using Gimbals for Smooth Shots
Gimbals are incredibly effective for achieving smooth footage, especially during movement. They utilize motors and sensors to keep the camera steady, compensating for any sudden shifts or shakes. When filming in low light, a gimbal can help maintain a professional look by ensuring that even dynamic shots remain stable and clear.
Post-Processing Techniques for Enhanced Stability
In addition to physical stabilization methods, post-processing can also play a significant role in improving the quality of your footage. Software such as Adobe Premiere Pro or Final Cut Pro offers stabilization features that can correct minor shakes in your video. However, it’s important to use these tools judiciously, as excessive stabilization can lead to unnatural-looking footage.
Tips for Maintaining Stability While Filming
- Keep Your Body Steady: When shooting handheld, use your body as a stabilizing platform. Keep your elbows close to your body and use a wide stance to create a stable base.
- Use a Slow and Steady Approach: When moving the camera, do so slowly and deliberately. Quick movements can lead to more noticeable shake, especially in low-light conditions.
- Practice Panning Techniques: If you need to pan the camera, do it slowly and smoothly. This will help maintain the clarity of your shots and reduce motion blur.
Choosing the Right Stabilization Method for Your Needs
Ultimately, the choice of stabilization technique will depend on your specific filming situation and the equipment you have available. For instance, if you are planning to shoot while walking or running, a gimbal may be your best option. Conversely, for static shots, a tripod can provide the stability needed to capture clear, high-quality footage.
By understanding and implementing these stabilization techniques, you can significantly improve the quality of your low-light videos. Whether through mechanical means, digital stabilization, or effective filming practices, achieving clear footage is within your reach.
Using Gimbals for Smooth Shots
When it comes to capturing stunning visuals, especially in challenging environments like low light, gimbals have become indispensable tools for filmmakers and content creators alike. These devices are designed to stabilize your camera, counteracting unwanted movements that can cause shaky footage. In this section, we will explore how gimbals can enhance your shooting experience, particularly in low-light conditions.
A gimbal is a pivoted support that allows the rotation of an object about a single axis. In the context of filmmaking, it provides a stable platform for your camera, enabling smooth and fluid motion. By using sensors and motors, gimbals can detect unwanted movements and adjust the camera’s position accordingly, ensuring that your shots remain steady even when you are in motion.
Filming in low-light conditions often presents unique challenges, such as increased camera shake and motion blur. With gimbals, you can effectively minimize these issues. Here are some key reasons why they are essential:
- Stability: Gimbals provide superior stabilization, which is crucial when shooting in dim environments where every slight movement can lead to visible shake.
- Improved Visual Quality: By reducing camera shake, gimbals help maintain the visual quality of your footage, ensuring that even in low light, your shots remain clear and focused.
- Versatility: Gimbals allow for a variety of shooting angles and movements, enabling you to get creative with your shots without compromising stability.
When selecting a gimbal, consider compatibility with your action camera and the features that best suit your filming style. Look for options that offer:
- Lightweight Design: Since action cameras are typically used for dynamic shooting scenarios, a lightweight gimbal will be easier to handle and maneuver.
- Battery Life: Long battery life is crucial for extended shooting sessions, especially in low-light conditions where you may need to shoot for longer periods.
- Multiple Modes: Gimbals that offer different shooting modes (like follow mode or lock mode) can provide more creative freedom in your filming process.
To maximize the benefits of using gimbals in low-light conditions, consider the following tips:
- Practice Smooth Movements: While gimbals are designed to stabilize your shots, practicing smooth and deliberate movements will enhance the overall quality of your footage.
- Use a Lower Frame Rate: Shooting at a lower frame rate can help reduce the appearance of motion blur, especially when combined with a gimbal’s stabilization features.
- Combine with External Lighting: Although gimbals help stabilize your shots, incorporating external lighting can further improve your footage quality by providing better illumination.
In conclusion, gimbals are powerful tools that can significantly enhance your low-light filming capabilities. By providing stability and allowing for creative shooting techniques, they help ensure that your footage remains smooth and visually appealing. Whether you are a professional filmmaker or an amateur enthusiast, investing in a quality gimbal can make a notable difference in your low-light shooting experience.
Post-Processing Tips for Noise Reduction
Filming in low-light conditions can often lead to unwanted noise in your footage, which can detract from the overall quality of your videos. Fortunately, there are several post-processing techniques you can utilize to effectively reduce noise and enhance your final product.
Noise in video can manifest as grainy textures or color distortions, particularly in darker areas. This is often a result of high ISO settings or low light conditions. Understanding how to manage this noise is crucial for achieving a polished look.
One of the most common methods for reducing noise in post-production is through the use of noise reduction filters. Most editing software, such as Adobe Premiere Pro or Final Cut Pro, comes equipped with built-in noise reduction tools.
- Apply the Filter: Locate the noise reduction filter in your software’s effects panel and apply it to your footage.
- Adjust Settings: Fine-tune the filter settings to strike a balance between noise reduction and detail preservation. Overdoing it can lead to a blurry image.
Another effective technique is color grading. This process not only improves the aesthetic appeal of your footage but can also help mask noise. By adjusting the color balance and contrast, you can create a more visually pleasing image.
- Enhance Shadows: Brightening shadows can help reduce the visibility of noise in darker areas.
- Adjust Saturation: Carefully increasing saturation can add depth to colors and distract from noise.
For those serious about video quality, investing in advanced editing software can provide additional tools for noise reduction. Programs like DaVinci Resolve offer sophisticated noise reduction options that can yield impressive results.
Combining multiple techniques can often yield the best results. For example, applying noise reduction followed by color grading can help maintain detail while enhancing overall image quality. Experimenting with these layers will allow you to find the perfect balance for your footage.
When you’re ready to export your final product, consider the format and settings you choose. Some formats are better suited for retaining quality than others. Ensure that your export settings are optimized for the platform where the video will be displayed.
In conclusion, effectively reducing noise in your low-light footage requires a combination of the right tools and techniques. By utilizing noise reduction filters, engaging in thoughtful color grading, and leveraging advanced software, you can significantly enhance the clarity and professionalism of your videos. Remember, the goal is to maintain detail and clarity while minimizing distractions caused by noise.
 6")
Practical Tips for Filming in Low Light
Filming in low light can present unique challenges, but with the right approach, you can capture stunning footage that showcases your subject beautifully. Implementing practical strategies can make a significant difference in your low-light filming experience. From careful planning to understanding your camera settings, these tips will help ensure success.
Planning your shoots is crucial when working in low-light conditions. What should you consider before heading out? Here are a few key elements to keep in mind:
- Location Scouting: Visit your filming location beforehand to assess the available light sources and identify potential challenges.
- Time of Day: The best time for low-light filming is during the golden hour or twilight, when natural light is soft and diffused.
- Weather Conditions: Overcast days can provide even lighting, while clear nights can offer dramatic shadows.
Before starting your shoot, it’s essential to test various settings on your camera. How do you ensure your camera is ready for low-light conditions? Here are some steps to follow:
- ISO Settings: Experiment with different ISO levels. A higher ISO increases sensitivity to light, but too much can introduce noise.
- Shutter Speed: Adjust your shutter speed to find the right balance between exposure and motion blur. A slower shutter speed allows more light but can cause blurriness with movement.
- Aperture: Use a wide aperture (low f-stop number) to let in more light, which is especially beneficial in dark environments.
In low-light situations, maximizing available light is essential. What types of light sources can enhance your footage? Consider the following:
- Natural Light: Utilize ambient light from street lamps, the moon, or nearby buildings.
- LED Lights: Portable LED panels can provide consistent lighting and are easy to adjust.
- Reflectors: Use reflectors to bounce light onto your subject, softening harsh shadows.
Stability is crucial in low-light filming to avoid unwanted blur. How can you ensure your footage remains steady? Here are some effective stabilization techniques:
- Use a Tripod: A sturdy tripod can help eliminate shake and keep your camera stable.
- Gimbals: Consider using a gimbal for smooth shots, especially when moving.
- Image Stabilization: Enable any built-in stabilization features on your action camera to reduce shake.
After filming, post-processing can significantly improve your footage quality. What editing techniques should you apply? Here are some tips:
- Noise Reduction: Use noise reduction filters to minimize graininess in your footage.
- Color Grading: Adjust the color balance and saturation to enhance the mood of your video.
- Sharpening: Apply slight sharpening to improve detail, but be cautious not to overdo it.
By implementing these practical tips and strategies, you can transform your low-light filming experience. With thorough planning, appropriate settings, and effective stabilization methods, you’ll be well on your way to capturing breathtaking footage, even in the most challenging lighting conditions.
Timing Your Shoots
is crucial for capturing high-quality low-light footage. Understanding the best times to film can significantly enhance the visual appeal of your videos. This section will explore the importance of timing, particularly during twilight and under moonlight, and how these natural light sources can elevate your content.
The time of day you choose to film can dramatically affect the lighting conditions and overall mood of your footage. Filming during the golden hour—shortly after sunrise or before sunset—provides a soft, warm light that can make your scenes look more cinematic. Similarly, shooting at twilight, when the sky is a deep blue and the lights of the environment begin to glow, can create a magical atmosphere that enhances the visual storytelling.
- Soft Light: Twilight offers a diffused light source, reducing harsh shadows and highlights.
- Color Palette: The colors during this time are richer and more vibrant, making your footage visually appealing.
- Dynamic Range: The transition from light to dark allows for greater contrast, enhancing the depth of your shots.
Shooting under moonlight can provide a unique challenge and opportunity for creativity. The moon serves as a natural light source that can illuminate your scenes without the need for artificial lighting. Here are some tips for making the most of moonlight:
- Plan Your Shots: Knowing the moon’s phase and position can help you capture the best angles.
- Use Long Exposure: A longer shutter speed can help gather more light, making the most of the moon’s glow.
- Experiment with ISO: Increasing your ISO can help capture more details in the shadows, but be wary of noise.
Preparation is key when planning to shoot in low-light conditions. Here are some steps to ensure you are ready:
- Scout Locations: Visit your filming locations at the same time you plan to shoot to assess the lighting conditions.
- Check Weather Conditions: Cloud cover can affect the quality of moonlight; clear skies are ideal for shooting.
- Test Equipment: Make sure your camera settings are optimized for low-light conditions before you start filming.
Don’t limit yourself to just twilight or moonlight. Experimenting with various times of day can yield surprising results. Early mornings can provide a serene atmosphere with mist and soft light, while late evenings can capture vibrant city lights against a dark sky. Each time offers unique opportunities to enhance your footage.
In conclusion, the timing of your shoots plays a critical role in the quality of your low-light footage. By understanding the benefits of shooting during twilight and utilizing moonlight effectively, you can create stunning visuals that captivate your audience. Always remember to plan ahead, experiment with different settings, and embrace the natural beauty that different times of day can offer.
Experimenting with Different Angles
When it comes to capturing stunning low-light footage with an action camera, is a crucial technique that can lead to remarkable results. By varying your shooting angles, you can uncover unique perspectives that enhance the visual storytelling of your videos. This practice not only allows for creative expression but also helps you adapt to the challenging lighting conditions often encountered in low-light environments.
In low-light scenarios, the way light interacts with your subject can dramatically change based on your shooting position. For instance, shooting from a lower angle can create a dramatic effect, while a higher angle might provide a more comprehensive view of the scene. By experimenting with various viewpoints, you can discover the best composition that highlights your subject while minimizing unwanted shadows and enhancing available light.
- Start Low and Wide: Begin by positioning your camera low to the ground. This angle can create a sense of depth and drama, particularly in outdoor settings.
- Try Overhead Shots: Shooting from above can give a fresh perspective and allow for better control over the lighting, as you can often capture more ambient light.
- Use Reflections: Look for reflective surfaces like water or glass. Shooting at an angle that captures these reflections can add a beautiful layer to your footage.
When filming in low light, the direction of your camera can significantly affect how light falls on your subject. For example, shooting towards a light source can create a silhouette effect, which may not always be desirable. Conversely, positioning your camera to capture light bouncing off surfaces can illuminate your subject more effectively. Experimenting with angles can lead to discovering the most flattering light for your scene.
1. Take Test Shots: Before committing to a scene, take a few test shots from various angles to see how they turn out.2. Move Around: Don't be afraid to change your position frequently. Sometimes the best angle is just a few steps away.3. Use a Tripod: A tripod can help stabilize your camera while you experiment with different angles, ensuring your shots remain clear.
Incorporating varied angles into your low-light filming not only improves lighting conditions but also enriches the narrative of your video. Different perspectives can evoke different emotions and highlight various aspects of your subject. For instance, a close-up shot from a low angle can make a subject appear more powerful, while a distant shot from above might create a sense of vulnerability.
In summary, experimenting with different shooting angles is an essential technique for action camera users looking to improve their low-light footage. By understanding how angles affect lighting and composition, you can enhance your storytelling and create visually captivating videos. So grab your camera, start exploring, and see how varying your perspective can transform your low-light filming experience!
Frequently Asked Questions
- What are the main challenges of filming in low light?
Filming in low light can be tricky due to insufficient lighting conditions, which often leads to noise and blur. Your camera’s settings, such as ISO and shutter speed, play a crucial role in overcoming these challenges. Understanding these factors helps you capture better footage.
- Which action cameras are best for low light filming?
When it comes to low light performance, models like the GoPro Hero series and DJI Osmo Action are highly recommended. These cameras feature larger sensors and advanced image processing, which enhance their ability to capture clear footage in dim environments.
- How can I reduce noise in my low light footage?
To minimize noise, you can adjust your camera’s ISO settings carefully. While a higher ISO increases sensitivity to light, it can also introduce noise. Additionally, using post-processing software with noise reduction filters can significantly enhance your final video quality.
- What external lighting options should I consider?
Incorporating external lighting can greatly improve your low-light shots. Options like LED panels and portable softboxes can provide the necessary illumination. Experimenting with the placement and direction of these lights can help you achieve the desired effect in your footage.
- Are gimbals necessary for low light filming?
While not strictly necessary, gimbals can be incredibly beneficial for achieving smooth, stable shots in low light. They help counteract camera shake, which is crucial for maintaining clarity and quality in your videos.